The post Best Sony A6000 Lenses for Beautiful Urban Photography in 2024 appeared first on Croasdill Photography.
]]>
What Lens to Consider for Urban Photography
The key lens features you will want to look for in a great urban exploration lens are:
- Consider using a wide-angle lens to capture sweeping cityscapes, stunning architecture, and vibrant streets. Another option is a compact zoom lens that covers both wide-angle and moderate telephoto, thus enabling you to capture diverse urban scenes without carrying multiple lenses.
- Look for great low-light performance allows you to capture city scenes day or night without resorting to long exposures and still be able to capture movement.
- Finally, opting for lightweight and portable lenses will allow easy exploration of different neighborhoods, moving quickly from one location to another. A versatile and lightweight lens makes your urban photography experience more enjoyable.

(What is the difference between Urban and Street photography? – check here)
With these features in mind, let’s explore the perfect lens for urban photography with the Sony A6000.
The top choices are –
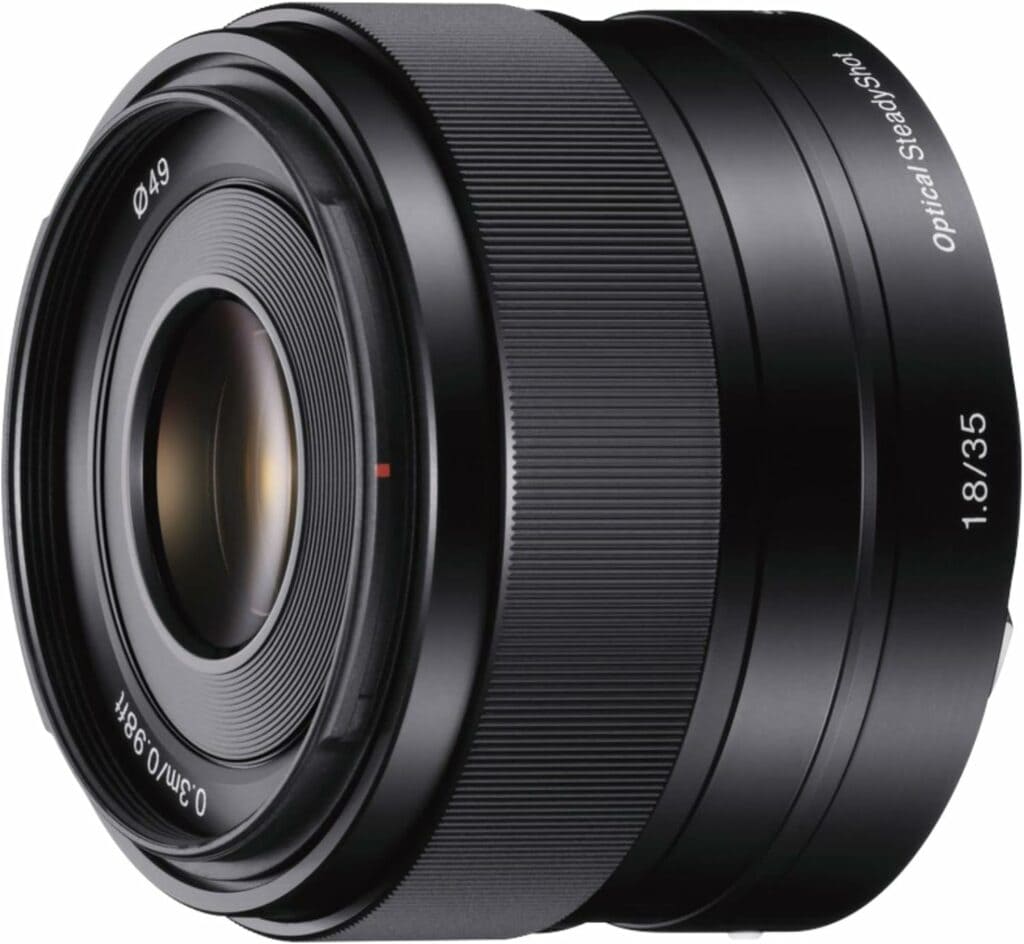
Sony E 35mm f/1.8 OSS Lens: Unleashing Creativity in Low Light
The Sony E 35mm f/1.8 OSS lens is an indispensable tool for Sony a6000 photographers seeking a perfect balance between versatility, performance, and portability. With its wide f/1.8 aperture, this lens excels in low-light conditions, allowing for exceptional image quality even in challenging urban photography environments. The Optical SteadyShot (OSS) image stabilization further enhances its capabilities by minimizing the impact of camera shake, ensuring consistently sharp and blur-free images, particularly in handheld situations.
Its 35mm focal length on APS-C cameras provides a natural perspective that is well-suited for a myriad of photography genres, including portraits, street photography, and everyday snapshots. Beyond its technical prowess, the lens is compact and lightweight, making it an ideal companion for on-the-go photographers and travel enthusiasts. Whether you’re capturing the vibrant energy of city life or the subtleties of a portrait, the Sony E 35mm f/1.8 OSS lens delivers a winning combination of optical excellence, convenience, and creative possibilities, making it a must-have for anyone looking to elevate their photography experience.
Sony SE 35mm f/1.8 OSS Lens
Overview
Pros of Sony E 35mm f/1.8 OSS Lens:
- Wide Aperture: The lens features a wide f/1.8 aperture, allowing for impressive low-light performance and the ability to create a beautiful background blur (bokeh) for enhanced subject isolation.
- Optical SteadyShot (OSS): The built-in Optical SteadyShot image stabilization helps reduce camera shake, which is particularly useful in low-light conditions or when shooting at slower shutter speeds, allowing for sharper images.
- Versatile Focal Length: The 35mm focal length on APS-C cameras provides a versatile field of view, making it suitable for various photography styles, including portraits, street photography, and general-purpose shooting.
- Compact and Lightweight: The lens is designed to be compact and lightweight, making it a convenient choice for everyday use and travel photography without adding significant weight to the camera setup.
- Fast Autofocus: The lens boasts a fast and accurate autofocus system, enabling quick and precise focusing, which is beneficial for capturing spontaneous moments, especially in dynamic shooting situations.
- Excellent Image Quality: The lens delivers sharp, high-quality images with good color reproduction and contrast, improving overall image clarity.
Cons of Sony E 35mm f/1.8 OSS Lens:
- Built for APS-C sensors: This lens will mount on full-frame Sony cameras but will not cover the whole sensor – it will need to be used in “crop” mode or will create vignetting.
- Slight Distortion: Some users may notice slight barrel distortion, particularly in certain shooting scenarios like architectural photography. However, this can often be corrected in post-processing.
- Plastic Build: The lens is predominantly plastic, which might not feel as robust or durable as lenses with more metal components.
- Pricier than Some Competitors: While providing good value for its features, the Sony E 35mm f/1.8 OSS lens may be slightly more expensive than comparable third-party lenses with similar specifications.
- Not Weather-Sealed: Similar to many lenses in this category, the Sony E 35mm f/1.8 OSS is not weather-sealed, requiring caution when shooting in adverse weather conditions to avoid potential damage.
In summary, the Sony E 35mm f/1.8 OSS lens offers a versatile focal length with a wide aperture and effective image stabilization, making it a strong performer for various photography styles. However, potential users should consider factors like the plastic build and the absence of weather-sealing in their decision-making process.
Facts
- 30mm (52.5mm ff equiv)
- Lens Format: APS-C
- Internal Image Stabilization
- Filter Thread: 49mm
- Weight: 155g. (5.5 oz)
- Diameter: 63mm (2.5 in)
- Length: 45mm (1.8 in)
- Min Focus Distance: 0.3m (12in)
- Max Magnification: 0.15x
Pros
Cons
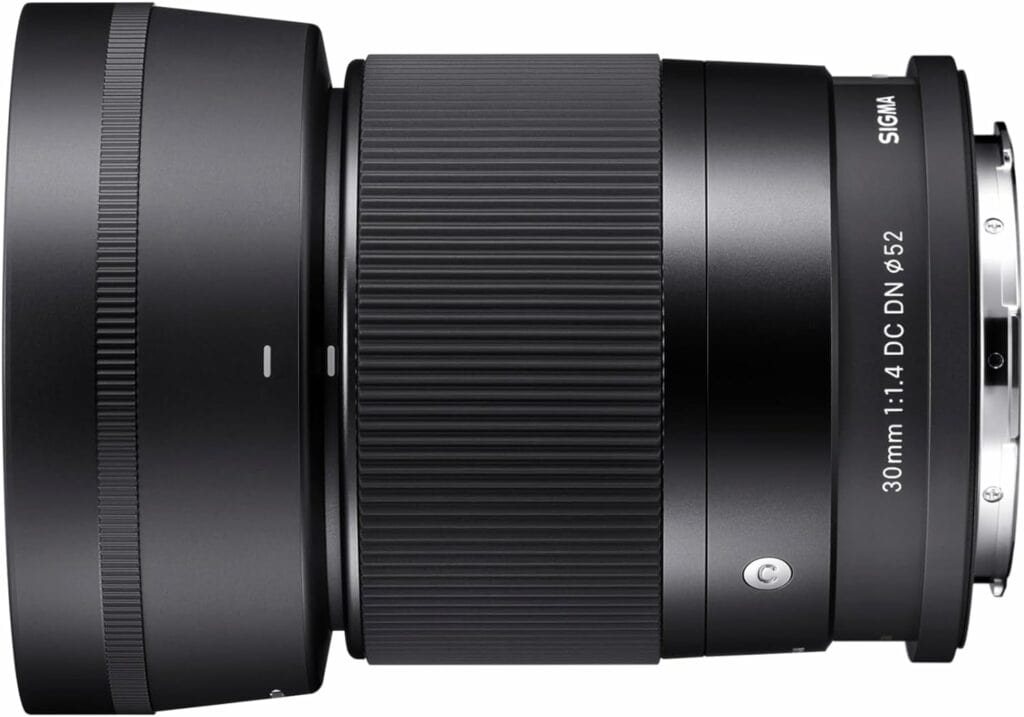
Sigma 30mm f/1.4 DC DN Contemporary Lens: Precision in Every Frame
The Sigma 30mm f/1.4 DC DN Contemporary lens is a compelling choice for urban photographers seeking a versatile and high-performance prime lens for the Sony A6000 cameras. Its standout feature is the impressively wide f/1.4 aperture, allowing for outstanding low-light performance and creating a beautiful background blur that enhances subject isolation. The lens excels in capturing sharp and detailed images, even when shooting wide open, contributing to overall image clarity.
Boasting a 30mm focal length, it balances wide-angle and standard perspectives, making it suitable for various photography genres, from portraiture to street photography. The lens also exhibits a compact and lightweight design, ensuring portability without compromising optical quality. With its quick and accurate autofocus system, the Sigma 30mm f/1.4 DC DN Contemporary lens offers photographers a reliable tool to unleash their creativity and capture stunning moments in diverse shooting scenarios.
Sigma 30mm f/1.4 DC DN Contemporary
Overview
Pros of Sigma 30mm f/1.4 DC DN Contemporary Lens:
- Large Aperture: The wide f/1.4 aperture allows for excellent low-light performance, making it ideal for shooting in challenging lighting conditions and achieving a beautiful background blur (bokeh).
- Sharp Image Quality: The lens produces sharp and detailed images, even when shooting wide open, contributing to the overall image clarity and quality.
- Versatility: With a 30mm focal length on APS-C cameras, it provides a versatile field of view suitable for various photography genres, including portraits, street photography, and low-light situations.
- Compact and Lightweight: The lens is designed with portability in mind, making it easy to carry around for extended periods without causing fatigue, which is particularly advantageous for on-the-go and travel photography.
- Fast and Accurate Autofocus: The lens features a quick and precise autofocus system, ensuring you can easily capture spontaneous moments, making it suitable for dynamic situations like street photography.
- Affordability: Compared to some other prime lenses with similar specifications, the Sigma 30mm f/1.4 offers good value for its performance, making it an attractive option for photographers on a budget.
Cons of Sigma 30mm f/1.4 DC DN Contemporary Lens:
- Slight Chromatic Aberration: In certain high-contrast situations, the lens may exhibit minor chromatic aberration, which could require post-processing correction.
- Not Weather-Sealed: The lens lacks weather sealing, so caution is needed when shooting in adverse weather conditions to avoid potential damage.
- No Optical Stabilization: The absence of optical stabilization might pose a challenge when shooting handheld in low-light conditions, potentially requiring higher ISO settings or steady hands to prevent motion blur.
- Some Distortion: There may be minimal distortion, especially noticeable in architectural photography, although this can often be corrected in post-processing.
In conclusion, the Sigma 30mm f/1.4 DC DN Contemporary Lens is a compelling choice for photographers seeking a versatile and affordable prime lens with excellent low-light performance, but it does come with some trade-offs, such as minimal distortion and the absence of optical stabilization.
Facts
- 35mm (52.5mm ff equiv)
- Lens Format: Full Frame
- Stepping Motor AF System
- Filter Thread: 49mm
- Weight: 265 g (9.35 oz)
- Diameter: 65 mm (2.55 in)
- Length: 73 mm (2.9 in)
- Min Focus Distance: 0.3m (12in)
- Max Magnification: 0.14x
Pros
Cons
Sony E 16-70mm f/4 ZA OSS: Flexibility in motion
Our final choice is the Sony E 16-70mm f/4 ZA OSS lens. It is an excellent choice for urban photography on the Sony A6000, offering a versatile focal range that effortlessly adapts to the dynamic nature of city environments. With a 16-70mm zoom range, this lens provides the flexibility to capture sweeping cityscapes, architectural details, and candid street scenes all in one package.
The constant f/4 aperture ensures consistent exposure and allows for reliable low-light performance, which is crucial for urban settings where lighting conditions can vary. The built-in Optical SteadyShot (OSS) image stabilization is particularly advantageous in urban environments, minimizing the impact of camera shake and ensuring sharp images, especially in crowded or fast-paced scenarios.
The lens’s high-quality optics, including a Zeiss T* coating, contribute to superior image clarity, sharpness, and vibrant colors. Its weather-sealed construction further enhances its appeal for urban exploration, providing durability and reliability in various weather conditions. Whether capturing the grandeur of city architecture or the energy of bustling streets, the Sony E 16-70mm f/4 ZA OSS lens is an indispensable tool for urban photographers using the Sony A6000.
Sony SEL1670Z Vario-Tessar T E 16-70mm F4 ZA OSS
Overview
Pros of Sony E 16-70mm f/4 ZA OSS Lens:
- Versatile Zoom Range: The 16-70mm focal length provides a versatile zoom range suitable for various photography genres, from landscapes and portraits to everyday snapshots.
- Constant Aperture: The lens maintains a constant f/4 aperture throughout the zoom range, offering consistent exposure and depth of field control, making it a reliable choice for various lighting conditions.
- Optical SteadyShot (OSS): Built-in Optical SteadyShot image stabilization helps reduce the impact of camera shake, especially at longer focal lengths, ensuring sharper images in both photo and video.
- High-Quality Optics: With a Zeiss T* coating, the lens delivers high-quality optics, resulting in excellent image sharpness, contrast, and color reproduction.
- Weather-Sealed Construction: The lens features weather sealing, protecting against dust and moisture. This makes it suitable for outdoor shooting in various weather conditions.
- Compact and Lightweight: Considering its zoom range and features, the lens is relatively compact and lightweight, enhancing its portability for everyday use and travel.
Cons of Sony E 16-70mm f/4 ZA OSS Lens:
- High Price Point: The lens is relatively expensive, which might deter budget-conscious photographers, especially compared to zoom lenses with similar focal lengths.
- f/4 Aperture Limitation: While the constant f/4 aperture is useful, it may not be wide enough for users who frequently shoot in low-light conditions or seek more pronounced background blur.
- Distortion at Wide End: Some users may notice barrel distortion at the wider end of the focal range, particularly noticeable in architectural or straight-line subjects. Post-processing correction may be required.
- Size and Weight: While compact for its zoom range, the lens may still be bulkier and heavier than prime lenses, affecting overall portability.
- Limited Low-Light Performance: Despite the f/4 aperture and image stabilization, this lens may not perform as well in extremely low-light conditions compared to lenses with wider apertures.
The Sony E 16-70mm f/4 ZA OSS lens offers a versatile focal range, constant aperture, and premium optics with weather-sealing benefits. However, potential buyers should consider the higher price point and the f/4 aperture limitation, especially if low-light performance and background blur are critical factors in their photography.
Facts
- 16-70mm (24mm-105mm ff equiv) Focal Range
- Lens Format: Full Frame
- F4.0 Max Aperture
- Image Stabilization
- Filter Thread: 55mm
- Max Format: APS-C / DX
- Sony E Mount
- Weight: 308g (10.9 oz)
- Diameter: 67mm (2.6 in)
- Length: 75mm (2.95 in)
- Min Focus Distance: 0.35m (13.78 in)
- Max Magnification: 0.23x
Pros
Cons
Conclusion and final thoughts
When it comes to urban photography, the lens you choose plays a crucial role in capturing the essence of the cityscape. Different lenses offer various focal lengths, apertures, and optical characteristics, which can greatly impact the final image. Understanding the importance of lenses and their specific qualities will help you select the perfect lens for your urban photography needs.
In the realm of urban photography, your choice of lens can make all the difference. The Sony A6000, combined with the right lens, transforms into a powerful tool for capturing the energy and beauty of city life. Whether you opt for the Sony E 35mm f/1.8 OSS, Sigma 30mm f/1.4 DC DN, or Sony E 10-18mm f/4 OSS, each lens offers a unique perspective, allowing you to express your creativity and tell compelling stories through your urban photographs.
Investing in the best lens for your Sony A6000 is an investment in the quality and impact of your urban photography. So, gear up, hit the streets, and let your creativity flow with the perfect lens by your side.
Thanks for reading! If you want to see more reviews, please check out the Reviews section of my website. Also, if you want more photography tips, check out the travel photography section!
Overview of the Sony A6000 cameras
The Sony A6000 family of APS-C mirrorless cameras has gained popularity among photographers for their exceptional performance and compact size. They feature APS-C image sensors ranging from 24 to 26 megapixels and deliver stunning image quality. The camera’s advanced autofocus system ensures fast and accurate subject tracking, perfect for capturing the dynamic scenes of the city.
One of the standout features of the A6000 cameras is their electronic viewfinder (EVF), which provides a clear and detailed preview of your shot, even in bright sunlight. This feature allows you to compose your images precisely and adjust exposure and composition in real time. Additionally, the A6000 camera offers a tiltable LCD screen, making it easy to capture unique perspectives and angles, especially in crowded urban environments.
What is the difference between urban and street photography?
Urban photography and street photography are closely related genres, but they have distinct characteristics that differentiate them. Here’s a breakdown of the key differences between urban and street photography:
Scope and Focus:
Urban Photography: This genre encompasses a broader scope, focusing on capturing the overall essence of urban life. It includes street scenes, architecture, cityscapes, daily life in urban environments, and the interplay between people and their surroundings. Urban photography can tell a more comprehensive city or urban area story.
Street Photography: On the other hand, street photography has a narrower focus. It is primarily concerned with capturing candid moments and people in public spaces. Street photographers aim to document everyday life, gestures, expressions, and interactions within the confines of public streets and spaces.
Composition and Style:
Urban Photography: Urban photographers often incorporate various elements into their compositions, including architecture, landscapes, and people. The style can vary widely, and urban photography may include candid and posed shots. The emphasis is on conveying the atmosphere and mood of the urban environment.
Street Photography: Street photographers typically lean towards candid and unposed shots. The style is characterized by spontaneity, capturing the raw and unfiltered moments of life on the streets. Composition in street photography often involves careful framing to highlight the subject against the backdrop of the city.
Subject Matter:
Urban Photography: Beyond individuals on the street, urban photography may focus on events, city infrastructure, cultural aspects, and the overall vibe of a city. It can encompass a more extensive range of subjects beyond just people.
Street Photography: The primary subject of street photography is people in public places. It seeks to reveal the human experience in urban environments, showcasing the ordinary and extraordinary moments that unfold on the streets.
Intent and Narrative:
Urban Photography: Urban photography often aims to provide a comprehensive visual narrative of urban life. It may tell a story about the city’s history, culture, and lifestyle through a series of images.
Street Photography: Street photography focuses on capturing individual moments, often without a broader narrative. Each photo tells its own story, and the collective impact reflects the diversity and spontaneity of life on the streets.
In summary, while urban photography encompasses a broader range of subjects within an urban environment, street photography is more specific, centering on candid and unposed moments of people in public spaces. Both genres offer unique opportunities for creative expression and storytelling within the dynamic context of city life.
The top features to consider when choosing a lens for urban photography
When it comes to urban photography, choosing the right lens is crucial to capturing the vibrant cityscape with precision and clarity. Here are some key features to consider when selecting a lens for urban photography:
- Wide-angle capability: Urban landscapes often feature expansive skylines, grand architecture, and bustling city streets. A wide-angle lens allows you to capture the entire scene, showcasing the vastness and intricacies of the cityscape. It also lets you include more elements in your frame, such as leading lines and foreground details, adding depth and interest to your photographs.
- Low-light performance: Cities come alive at night with illuminated buildings, glowing streetlights, and vibrant nightlife. A lens with excellent low-light performance is essential to capture the city after dark. Look for lenses with wide apertures, such as f/1.8 or wider, as they allow more light to enter the camera sensor, resulting in brighter and more detailed night shots.
- Versatility and portability: Urban photography often involves exploring different neighborhoods, moving quickly from one location to another. A versatile and lightweight lens makes your urban photography experience more enjoyable. Consider lenses with a compact design and a focal length range that covers both wide-angle and moderate telephoto, allowing you to capture various urban scenes without carrying multiple lenses.
FAQ
What are Wide Angle Lenses?
Wide-angle lenses typically have a focal length of 35mm or smaller (20mm on an APS-c camera body). This lens captures a wider view than you can normally see without turning your head. This is important because it gives the viewer of the photo a sense of the scale and scope of the landscape. Wide-angle lenses are also great for emphasizing depth in a photograph.
What are Telephoto Lenses?
A telephoto lens typically has a focal length of 80mm or larger (50mm on an APS-c camera body). This lens lets you make distant items appear larger in the image’s frame. Landscape photographers will use telephoto lenses to capture the details of a distant scene.
What are Zoom Lenses?
A zoom lens is a lens that encompasses a broad focal length, from wide-angle to mild telephoto zoom range. This lens type is great for landscape photography because it gives you the flexibility to capture wide-sweeping landscapes and more intimate details within the same scene.
What is an APS-C camera?
APS-C cameras are digital cameras with a sensor size about 1.5 times smaller than the 35mm film format. This smaller sensor size results in a crop factor of 1.5x, which means that the field of view captured by the camera is about 1.5 times narrower than what is seen with a full-frame camera.
What does 35mm Equiv mean?
An APS-C sensor is 75% smaller than a full-frame sensor. This results in a 1.5x “crop factor”. This cropping results in lenses having a 1.5x magnification when used on an APS-C sensor compared to a full-frame sensor. The quality of the image is the same. APS-C camera users get an extra boost in focal length over full-frame users (so you can spend less $$ on lenses).
What are the Sony A6000 cameras?
The Sony a6000 APS-C camera family includes the following models – a6000, a6100, a6200, a6300, a6400, a6500, and a6600. The only models currently in production are the a6000, a6100, and a6600. The a6000 and a6100 are priced under $1000 are make great started cameras. All three models are known for their outstanding image quality.
What is the difference between Sony E and Sony FE lenses?
Both E-mount lens lines, E and FE, are compatible with Sony APS-C camera bodies. Sony E-mount lenses are designed specifically for use with Sony APS-C mirrorless cameras, such as the a6000 series. These lenses offer a smaller form factor and lighter weight than their full-frame counterparts. Sony FE lenses are designed with Sony full-frame mirrorless cameras and offer superior image quality and low-light performance.
Other Questions
What size lens is best for urban photography?
The best lens size for urban photography often depends on personal preferences, shooting style, and the specific urban scenes you want to capture. However, prime lenses with focal lengths between 24mm and 50mm are considered versatile and well-suited for urban photography. Here are a few focal length options and their characteristics:
- 35mm: A 35mm lens is popular for urban photography as it provides a natural perspective similar to what the human eye sees. It’s great for capturing street scenes, environmental portraits, and various subjects in urban environments.
- 24mm-50mm: Lenses within this range offer versatility, allowing you to capture wider cityscapes and closer details. A 50mm lens, for example, is excellent for street photography and portraits, while a 24mm lens is great for capturing expansive city views.
- Wide-Angle (16mm-24mm): If you enjoy capturing sweeping cityscapes, architecture, and dynamic street scenes, a wide-angle lens can be a valuable addition. Lenses in the 16mm to 24mm range provide a broad field of view, making them ideal for capturing the entirety of urban landscapes.
- Zoom Lenses (e.g., 24-70mm): A zoom lens with a range of 24-70mm offers versatility, allowing you to adapt to different situations without changing lenses. It’s particularly useful when quickly switching between capturing wide cityscapes and closer details.
Ultimately, the “best” lens size for urban photography depends on your creative vision and the specific type of shots you want to achieve. Consider factors such as focal length, aperture, and whether you prefer prime or zoom lenses based on your shooting style and the variety of scenes you encounter in urban environments.
Do professional photographers use Sony A6000 cameras?
Yes, professional photographers use the Sony a6000, especially when a lightweight and compact camera is preferred without compromising image quality. The Sony a6000 is a mirrorless camera that gained popularity for its advanced features, excellent image quality, and compact form. While it may not be the flagship model in Sony’s lineup, its combination of a 24.3-megapixel APS-C sensor, fast autofocus system, and compact design has made it a popular choice for various photographers, including professionals.
Professional photographers often use the Sony a6000 for various applications, such as street photography and travel photography, and even as a secondary or backup camera for more specialized shoots. Its portability, high-quality image output, and the availability of a diverse range of lenses make it a versatile tool for many photographers.
That said, the choice of a camera ultimately depends on the specific needs and preferences of the photographer, the type of photography they specialize in, and their budget considerations. While some professionals may opt for more advanced models in Sony’s lineup for specific features, the a6000 has proven to be a capable and reliable camera for a wide range of amateur and professional photographers.
What is the most used street photography lens?
There isn’t a single “most used” street photography lens, as preferences can vary among photographers based on their shooting style, preferences, and the type of street photography they engage in. However, certain focal lengths are commonly favored for street photography:
- 35mm: A 35mm lens is often considered a versatile choice for street photography. It provides a natural perspective, allowing photographers to capture scenes with a similar field of view to what the human eye perceives. This focal length is great for environmental portraits and capturing the essence of urban life.
- 50mm: A 50mm lens is another popular choice, providing a slightly tighter field of view. It is excellent for isolating subjects and capturing candid moments with a classic and cinematic look.
- 28mm: A wider 28mm lens is favored by some street photographers for its ability to capture more of the scene, making it suitable for dynamic street scenes, urban landscapes, and environmental portraits.
- 24mm: Wide-angle lenses, such as 24mm, are ideal for capturing expansive street scenes and architecture, providing a unique perspective. These lenses can create visually interesting compositions with a greater sense of context.
Ultimately, the “best” street photography lens depends on the photographer’s style and preferences. Some photographers prefer prime lenses for their compactness and wide apertures, while others may opt for zoom lenses for added flexibility. It’s common for street photographers to experiment with different focal lengths to find the lens that best suits their creative vision and the type of street photography they engage in.
Is 50mm or 85mm better for street photography?
Is the Sony A6000 still worth it 2024?
The Sony a6000 was and still is a popular and capable camera, especially for enthusiasts and entry-level photographers. However, the “worth” of a camera depends on various factors, including your specific needs, budget, and the current market conditions.
The post Best Sony A6000 Lenses for Beautiful Urban Photography in 2024 appeared first on Croasdill Photography.
]]>The post 5 Best And Affordable Travel Cameras in 2023 appeared first on Croasdill Photography.
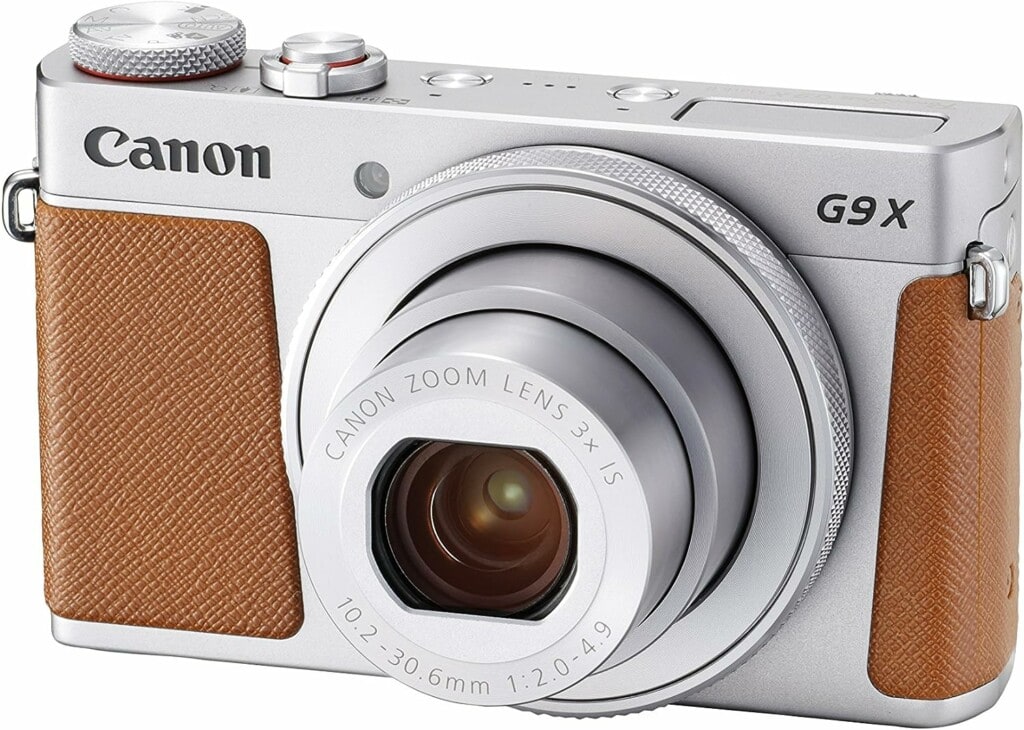
]]>Canon PowerShot G9 X Mark II
The Canon PowerShot G9 X Mark II shines as a travel camera because of its excellent balance of compactness, functionality, and affordability. Weighing just 206g (7.5 oz), carrying around on your travels is convenient without burdening your luggage. Its 1.0-inch, 20.1 Megapixel CMOS sensor ensures high-quality images, sharper than what most smartphones can produce.
Furthermore, it’s equipped with a fast, f/2.0–4.9 lens that captures plenty of detail, even in low light conditions – perfect for those spontaneous, impromptu travel snaps.
Its Wi-Fi and Bluetooth connectivity offer seamless photo sharing, ensuring your memories can be easily stored or shared on the go. Lastly, the touch panel and simple user interface make it easy to use, even for photography novices.
Despite its many perks, the Canon PowerShot G9 X Mark II has a few limitations. Its zoom range, notably, is quite limited—just a 3x optical zoom—which might not be sufficient for capturing distant subjects or intricate landscape details. The video resolution is also limited to 1080p, so it wouldn’t be the best pick for an action camera.
Canon PowerShot G9 X Mark II
Overview
The Canon PowerShot G9 X Mark II is a pocket-sized camera that packs a punch with its 20.1 megapixel CMOS sensor and DIGIC 7 Image Processor.
It features 3x optical zoom and a 28-84mm f/2.0-4.9 lens, making it perfect for wide-angle and telephoto shots.
In addition, it’s extremely lightweight, weighs only 206 g (7.25 oz), and has a reliable battery life. It’s perfect for capturing amazing moments while traveling on a budget.
Pros
Cons
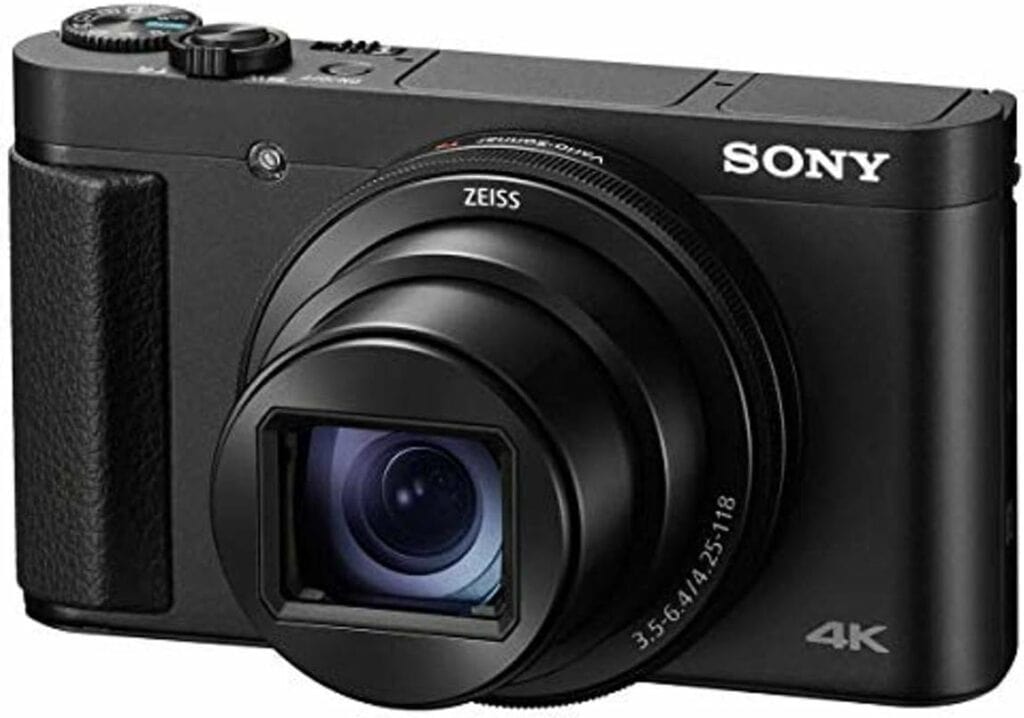
Sony HX99
The Sony HX99 is ideal for a travel camera, blending portability, affordability, and impressive functionality. This compact powerhouse boasts a high-zoom range with its 24-720 mm lens, making it versatile for close-up and distant shots.
The 18.2 Megapixel Exmor R CMOS sensor ensures high-resolution images, while its BIONZ X image processing engine helps capture fine details and reduces noise, even in low-light conditions.
The Sony HX99 stands out for its 4K video capabilities and continuous shooting feature, perfect for capturing motion-filled travel adventures. With built-in Wi-Fi and Bluetooth, sharing or transferring your images to your device is a breeze.
Finally, its 180° tiltable LCD for easy self-portraits and the pop-up OLED Tru-Finder viewfinder for more accurate framings make the Sony HX99 a robust, user-friendly choice for travelers.
While the Sony HX99 excels in many areas, there are some limitations to note. The camera’s impressive zoom range can sometimes lead to decreased image quality at full zoom. Moreover, despite its 4K video capabilities, the lack of an external microphone port may limit its appeal for those hoping to capture high-quality audio alongside their visuals.
Sony HX99
Overview
The Sony HX99 offers an impressive 24-720mm f/3.5-6.4 zoom lens and a high-quality 18.2 megapixel CMOS sensor.
It perfectly balances exceptional image quality and easy portability, weighing only 242 g (0.53 lb / 8.54 oz).
It also features an impressive zoom range that lets you capture landscapes and candid shots.
Pros
Cons
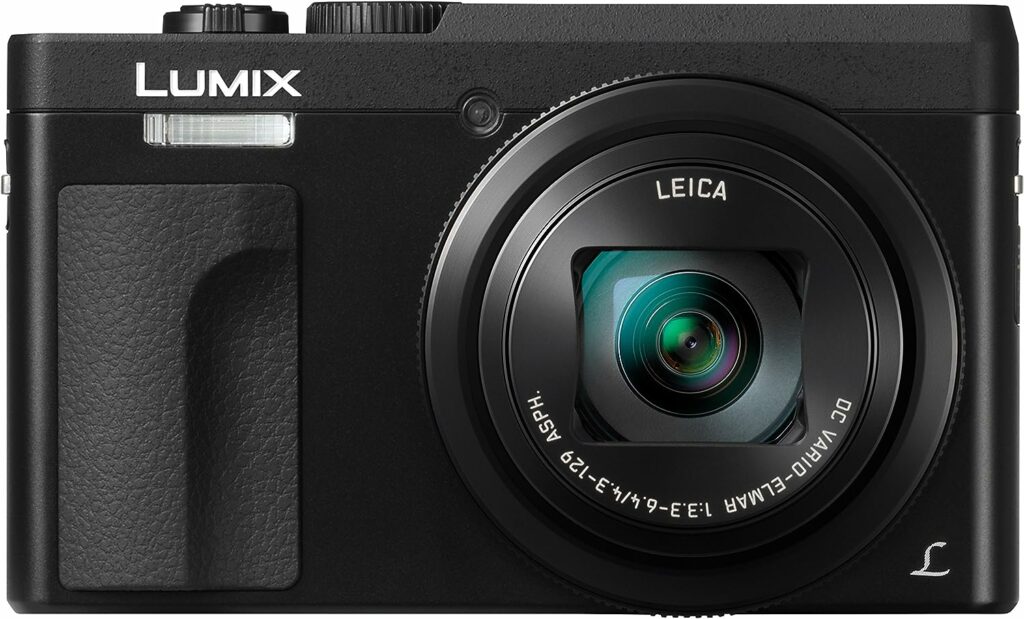
Panasonic Lumix ZS70
The Panasonic Lumix ZS70 elevates travel photography with its robust features while maintaining affordability. Equipped with a 20.3 Megapixel MOS sensor and a versatile 30x Leica DC VARIO-ELMAR Lens (24-720mm), the Lumix ZS70 ensures high-quality images from expansive landscapes to distant subjects.
Its unique 4K PHOTO mode lets you capture the perfect moment by selecting a frame from a video sequence shot at a high burst rate of 30fps, ensuring you never miss an important shot.
Moreover, it boasts a Control Ring for quick and intuitive setting adjustments and a 180-degree front flip-up touch screen, making it easier to take high-quality selfies.
The built-in Wi-Fi allows for instant photo sharing and remote camera control. The camera’s compactness, weighing just 322g (11.3 oz), makes it an excellent choice for travel enthusiasts who are looking for portability without sacrificing performance.
Despite its noteworthy features, the Panasonic Lumix ZS70 has its share of drawbacks that potential buyers should consider. Its low-light performance could be better; images tend to be grainy with noticeable noise when shot in dim conditions. While fine for still photography, the autofocus system struggles a bit during video capture, particularly at higher zoom levels.
Lastly, while the camera offers 4K video recording, it is limited to 15 frames per second, resulting in less smooth footage compared to cameras that offer 4K at 30fps or 60fps.
Panasonic Lumix ZS70
Overview
If you’re looking for a camera that fixes everything, the Panasonic Lumix ZS70 is the one for you.
It features a 20.3 megapixel MOS sensor, 30x optical zoom Leica lens, and 4K video capabilities for exceptional image quality.
Additionally, it comes with Wi-Fi and Bluetooth connectivity, making it easy to transfer images while you’re on the go.
Pros
Cons
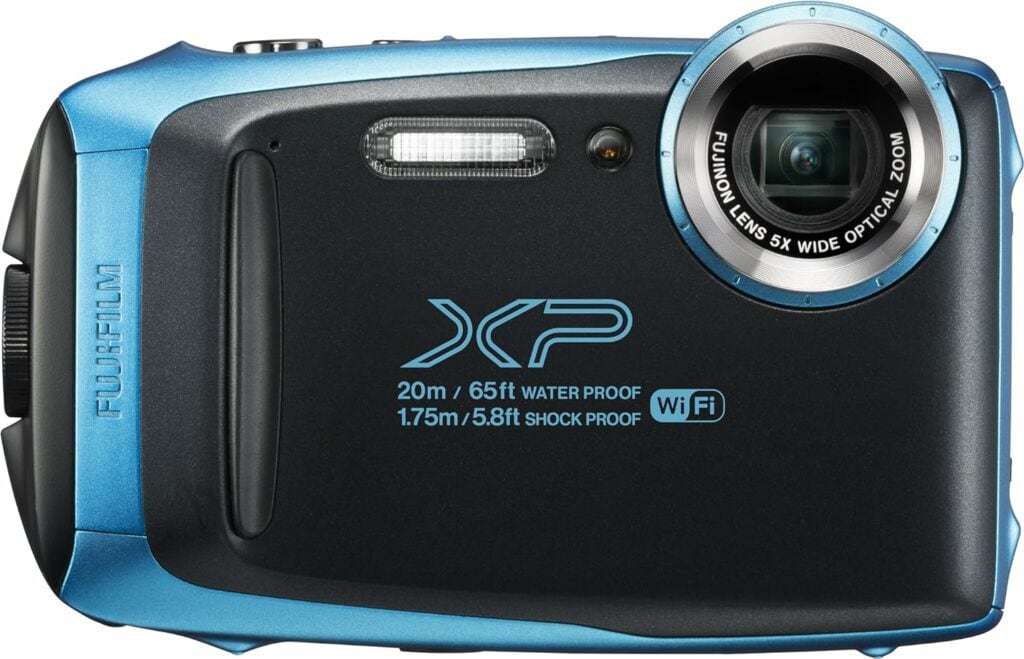
Fujifilm FinePix XP120
The Fujifilm FinePix XP120 is a standout option for travelers seeking durability and performance in one compact package. Its robust, weather-sealed body is designed to withstand the elements, making it a perfect companion for adventurous excursions, whether you’re hiking in the mountains or diving underwater.
The camera boasts a 16.4-megapixel BSI-CMOS sensor and a 5x optical zoom lens, delivering crisp, clear images across various lighting conditions.
Its built-in Wi-Fi connectivity allows for the swift transfer of photos and videos to your devices, ensuring that sharing your travel experiences is effortless. Furthermore, the FinePix XP120’s lightweight design, at just 203g (7.2 oz), ensures it won’t be a burden during your travels, while its vibrant color options add an element of fun to your photography gear.
While the Fujifilm FinePix XP120 possesses many attractive attributes, it’s not without its drawbacks. Despite 1080p full HD resolution, the video quality can be inconsistent, particularly in low-light conditions. Also, while sufficient for many scenarios, the camera’s 5x optical zoom may not cater to those who wish to capture detailed images from a distance.
Furthermore, the lack of manual controls limits users’ ability to customize settings according to their preference, which might deter more advanced photographers. Finally, the battery life, while acceptable, may fall short during extended use, which could be problematic for users on long trips or those without readily available charging options.
Fujifilm FinePix XP120
Overview
The Fujifilm FinePix XP120 is a rugged, compact camera that is ideal for adventurous travelers.
Its 16.4 megapixel CMOS sensor, combined with the 28-140mm f/3.9-4.9 5x optical zoom lens, delivers crisp and clear images.
Its robustness sets this camera apart; it’s waterproof up to 65 feet, shockproof from 5.8 feet, and freeze-proof down to -10 degrees Celsius (14 degrees F).
Pros
Cons
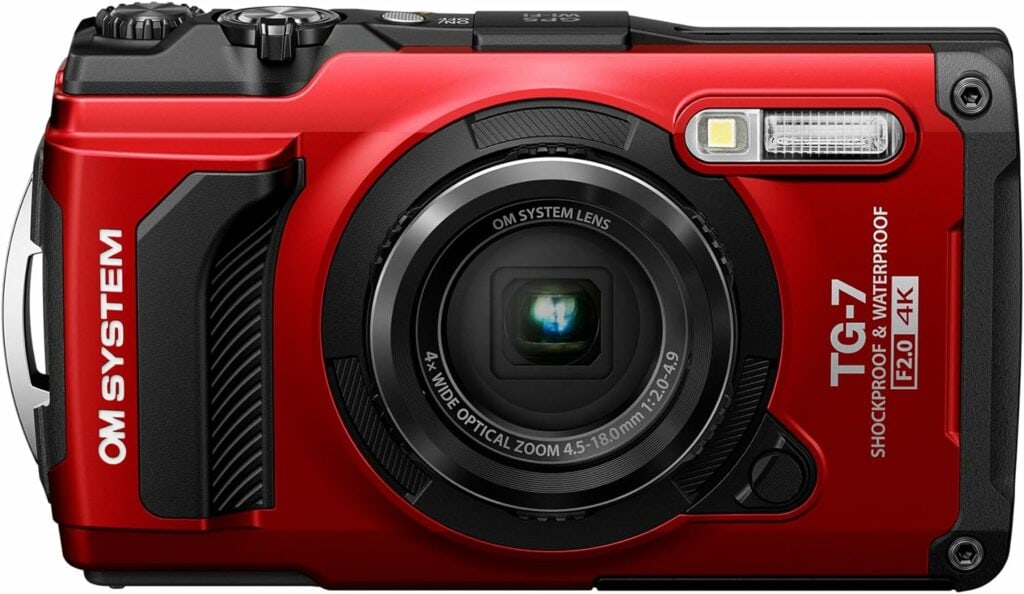
OM SYSTEM Tough TG-7
The OM SYSTEM Tough TG-7 is an exceptional travel camera due to its rugged durability and high-performance features. Its waterproof, shockproof, and freeze-proof design is built to withstand extreme environments, making it an ideal companion for adventurous travelers.
The camera’s high-resolution sensor and broad zoom range lens allow it to capture vivid and detailed images in various settings, from breathtaking landscapes to intricate close-ups. Its compact and lightweight design also offers easy portability, a critical characteristic of any travel camera.
Despite its toughness, it doesn’t compromise image quality, boasting a 12-megapixel CMOS sensor and 4x optical zoom, with a 25-100mm equivalent f/2.0-4.9 lens. It also has impressive 4K and high-speed video capabilities, making it possible to capture stunning slow-motion sequences. Furthermore, the TG-7 includes built-in Wi-Fi and GPS, making travel photography convenient.
The inclusion of Wi-Fi connectivity further enhances its appeal by simplifying the process of sharing your unique travel experiences. Hence, the OM SYSTEM Tough TG-7 perfectly marries rugged resilience with uncompromised performance, setting it apart as an exceptional travel camera.
However, the OM SYSTEM Tough TG-7, despite its impressive features and hardy design, does have some limitations that potential buyers should consider. One significant drawback is its low light performance; the images can exhibit noticeable noise and lose detail in poor lighting conditions.
Additionally, while the camera can endure harsh conditions, its lens is not dustproof, which could pose issues when used in sandy or dusty environments. Lastly, the absence of manual control might deter advanced photographers who prefer to have more control over their camera settings.
OM SYSTEM Tough TG-7
Overview
The OM SYSTEM Tough TG-7 is an impressive choice for adventurous travelers who need a rugged, reliable, and affordable camera. It’s designed to withstand extreme conditions, being waterproof, shockproof, and even freezeproof.
Boasting a 12-megapixel CMOS sensor and 4x optical zoom, with a 25-100mm equivalent f/2.0-4.9 lens.
It also has impressive 4K and high-speed video capabilities, making it possible to capture stunning slow-motion sequences.
Pros
Cons
Conclusion – Cameras for Travel
When it comes to finding an affordable travel camera, you don’t need to sacrifice quality for an affordable price. These are some of the best inexpensive travel cameras on the market that feature both high-quality images and portability, lightweight and compact. It’s time to turn your travels into unforgettable memories with a camera that fits your budget.
Happy snapping!
If you like guides like this, check out my Guides section for more helpful information.
Five Most Important Features in a Travel Camera
- Durability and Weather Resistance: A good travel camera should withstand various conditions, from rain and snow to dust and heat. Look for waterproof, shockproof, and dustproof cameras to ensure they can handle your adventures.
- Image Quality: High resolution and good low-light performance are key factors to consider regarding image quality. Look for cameras with high megapixel counts and large sensors. Features like optical zoom can also greatly enhance the quality of your photos.
- Size and Weight: As a traveler, you want a lightweight, compact camera for easy portability. Bulky cameras can be cumbersome, especially on long trips or during outdoor activities.
- Battery Life: The best travel cameras offer long battery life to ensure you can capture as many photos as you want throughout your trip. Consider a camera with a removable battery, as you can carry extras for longer journeys.
- Additional Features: Look for additional features like Wi-Fi connectivity for easy photo transfer, GPS for location tagging, and video capabilities for capturing dynamic scenes. Manual controls allow for more flexibility and customization, which can be particularly important for advanced photographers.
The post 5 Best And Affordable Travel Cameras in 2023 appeared first on Croasdill Photography.
]]>The post Badlands National Park – Exploring Its Unparalleled Beauty appeared first on Croasdill Photography.
]]>
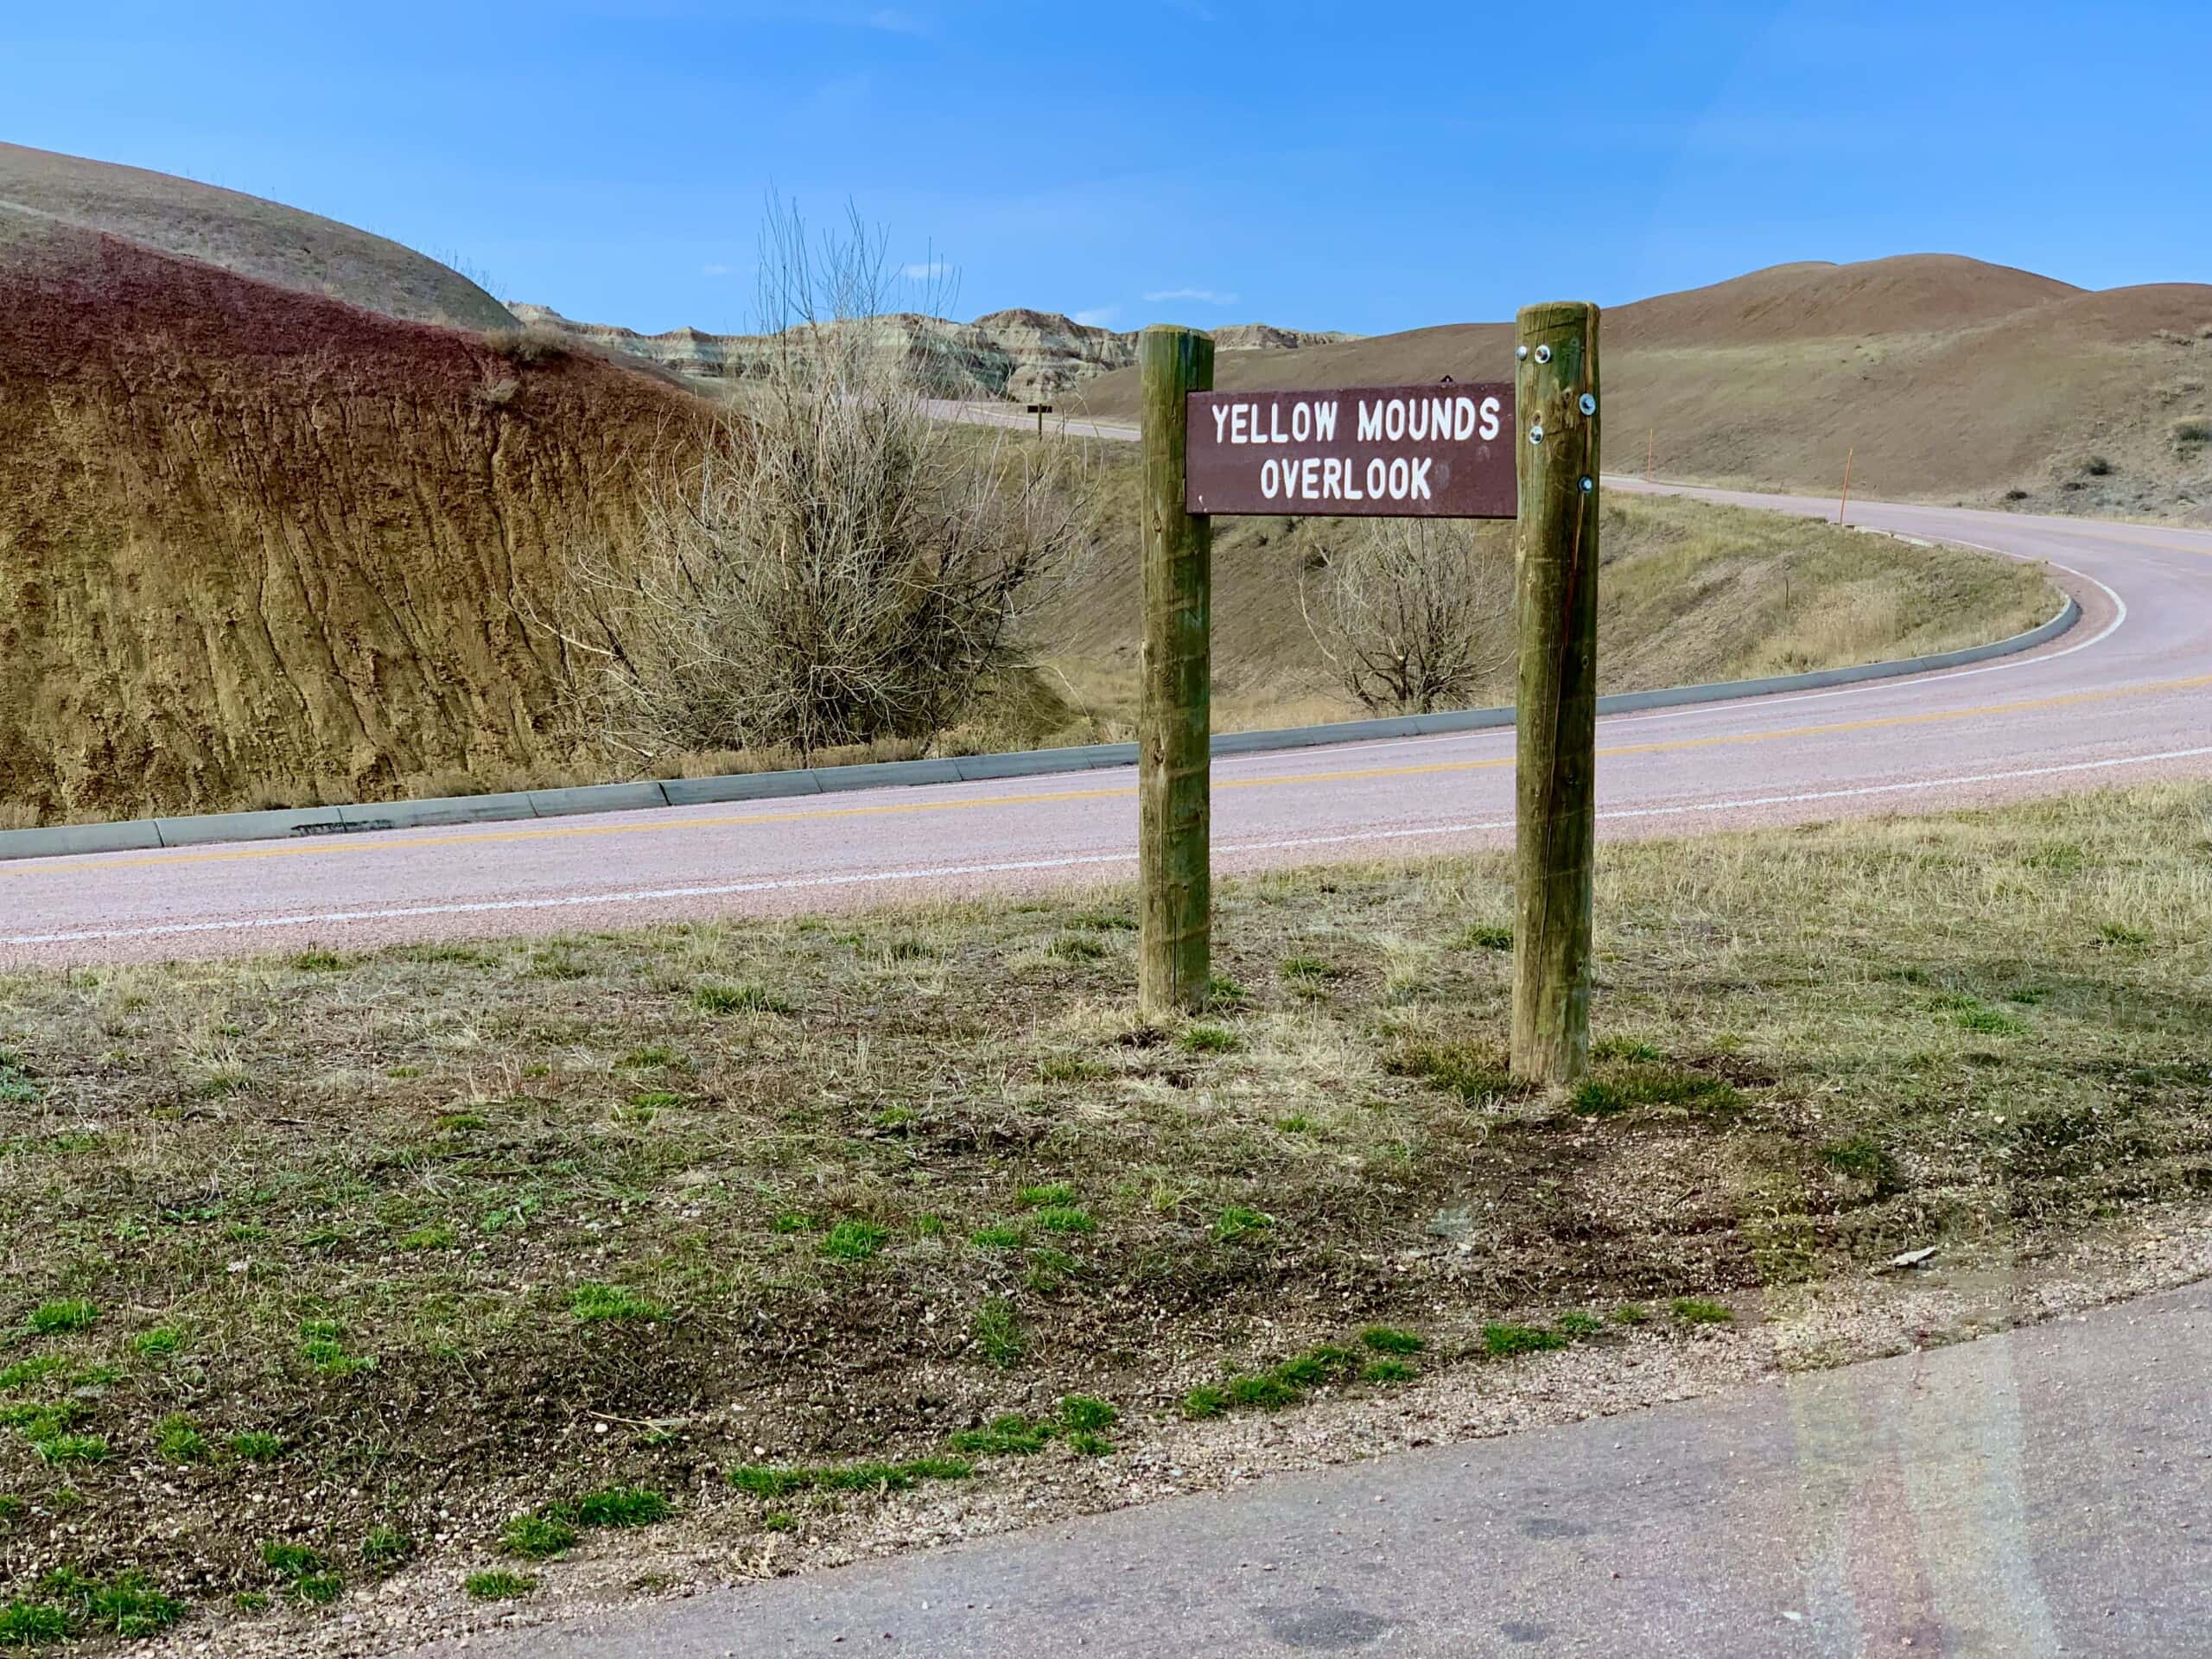
Overview of Badlands National Park
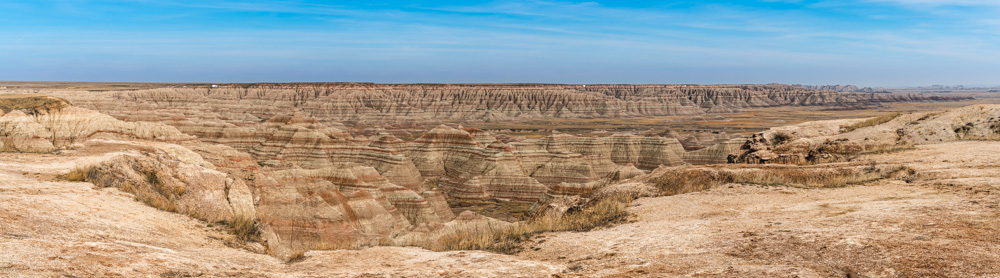
Located in southwestern South Dakota, Badlands National Park spans over 244,000 acres of breathtaking landscapes. The park is known for its rugged terrain, colorful rock formations, and diverse wildlife. It was established as a national park in 1978 and has since become a popular destination for outdoor enthusiasts, photographers, and nature lovers.

History of Badlands National Park
Before European settlers arrived on the Dakota prairies, this area’s Native American culture recognized the importance of this geological structure. The Lakota people called it “Mako Sica,” which means “land bad,” the Badlands’ rugged terrain and unforgiving weather were considered unfit for human habitation. Nevertheless, many Native American tribes, including the Sioux, have lived in and around this mystical land for thousands of years.
Later, when French fur traders encountered the area, they called it “les mauvaises terres à traverse, ” which translates to “bad lands to cross.” During the 1800s, European settlers began moving west for new opportunities. To the pioneers, the Badlands was an insurmountable barrier on their journey. The harsh weather and rough terrain made it impossible to settle or navigate.
Theodore Roosevelt, the 26th President of the United States, was a passionate conservationist and visited Badlands National Park several times in his life. He was deeply moved by the rugged beauty of this land and worked towards preserving it for future generations.
In 1978, Badlands National Monument became Badlands National Park under President Jimmy Carter’s administration. Since then, it has become a haven for outdoor enthusiasts and photographers alike. The park’s creation was a joint effort between the National Park Service, the South Dakota State Historical Society, and the Oglala Sioux Tribe. The park’s territory includes the largest undisturbed mixed grass prairie in the United States.
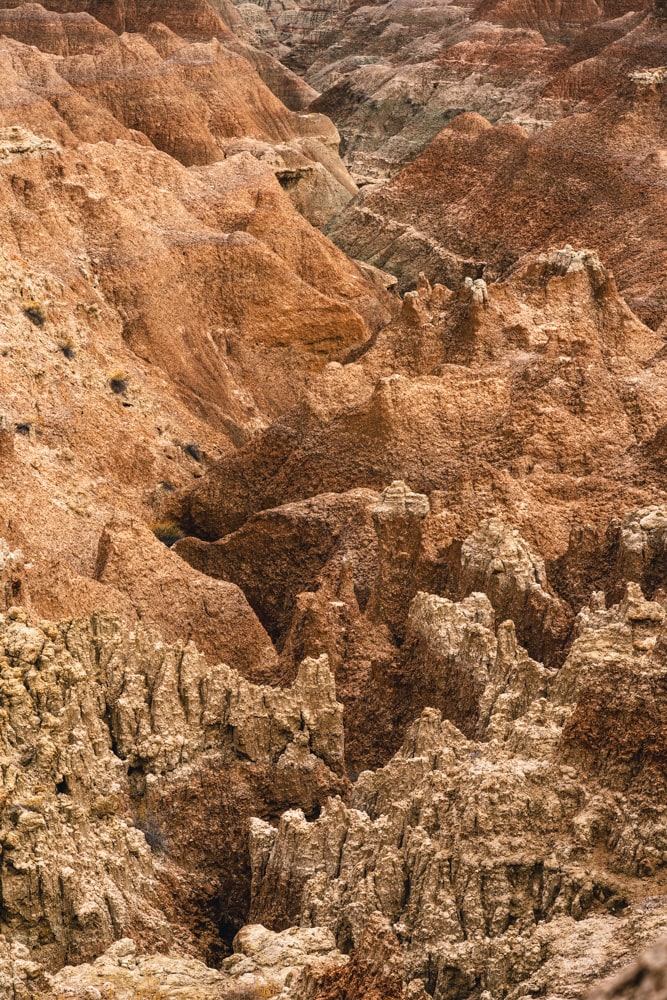
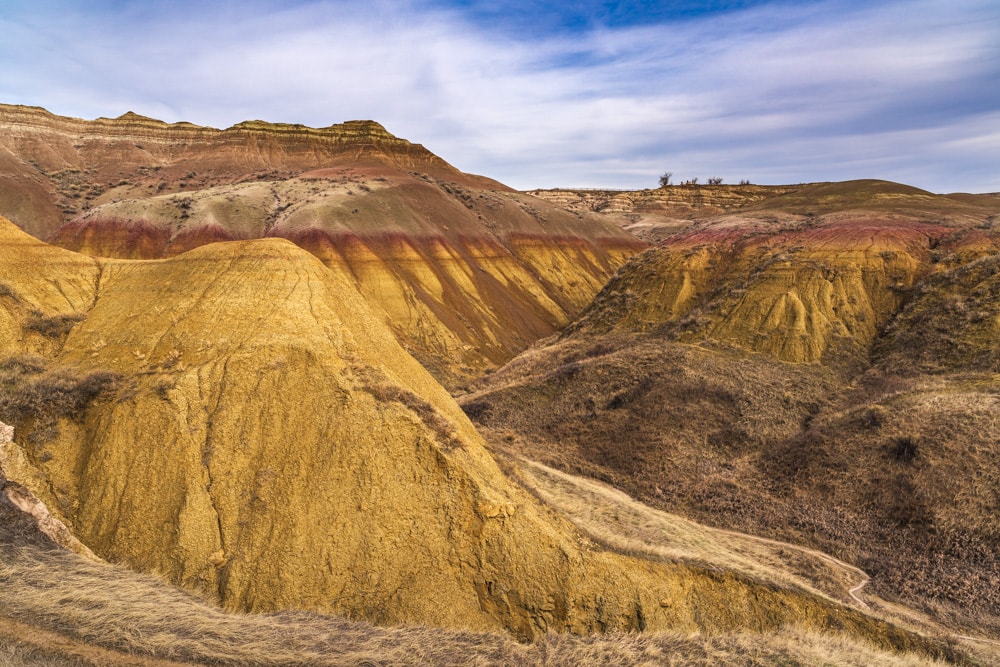
The Unique Geology of Badlands National Park
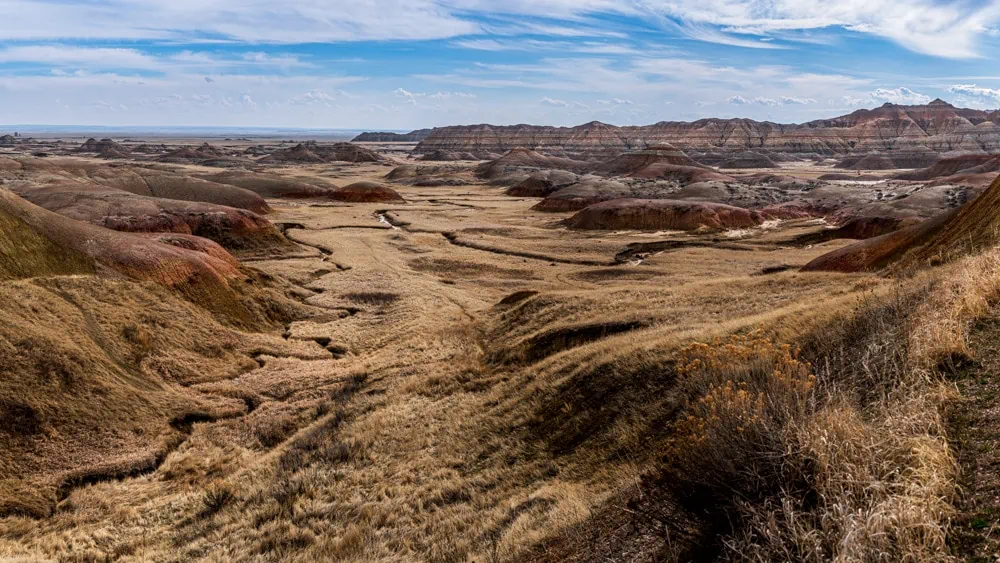
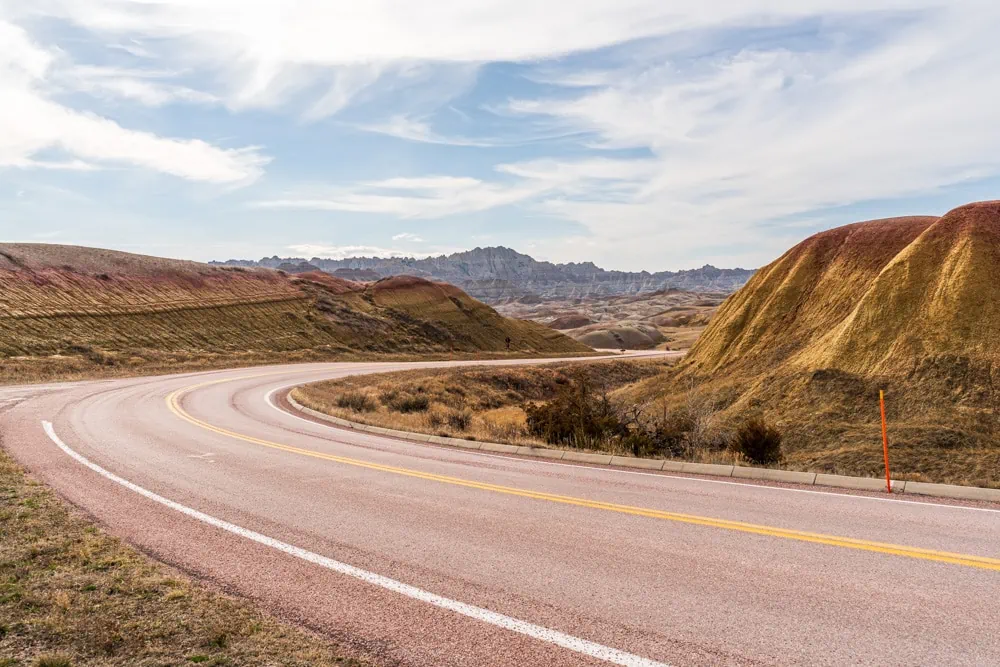
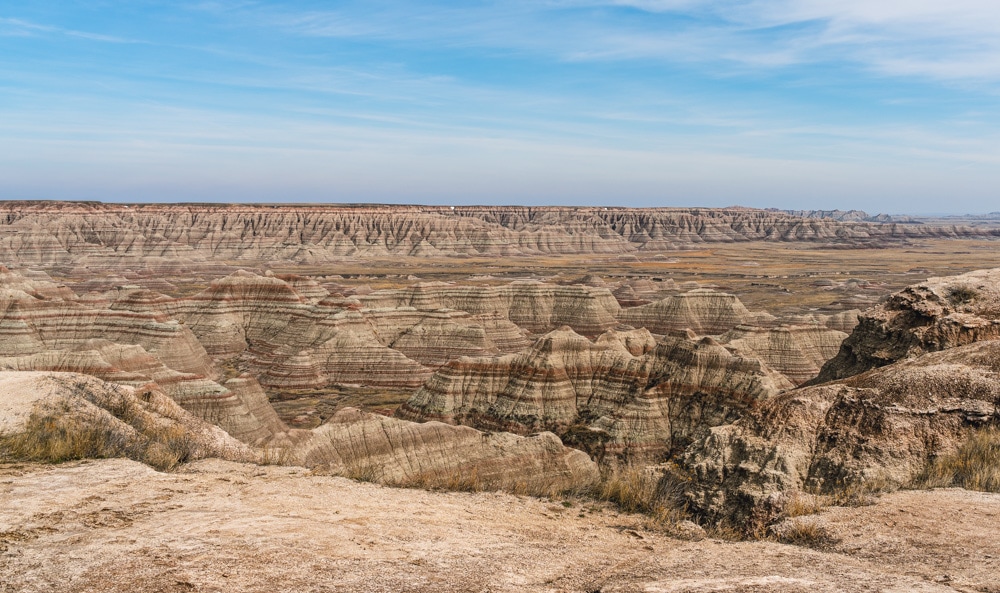
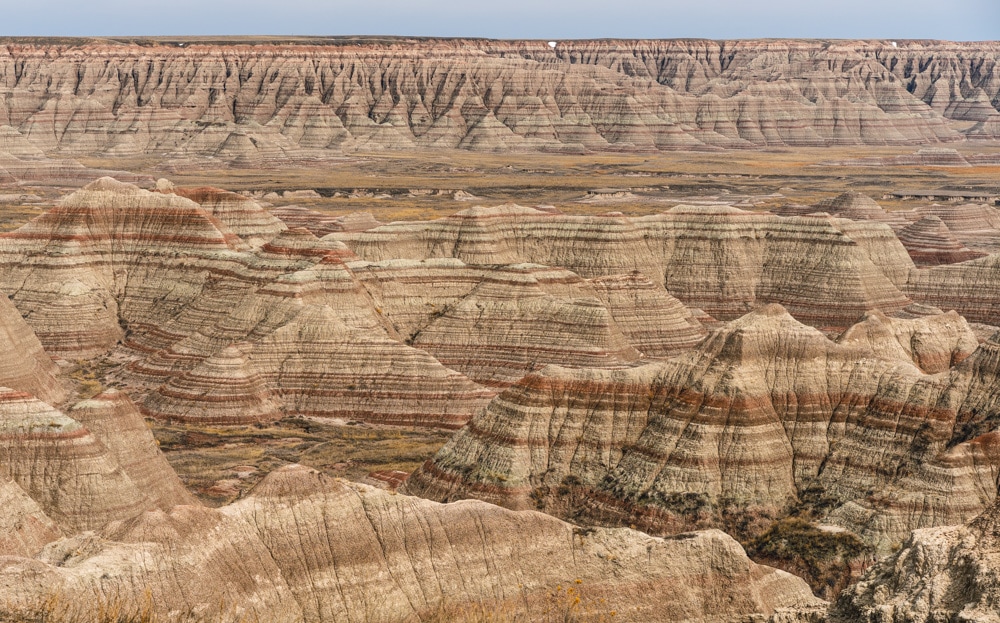
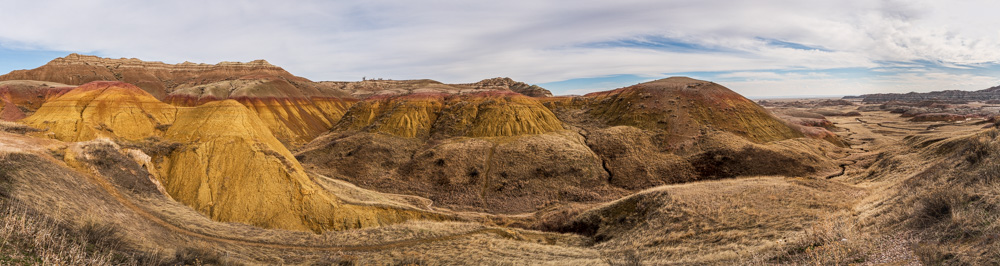
The fascinating geology of Badlands National Park left me in awe. The park’s unique landscape tells a story of millions of years of erosion, deposition, and transformation of sediments and rocks. The makeup of the bands of stone in the cliffs is remarkable and truly one-of-a-kind. The colors of the Badlands’ sedimentary rock formations change throughout the day with the light. The canyon faces, ranging from rich browns and yellows to bright red, have a surreal appearance found in few places on Earth.
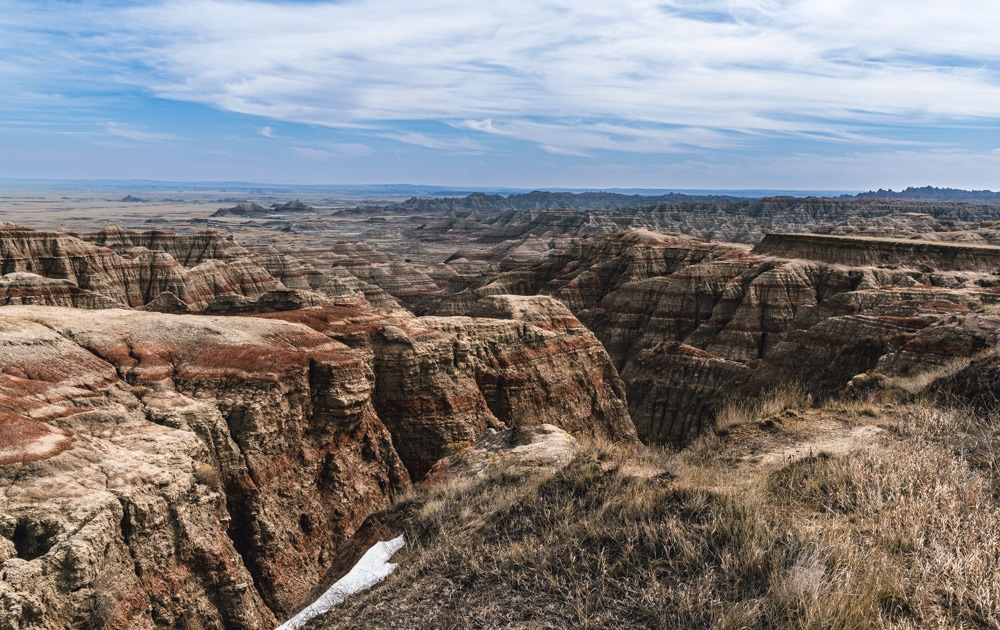
The Badlands has numerous geological formations such as canyons, ravines, gullies, and hoodoos. My favorites were the Hoodoos because it’s fun to say.

Hoodoos are tall and thin spires of rock that rise from the bottom of the arid drainage basins. Wind and water erosion forms These stunning geological features over time, creating unique shapes and patterns.
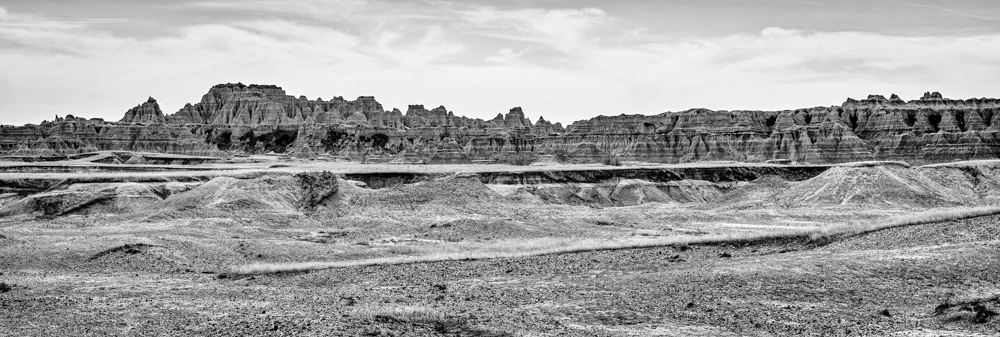
Badlands National Park boasts towering cliff walls that rise up to 250 feet, creating a dramatic and awe-inspiring landscape. These rocks offer a tangible connection to the park’s geological history, with colorful striations in layered sedimentary formations.

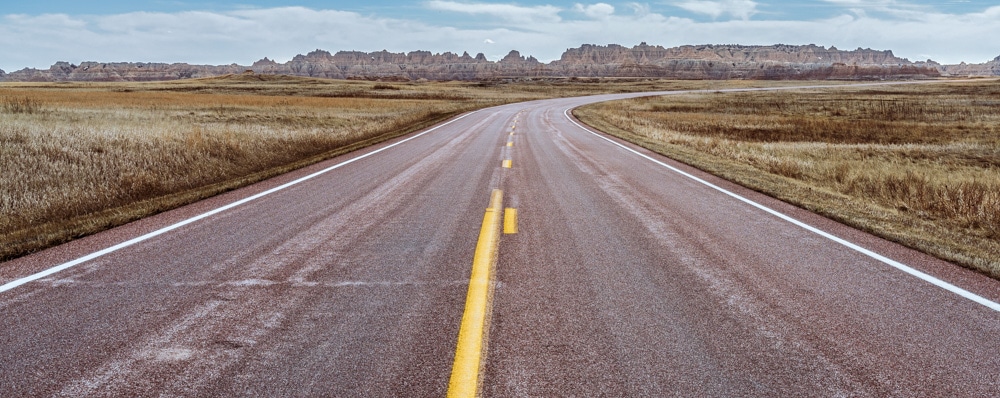
The road winds through cliffs and hoodoos, providing easy exploration of geological formations and breathtaking views.
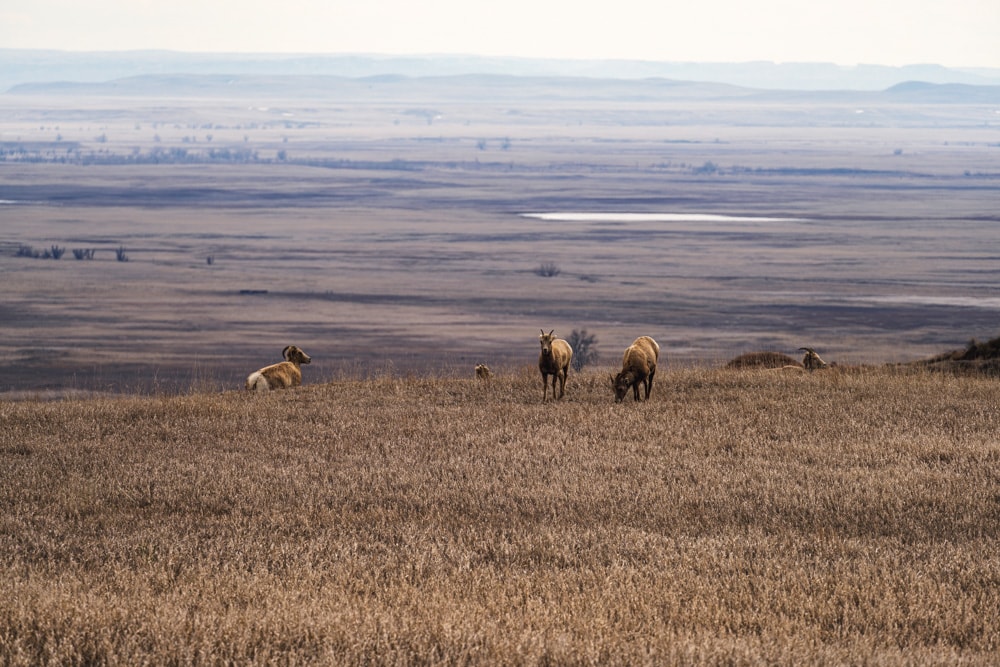
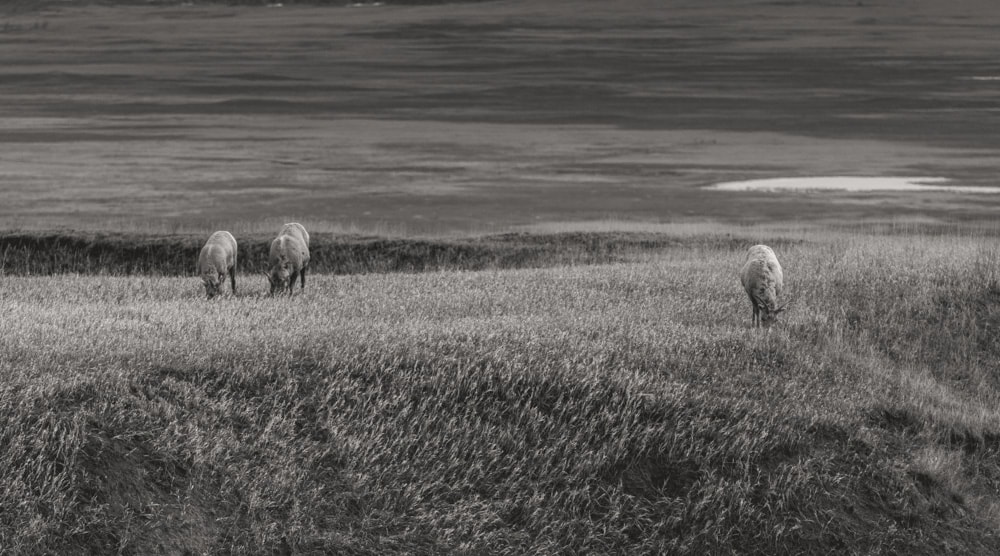
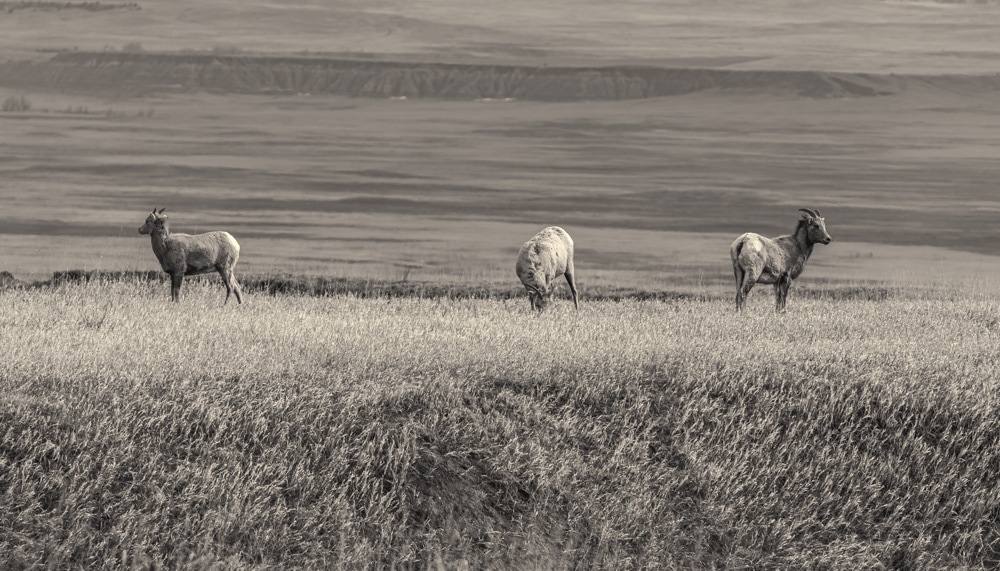
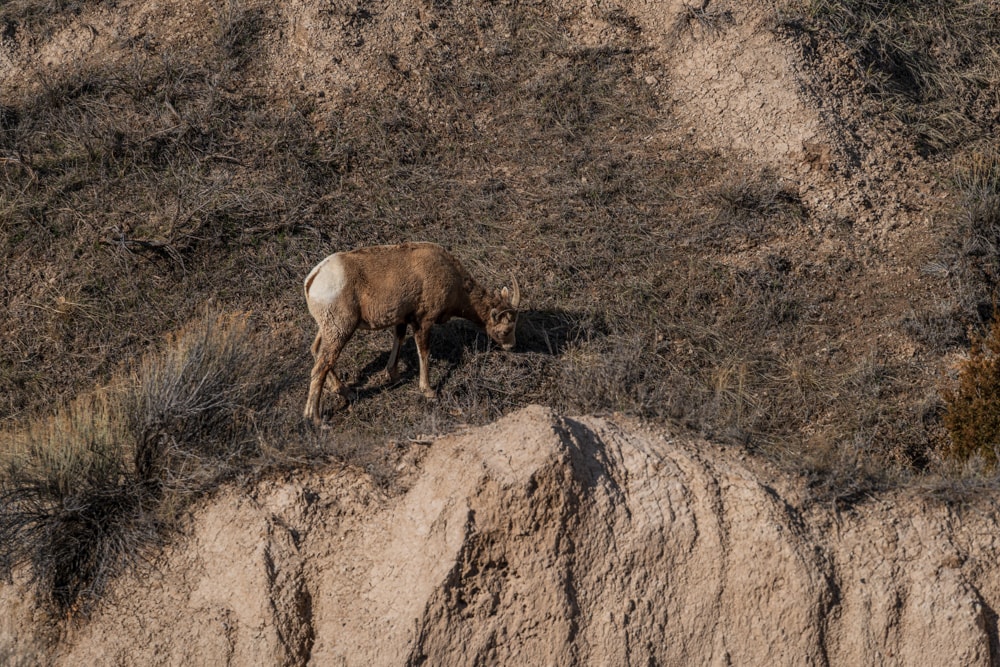
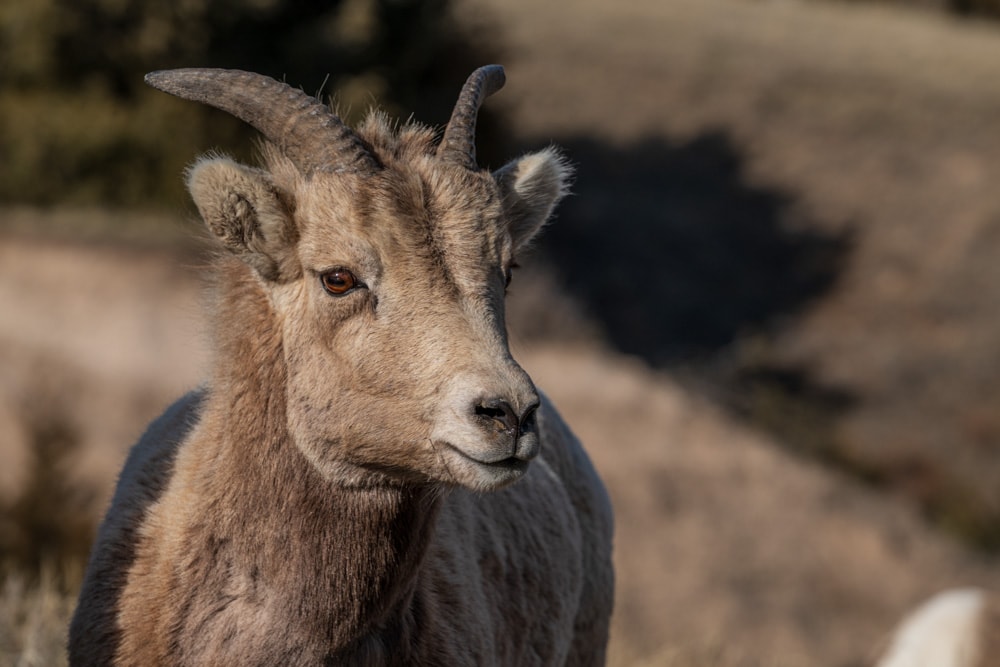
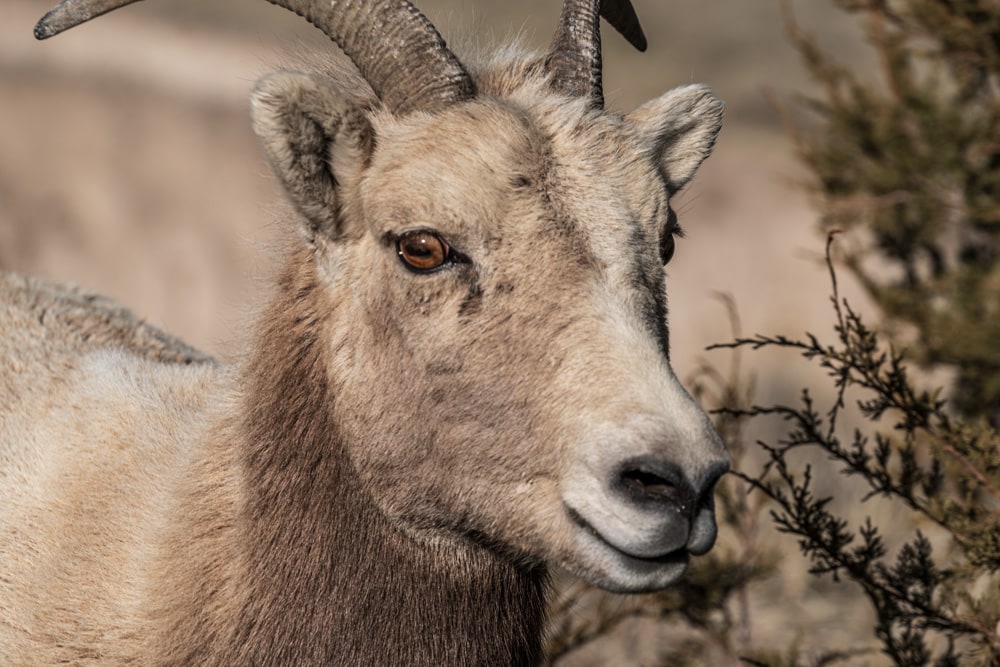
Bighorn Sheep
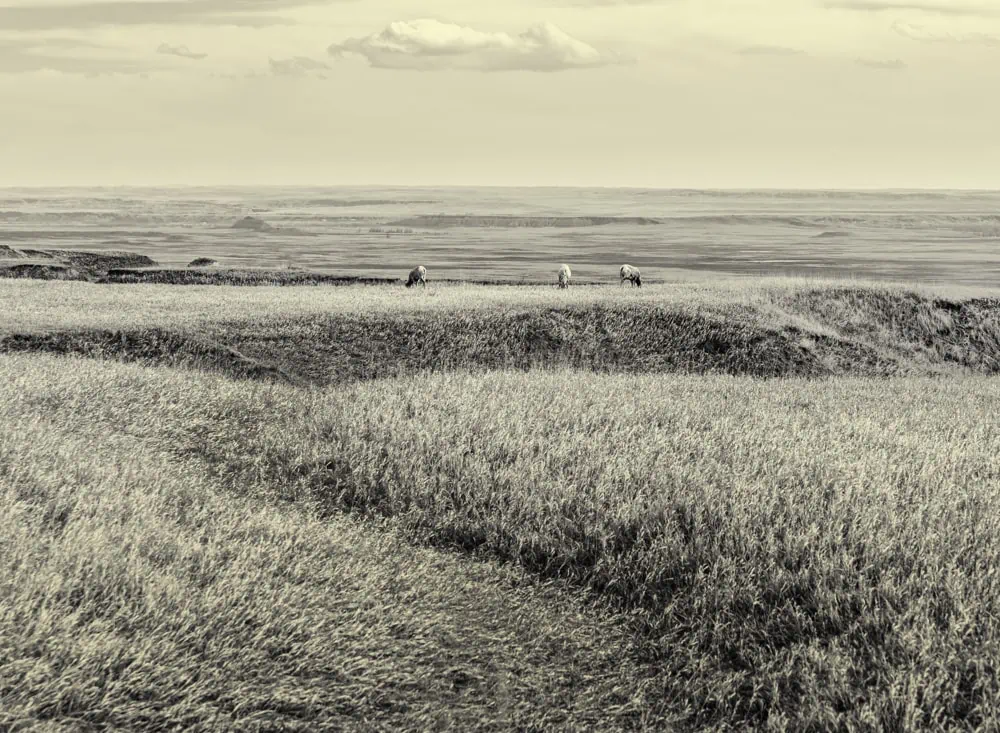
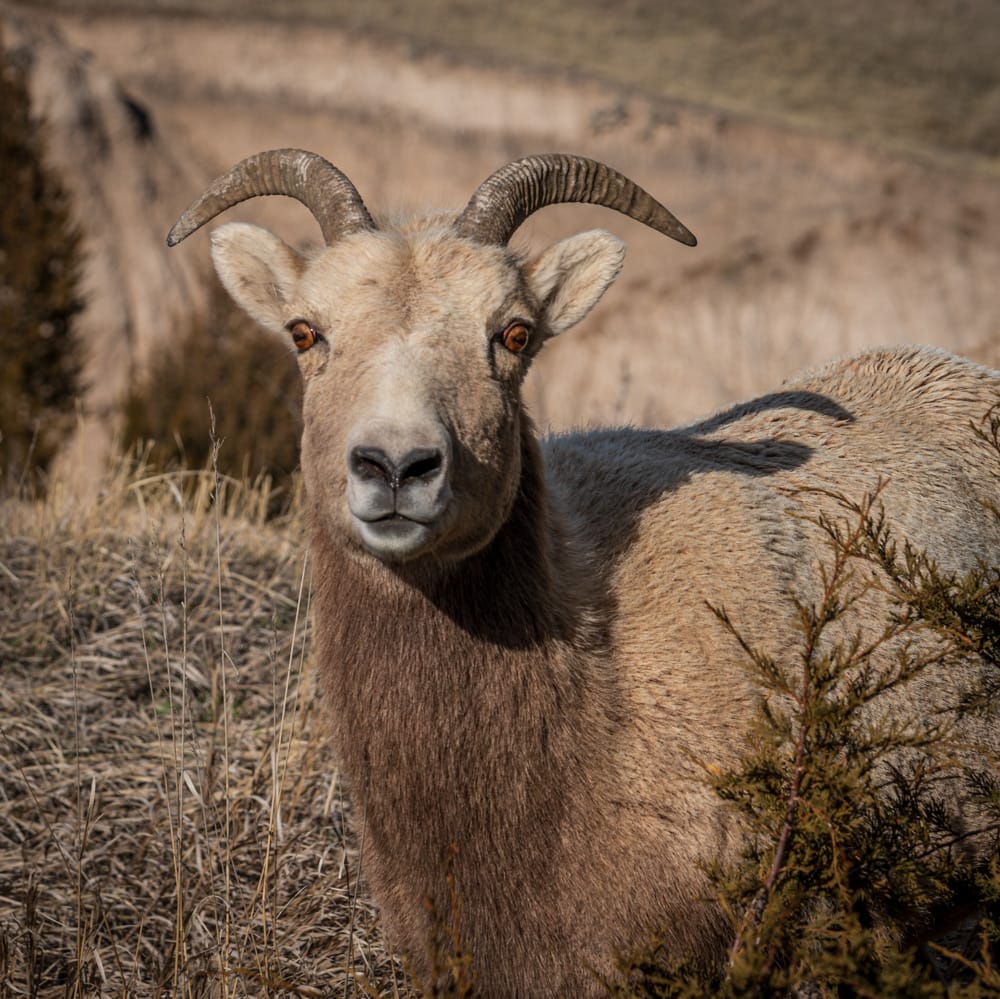
One of the most exciting things to see while visiting Badlands National Park is the Bighorn sheep that call it home. These magnificent creatures are named for their massive, curved horns that can weigh up to thirty pounds.
Bighorn sheep are typically found on the park’s rolling hills, grazing on hardy mountain grasses and brushing against the rocky slopes. The Bighorn sheep are a symbol of the park’s wilderness and a testament to the park’s conservation efforts.
Once threatened by diseases introduced through contact with domestic sheep, their numbers dwindled dangerously low. The park’s management team initiated restoration programs that helped their population recover. Making the sighting of these magnificent creatures a testament to successful conservation efforts.
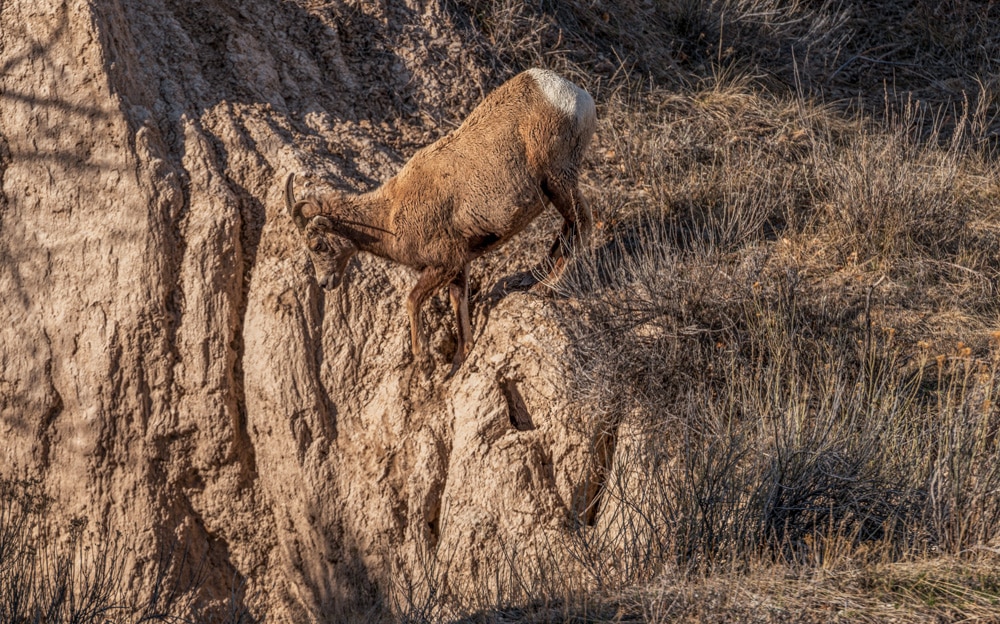
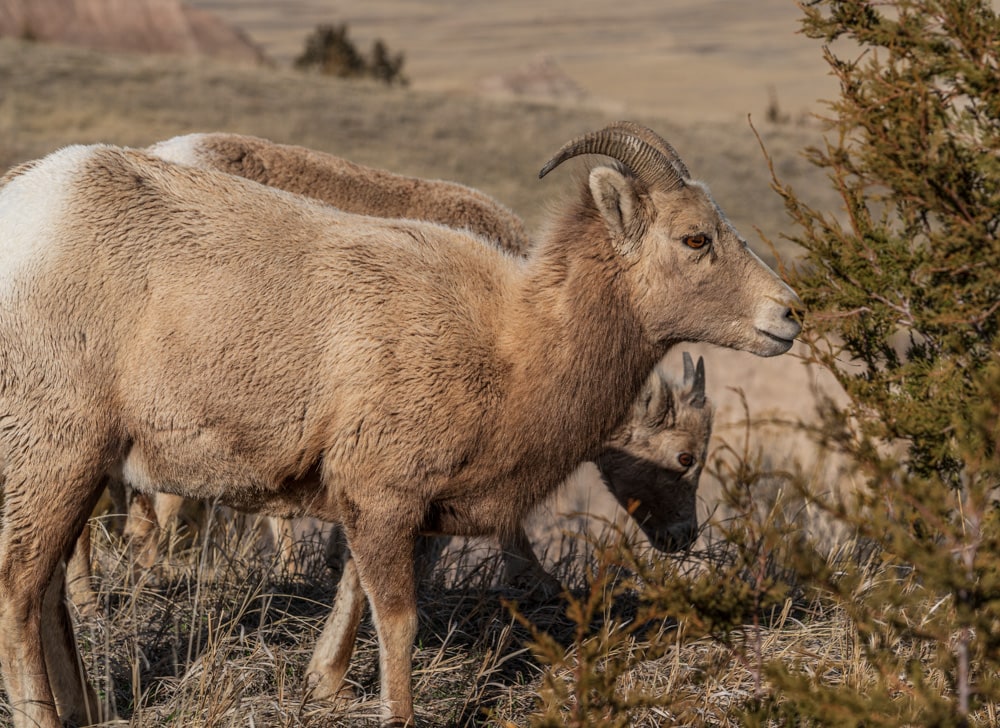
The Badlands National Park offers an ideal habitat for the Bighorn sheep. The park’s undulating topography and rocky slopes give the sheep excellent vantage points for detecting predators. The sparse vegetation offers a rich diet of grasses, sedges, and forbs that these animals prefer. The park’s semi-arid climate suits the Bighorn sheep’s rugged nature. They are built to withstand the park’s variable weather conditions, ranging from freezing winters to scorching summer heat.
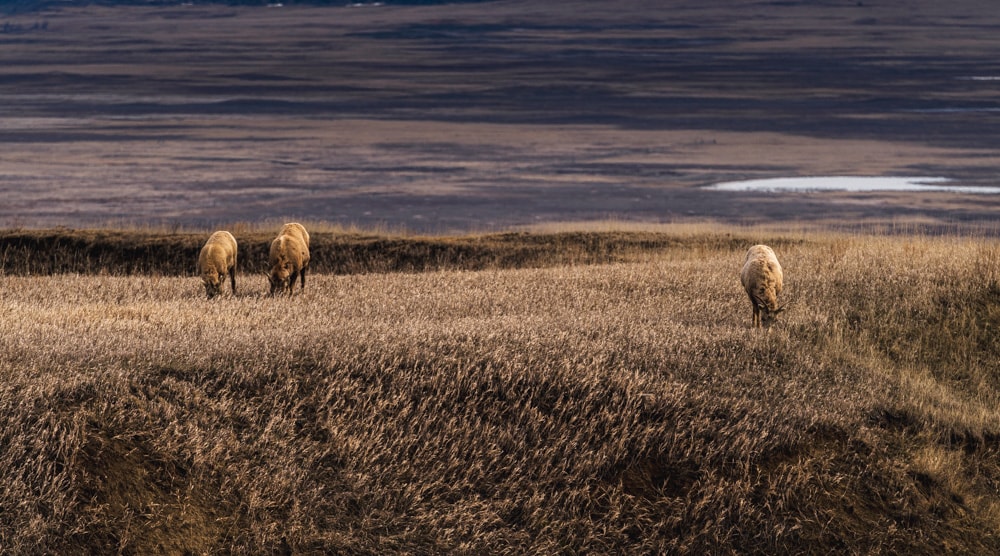
In the face of adverse conditions, these magnificent creatures have adapted to their harsh environment, turning the “badlands” into a thriving ecosystem. Whether navigating cliffs or grazing in the valleys, the Bighorn is a quintessential part of the landscape and continues to enchant visitors.
Keep your eyes peeled while driving through the park, and you may spot a herd or two.
Image Gallary of Badlands National Park


More Information on Badlands National Park
For more information on planning your visit to Badlands National Park, including maps, camping sites, and fees, check out the official website of the National Park Service.
For information on the Geology of The Badlands – See Geologic Formations: How Badlands Buttes Came to Be
Conclusion
If you’re like me and are a photographer looking to capture the beauty of the United States, then a stop at Badlands National Park must be on your list. And when you drive the winding road through the park, wonder what the native people must have thought of this unique place.
In conclusion, you must make time to detour off the main road and visit Badlands National Park to create memories that will last a lifetime.
Where is Badlands National Park
The park is located in South Dakota, just south of the town of Wall (the home of the infamous “Wall Drugs” sign. Follow highway 240 south from I-90 to reach the eastern park entrance.
The post Badlands National Park – Exploring Its Unparalleled Beauty appeared first on Croasdill Photography.
]]>The post Exploring the Abandoned Lonaconing Silk Mill: Our Manufacturing Heritage appeared first on Croasdill Photography.
]]>What is the Lonaconing Silk Mill
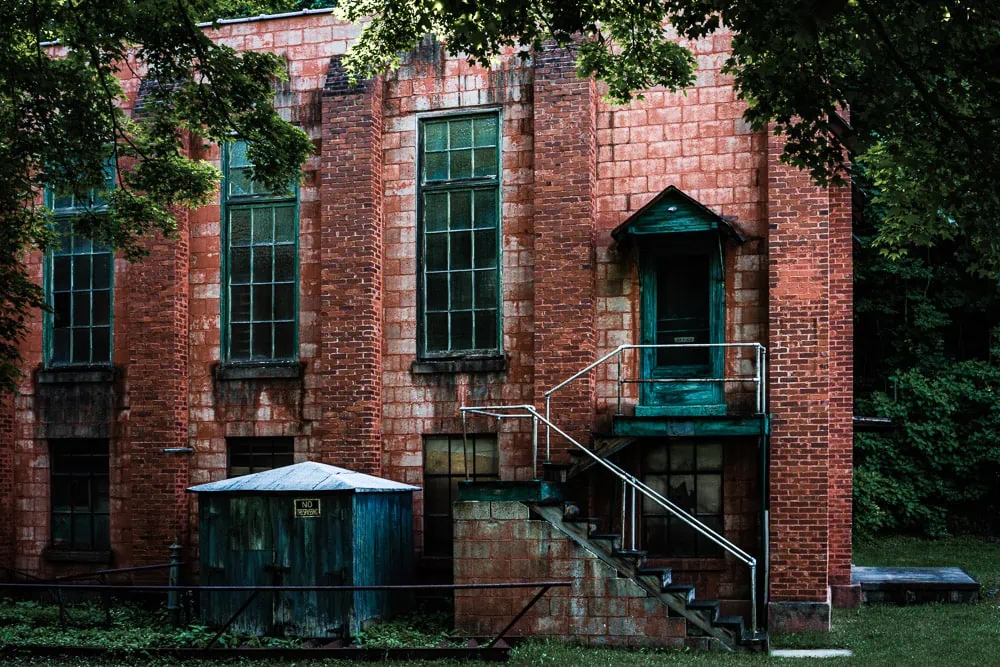
The Lonaconing Silk Mill, located in Allegany County, in western Maryland, was founded in 1907 by the Klotz Throwing Company. During the early 20th century, silk production was a booming industry in America, and the Lonaconing Silk Mill was among the largest silk manufacturers in the United States.
Though the mill was always productive, textile manufacturing was always on the edge of viability in the US. The mill had to cease operations in 1929 during the Depression and then again during World War II due to the lack of raw silk from Asia. But before closing in 1945, the mill produced many of the parachutes used by the US armed forces during that war.
In the end, the mill was forced to shut down on July 7, 1957, following a strike by the labor union. The company couldn’t meet the workers’ demands, which resulted in the mill’s closure. As a result, the workers left, and the mill’s doors were permanently closed that day. Inside the walls, time essentially stopped and preserved a time capsule of early 20th-century manufacturing.

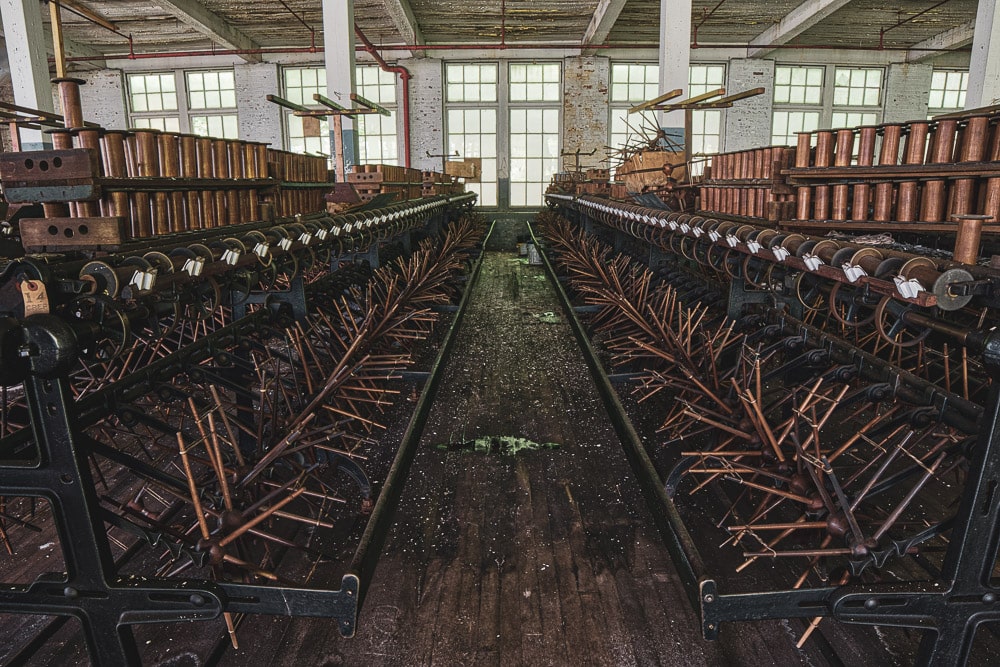
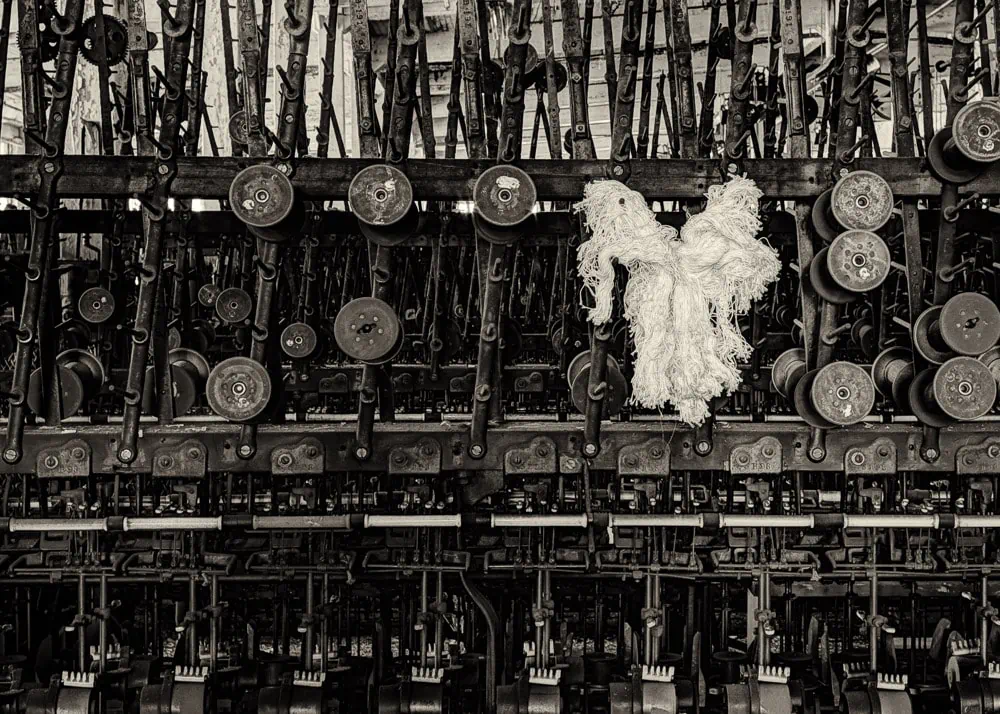
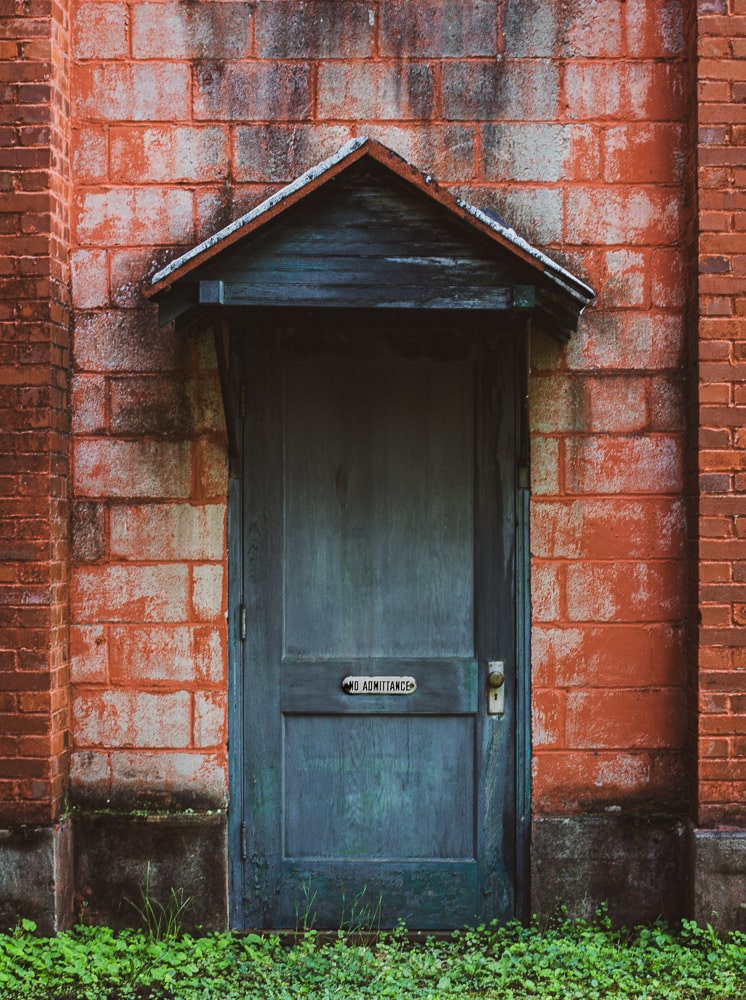
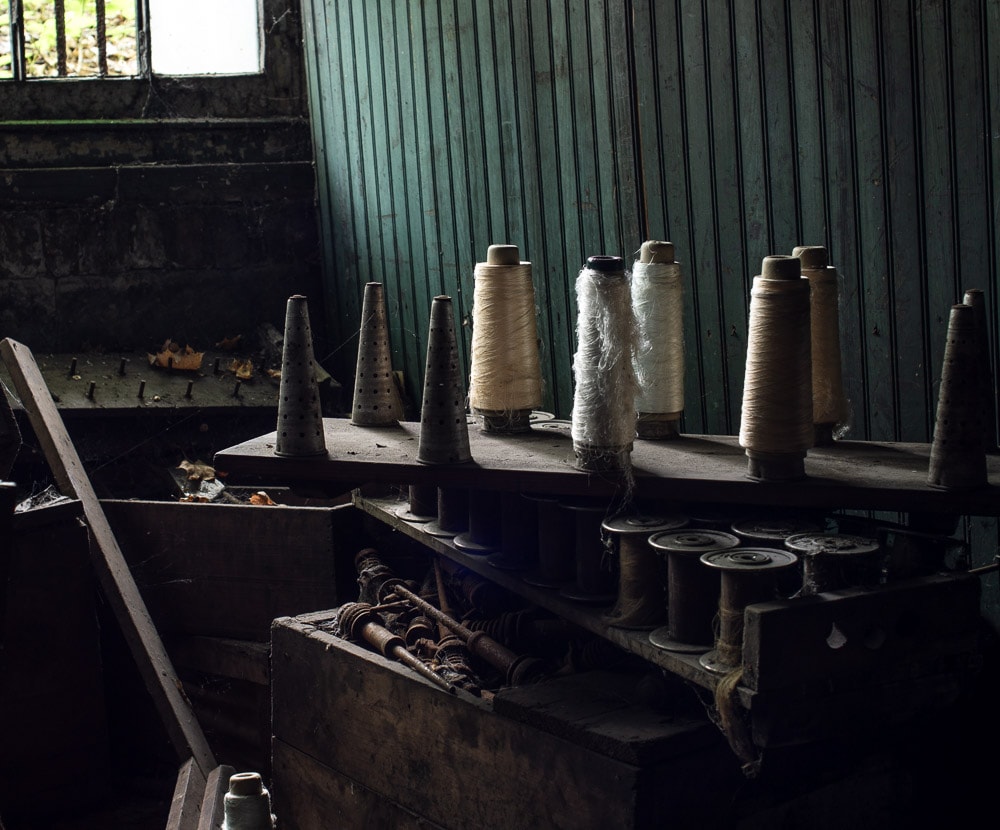
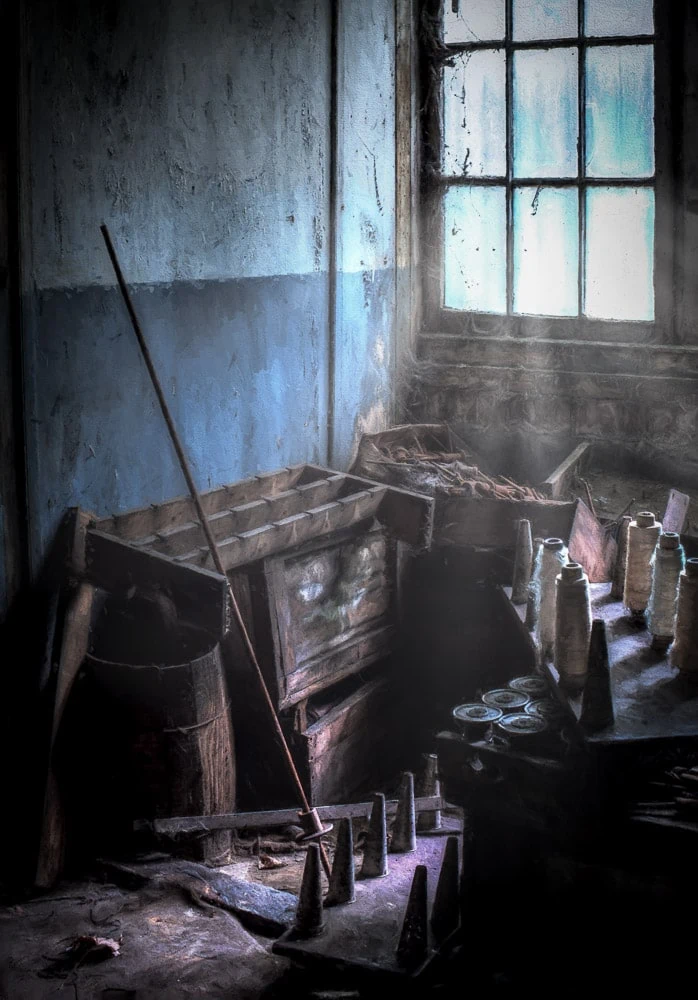
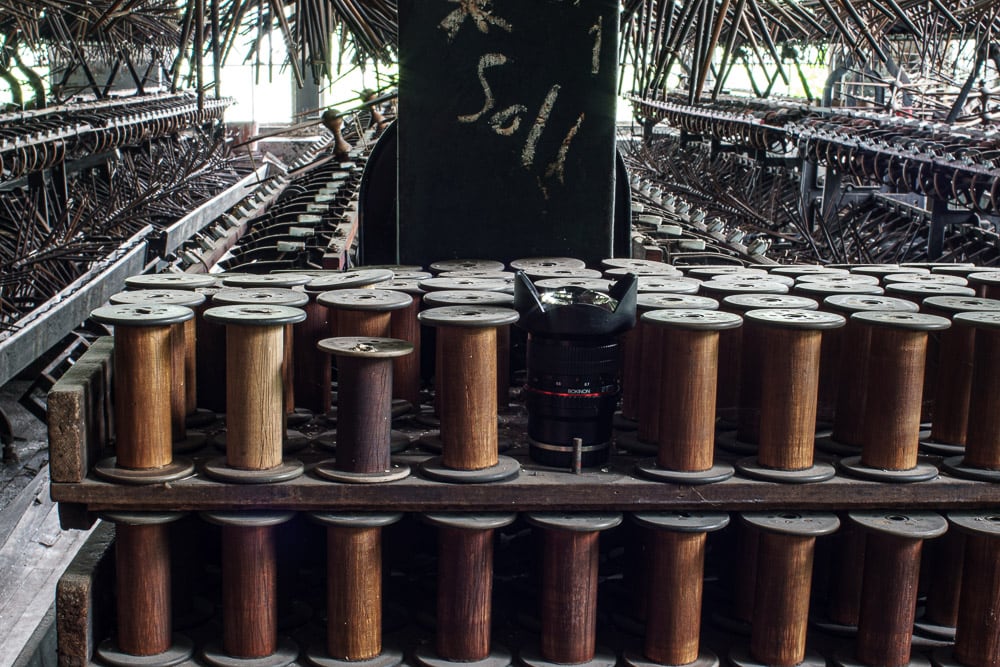
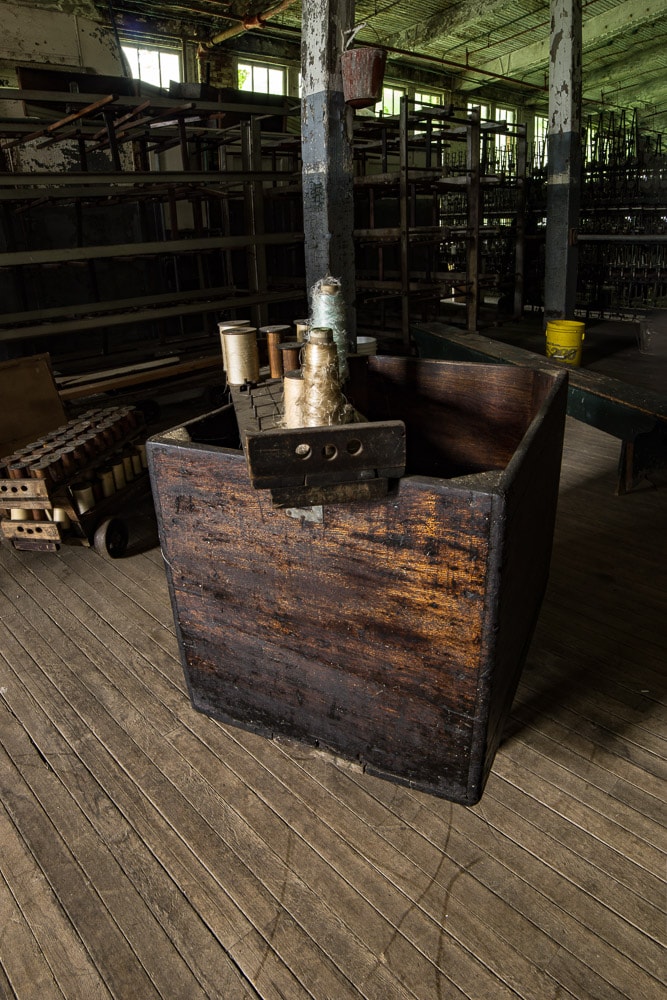
The silk mill that once symbolized America’s manufacturing heritage is now a haunting reminder of the past. The massive building spans over 48,000 square feet and is still filled with machinery and tools, waiting for the workers who will never return. Unfortunately, the structure is now in disrepair, with peeling paint and dusty hallways.
Why Visit the Lonaconing Silk Mill
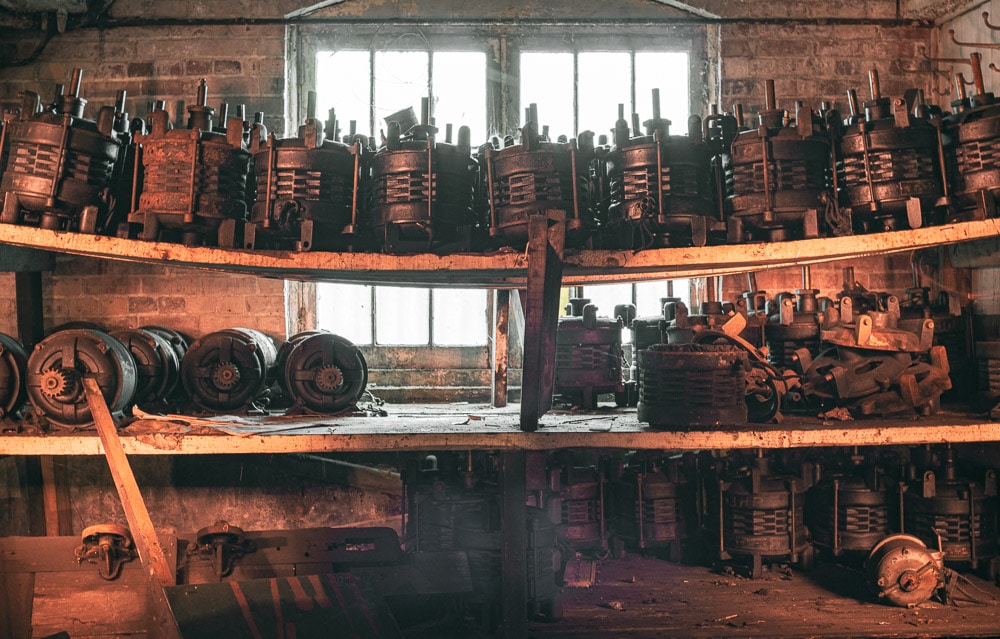
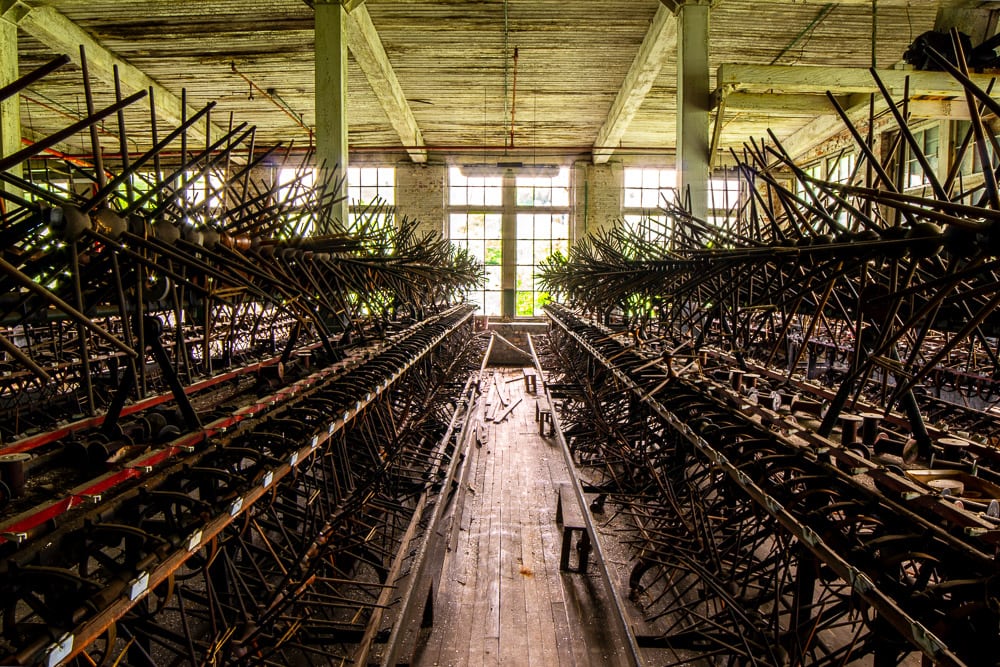
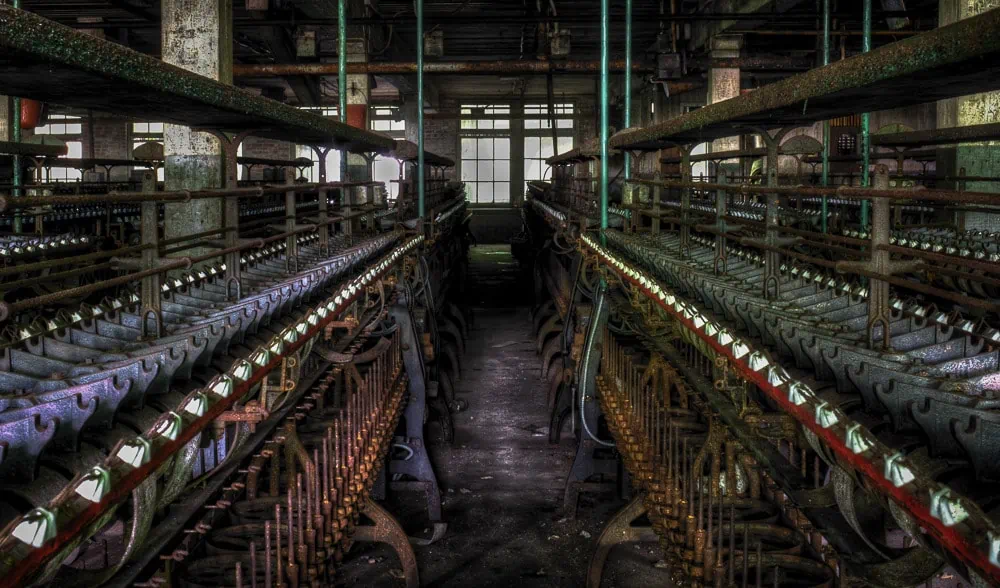
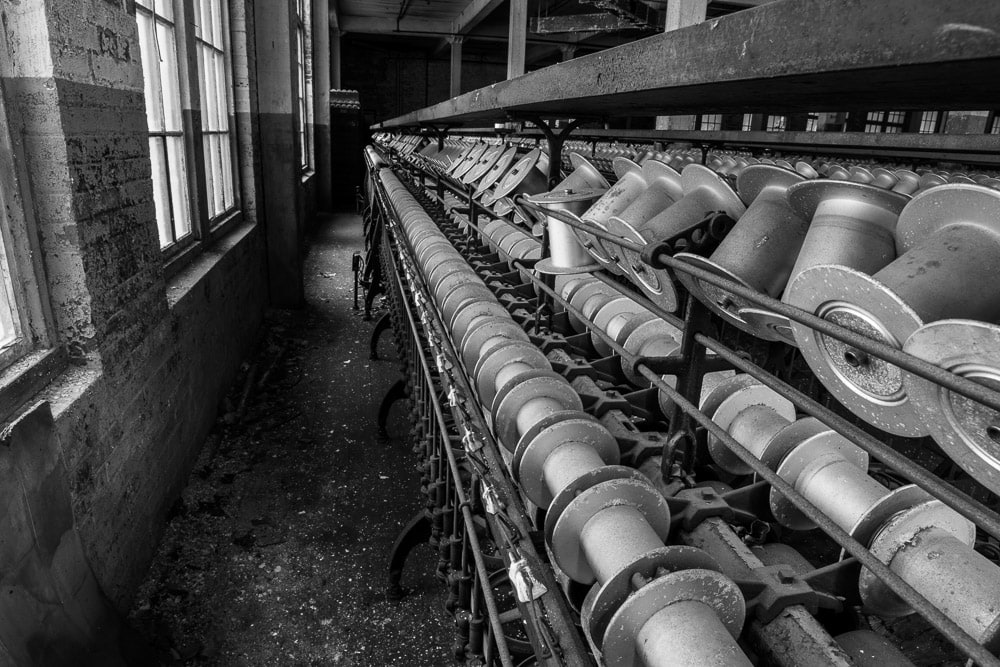
Despite its haunting appearance, it is a photographer’s paradise. The machinery is still intact, offering endless opportunities to capture the industrial beauty of a bygone era.
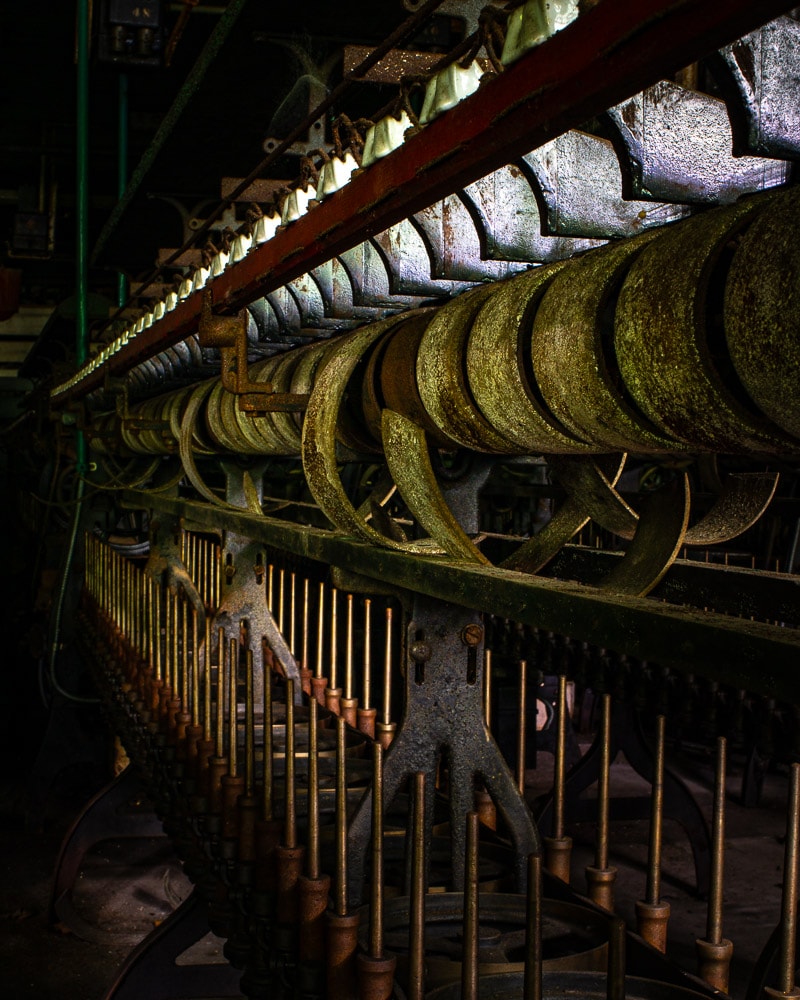
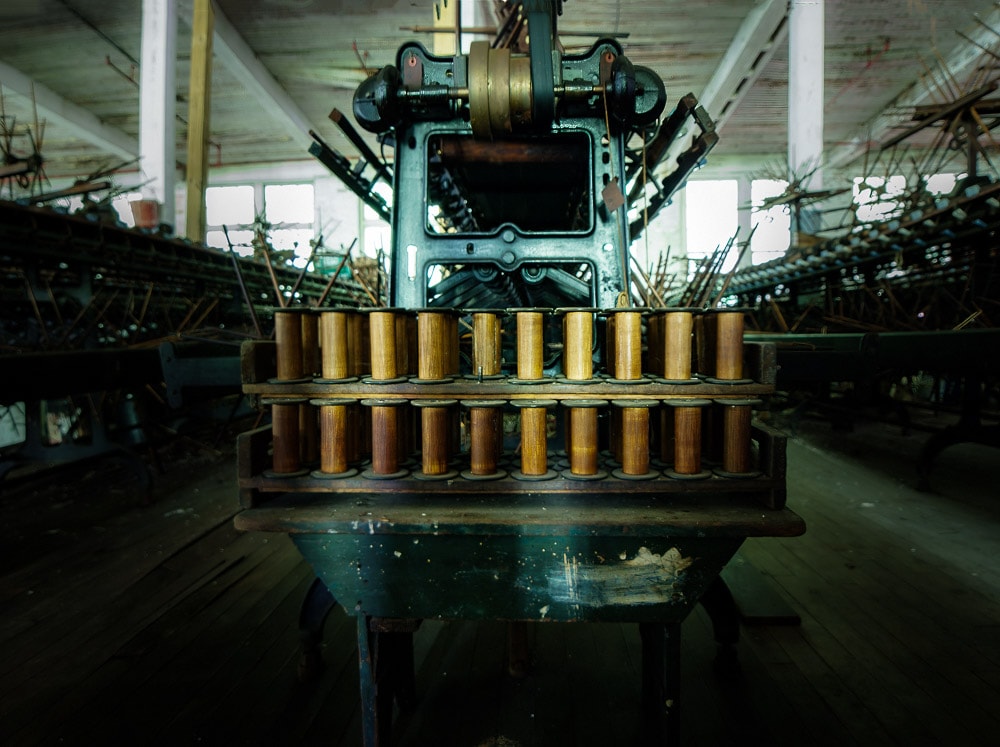
Visiting the abandoned Lonaconing Silk Mill will leave you in awe of the immense machinery that was once used for silk production. Although the machines are now deteriorating, they stand as a testament to the hard work and dedication of the mill workers.
Walking through the mill provides a glimpse of what life was like for workers in the early 20th century. The sizes of the machinery and the scale of work that was involved would have been mind-blowing. It is a story of hard work, dedication, and tools that once created the manufacturing boom in America’s industrial era.
The Caretaker
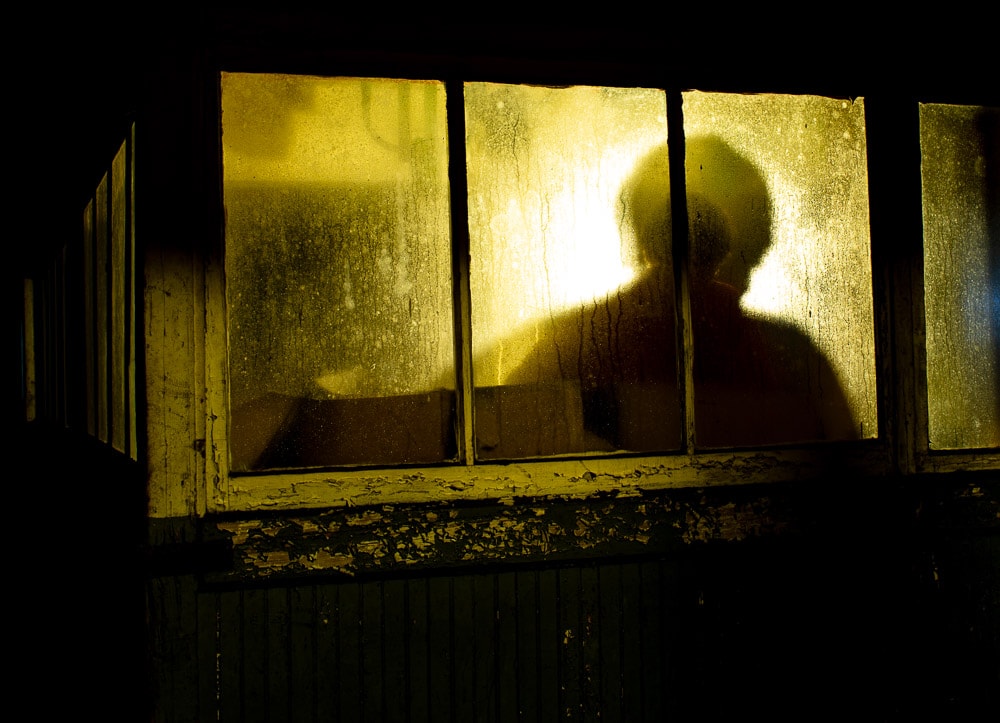
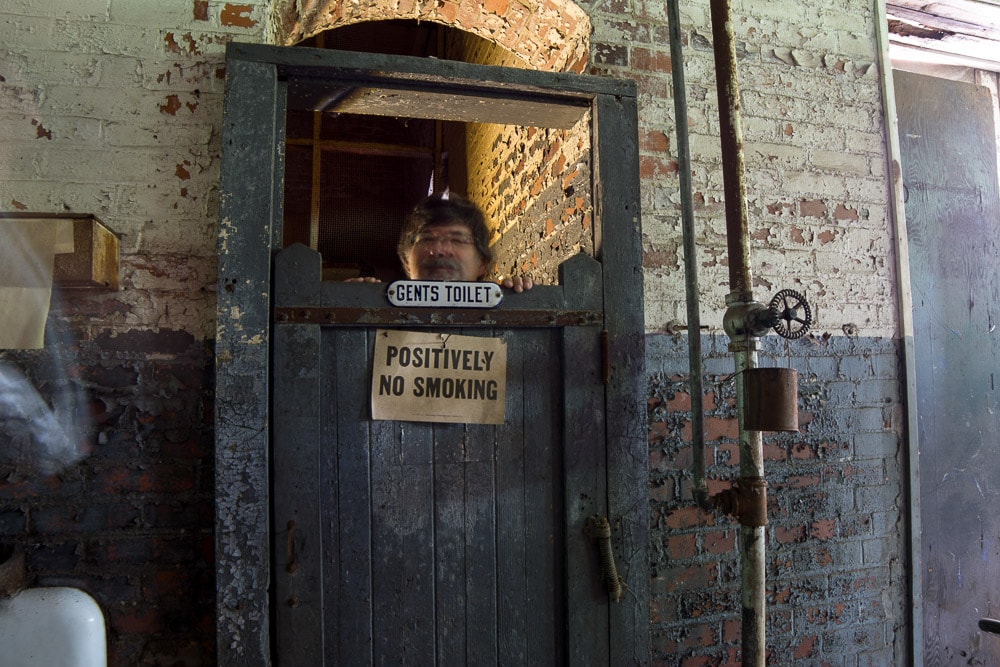
Herb Crawford, the then-caretaker, led us through the abandoned building during my visit. His passion for the place had kept it from falling into complete disrepair. Crawford provided a comprehensive explanation of the mill’s operation, the significance of the remaining equipment, and the daily routine of the mill workers.
The mill’s interior is amazing due to Herb’s tremendous labor of love. Despite some dust and crumbling paint, the facility has remained unchanged since the day the doors closed.
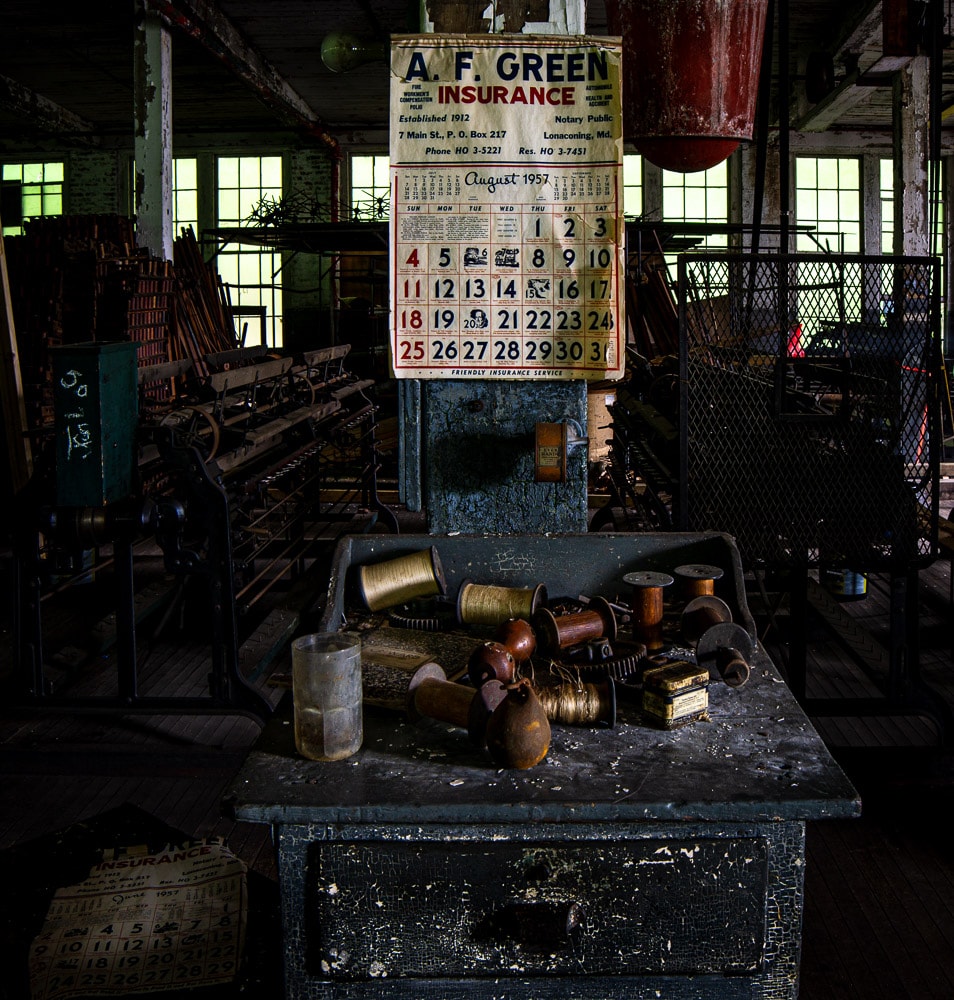
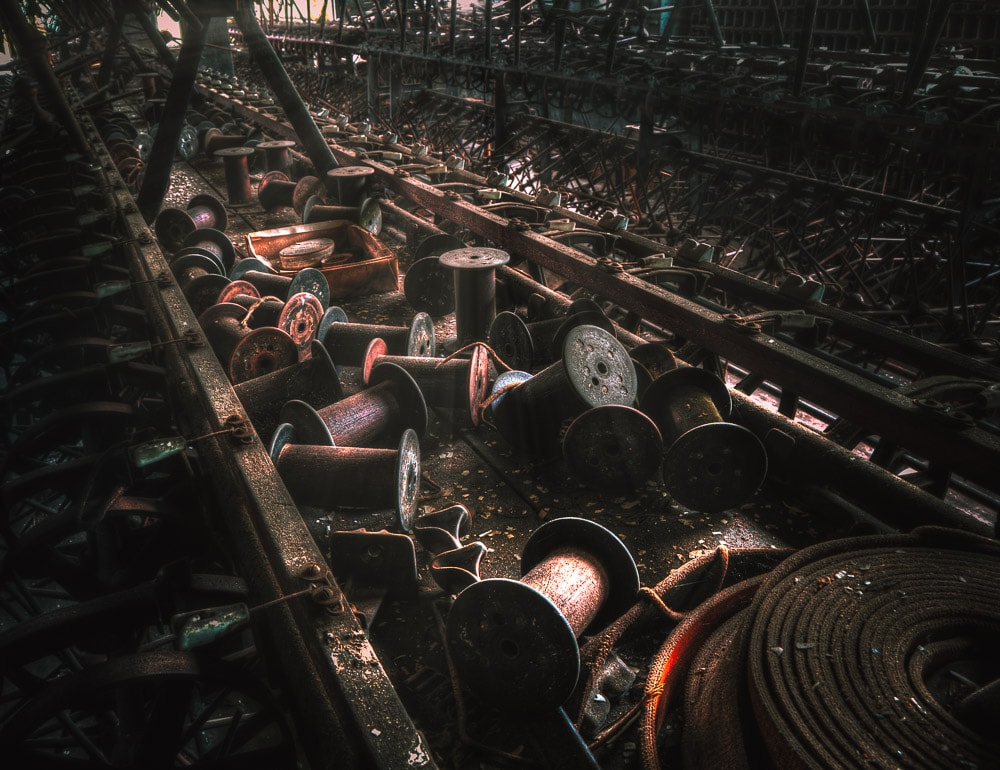
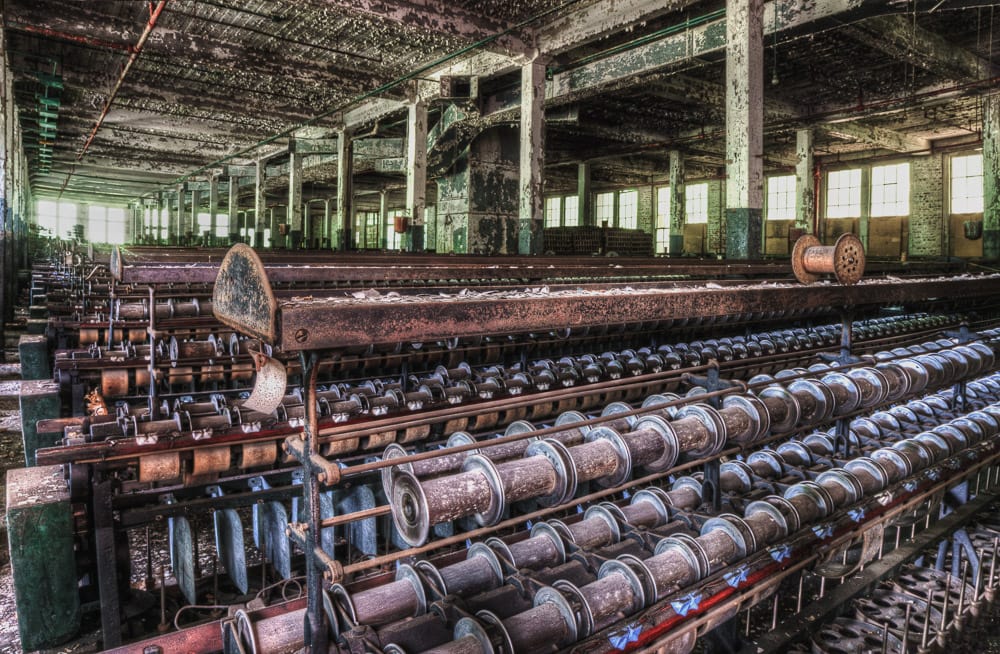
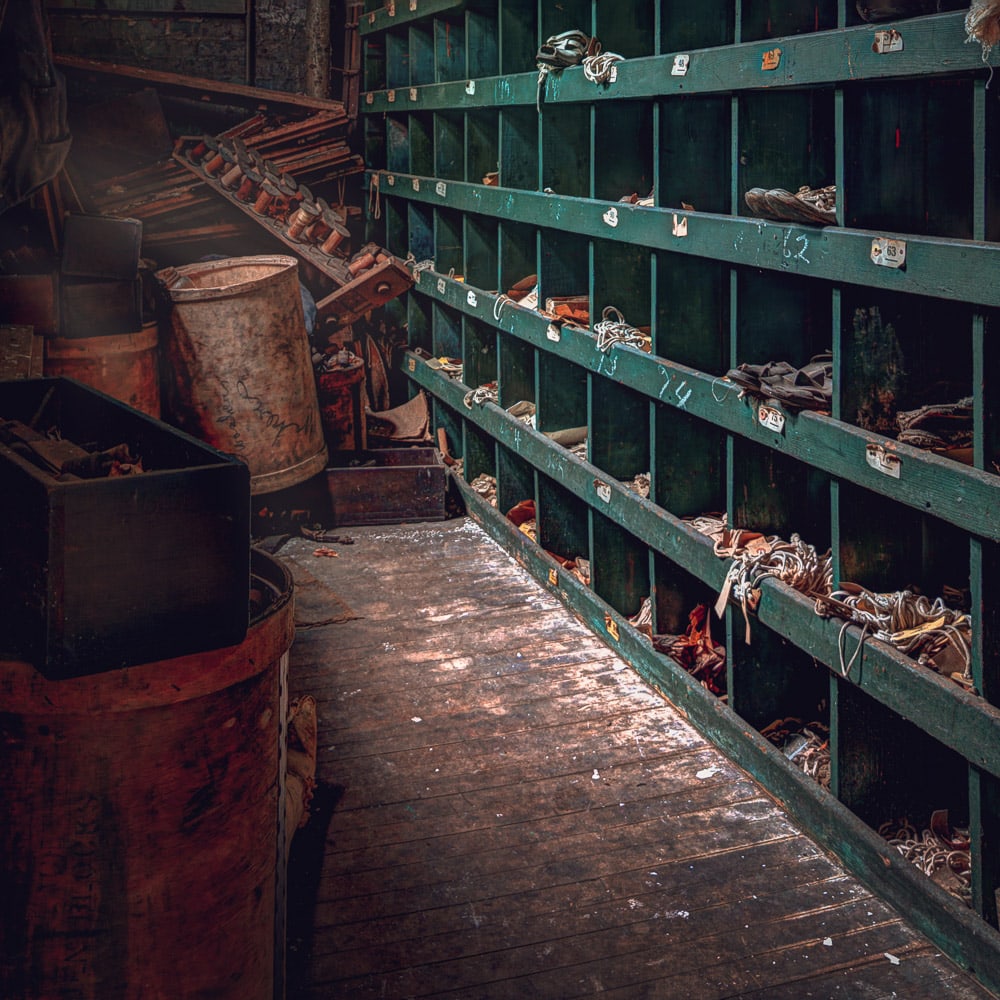
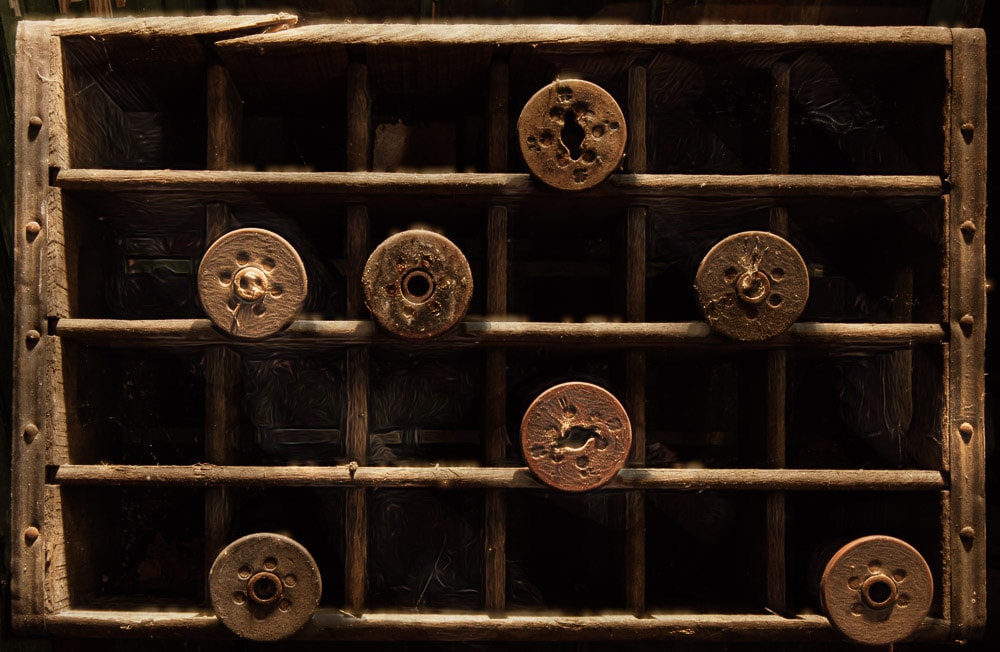
Herb has overseen the dozens of spinning machines turned off when the mill closed, and thousands of wooden spools remained stacked and ready for use. To preserve the mill, Herb has regularly guided paid tours through the facility, ensuring that the calendars hanging on the walls still show the date as July 1957.
The Mill’s Future
Herb passed away at the age of 84 in 2019. Sadly, his dream of restoring the Lonaconing Silk Mill was left unfinished. And, as of now, the building has been vacant longer than it was operational.
Nevertheless, in 2020, Lonaconing resident Brandon Sloan purchased the structures and land from Herb’s heirs. Brandon’s top priority is to preserve the mill. He aims to make it a place of historical pride for the local Lonaconing community, carrying on Herb’s legacy.
I’m uncertain if tours of the Lonaconing Silk Mill are currently available. Contact the mill through their Facebook or website’s Contact page for more information.
More on the Lonaconing Silk Mill
If you want to see more information about the Silk Mill, please check out these other stories.
- The Baltimore Sun – Spinning it forward: Renovation plans set for a former silk mill in Western Maryland
- The Explorographer – The Beginning of The End @ The Lonaconing Silk Mill
- Allegany Magazine – Save Our Silk
- The Klotz Company Store: Official website for Lonaconing Silk Mill events and items.
- The Silk Mill: Lonaconing Silk Mill’s Facebook page
Image Gallary


Conclusion
The Lonaconing Silk Mill stands today as a tribute to the rise and fall of America’s manufacturing heritage. The beauty of the mill is seen not only in the hauntingly beautiful industrial architecture and machinery but also in its ability to stir the imagination and inspire photographers to capture the essence of America’s industrial past. The mill also serves as a unique and important window into the economic and social history of the nation. A visit to this abandoned mill will inspire and remind us of the hard work and the determination of the generations before us who built America.
Where is the Lonaconing Silk Mill
The mill is located southwest of Cumberland, MD, in Lonaconing. The property is not publicly available and is monitored by cameras 24/7. If you want to visit this historic location, please get in touch with the folks at the Klotz Company Store through their Facebook or website’s Contact page for more information.
The post Exploring the Abandoned Lonaconing Silk Mill: Our Manufacturing Heritage appeared first on Croasdill Photography.
]]>The post Still Life Photography Gallery appeared first on Croasdill Photography.
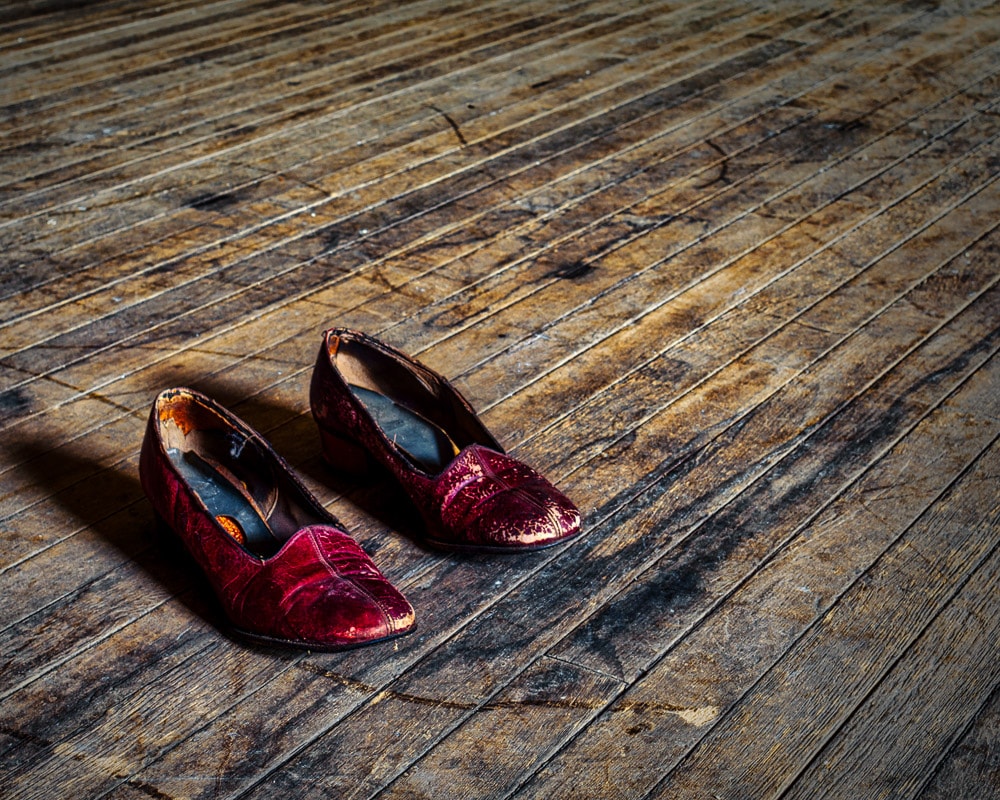
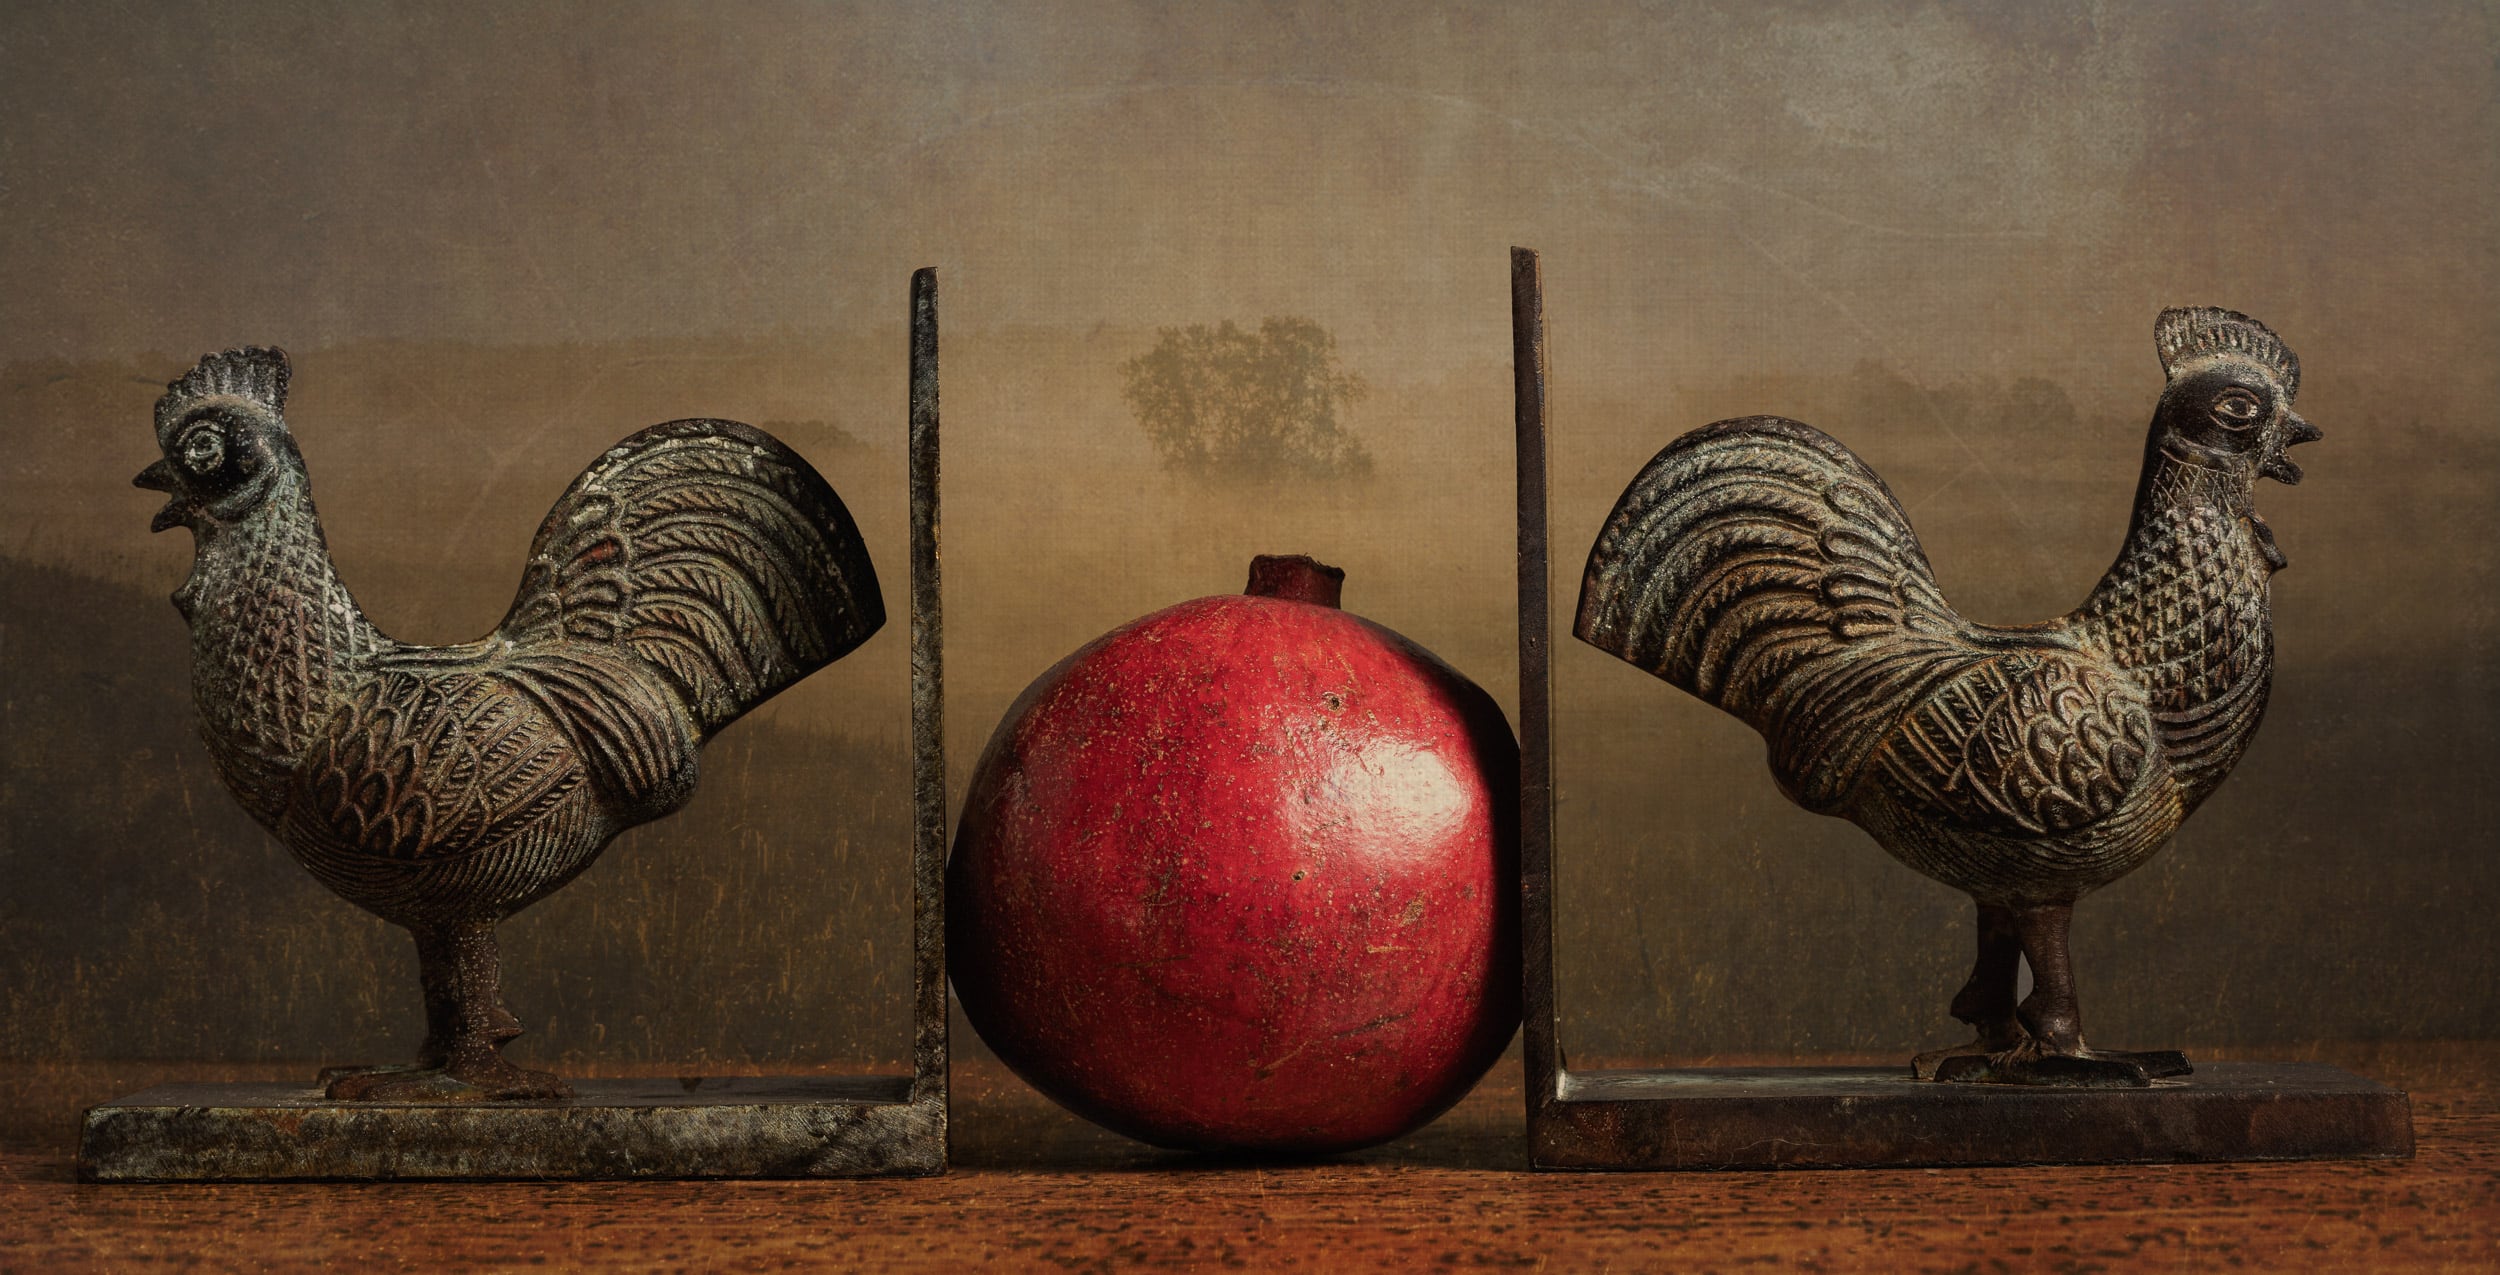
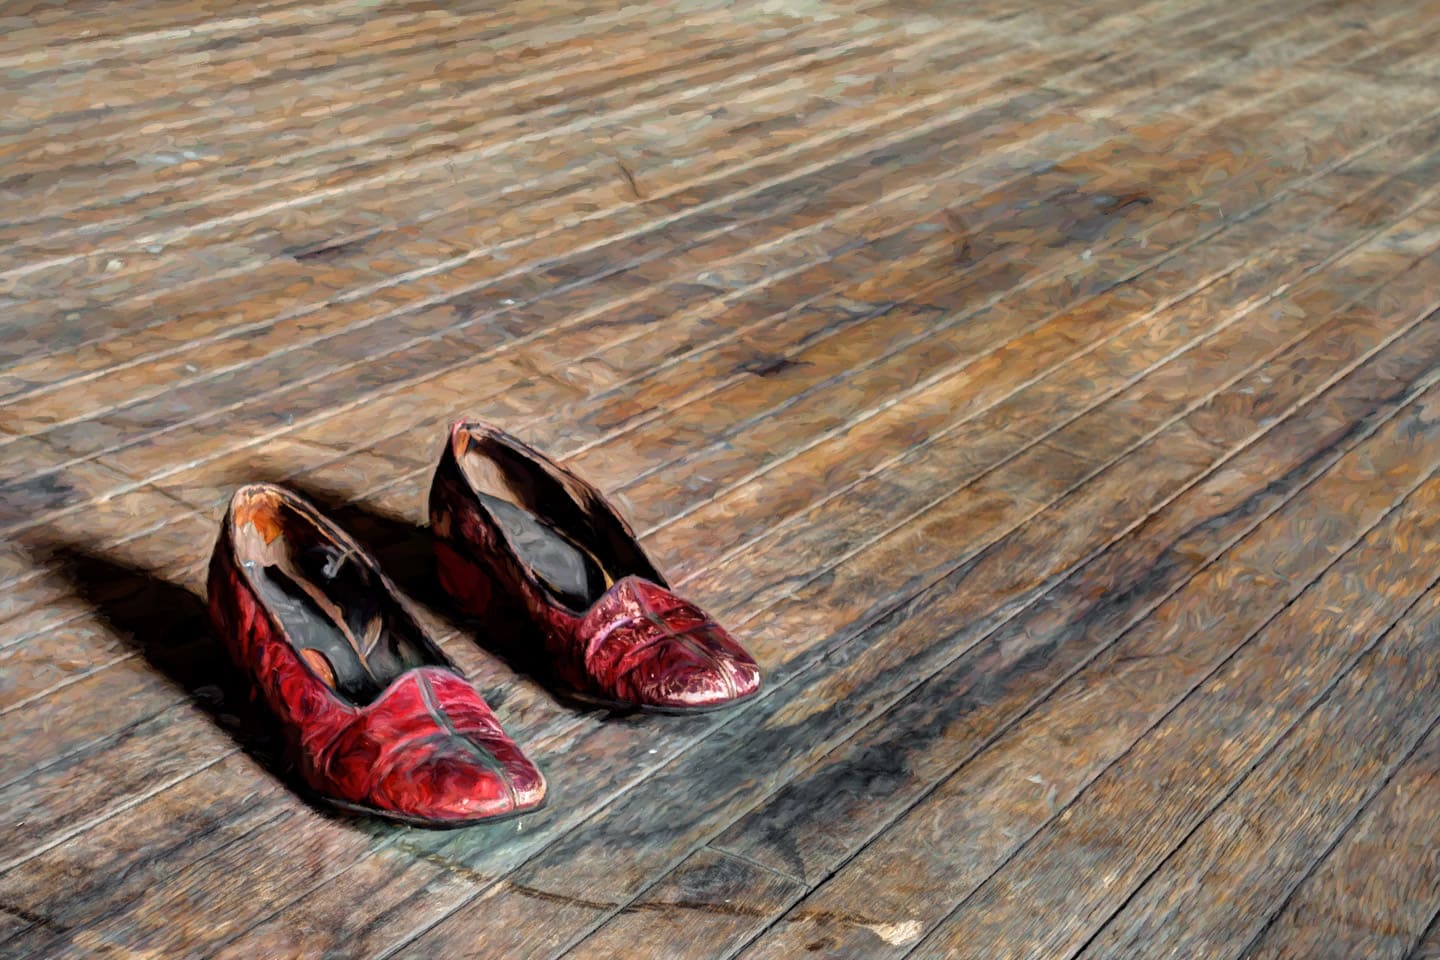
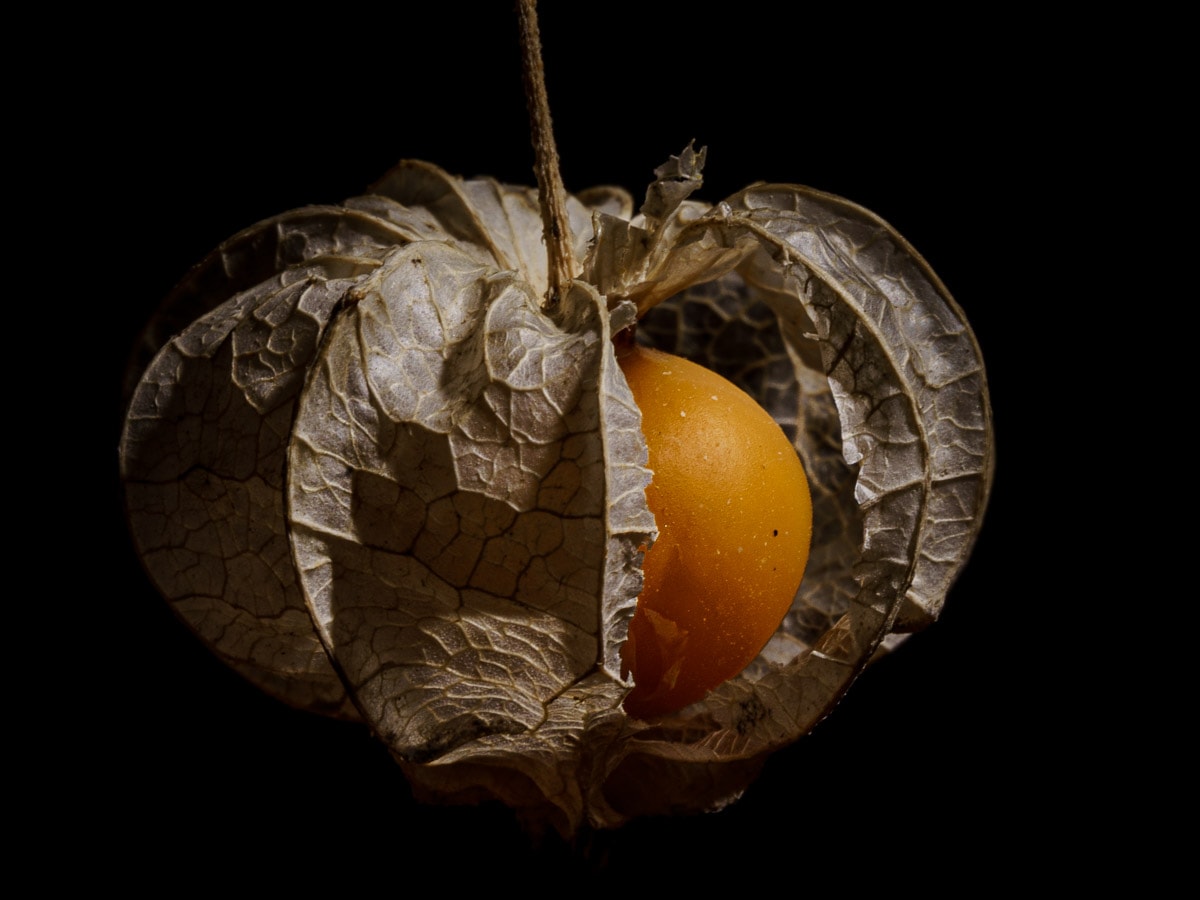
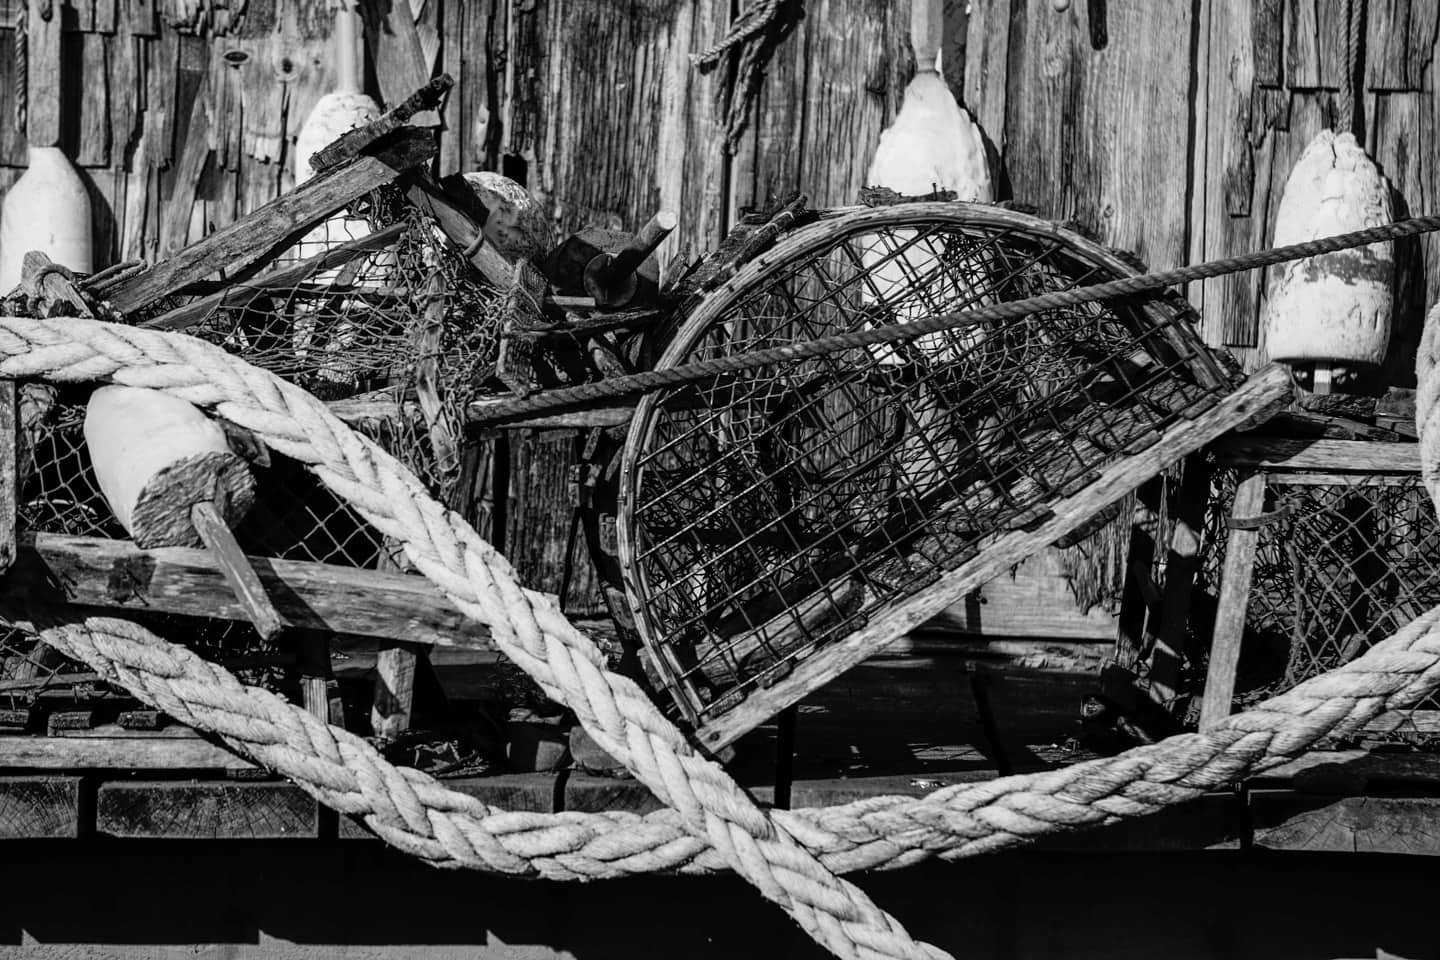
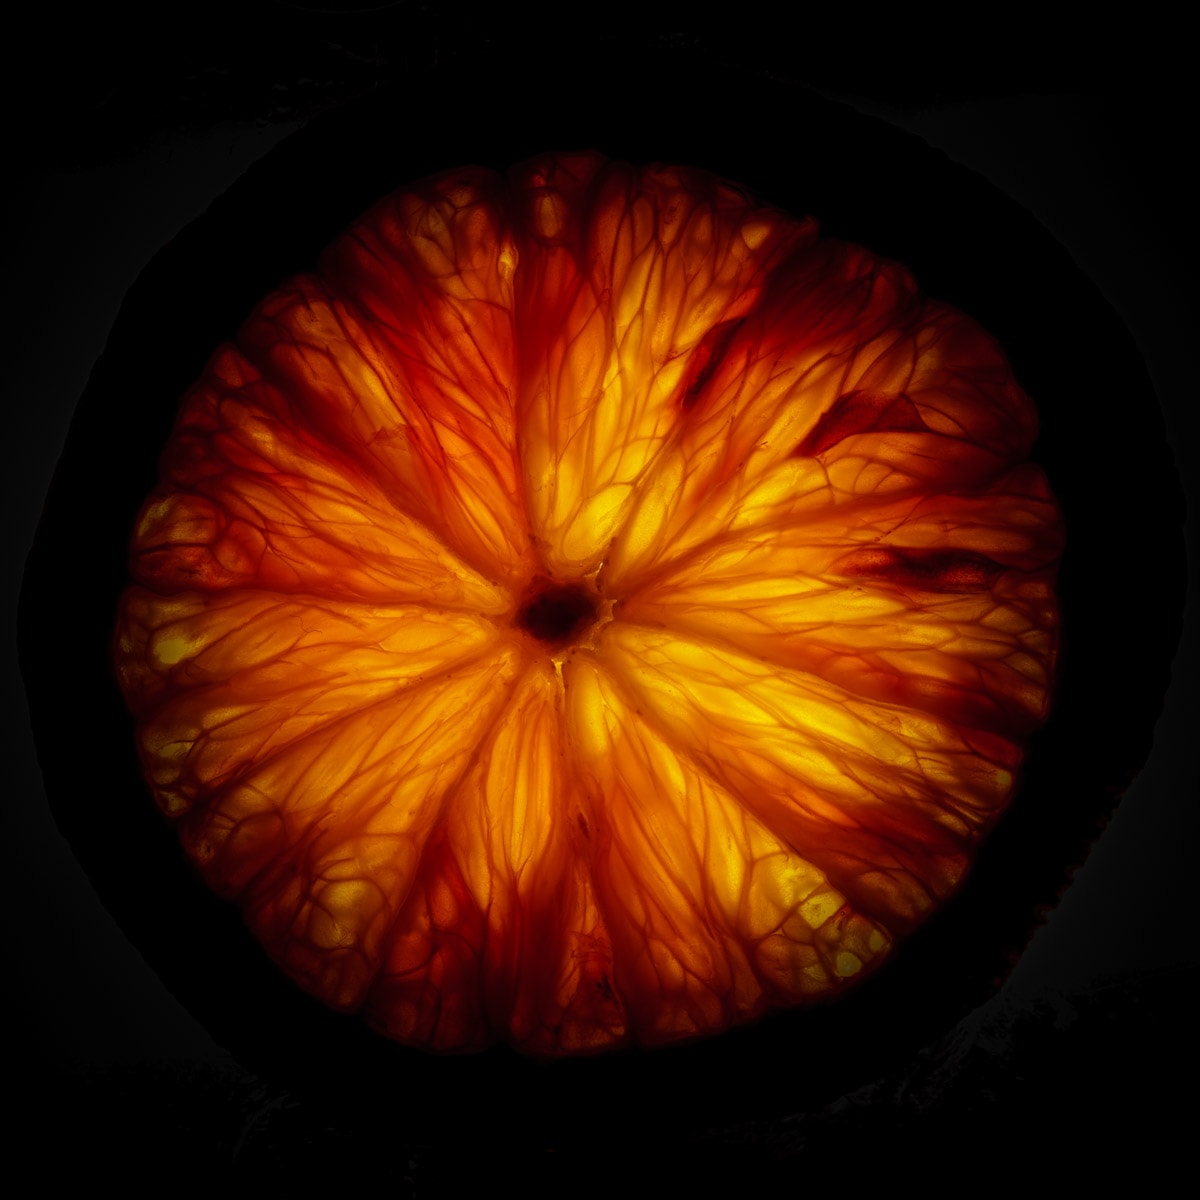
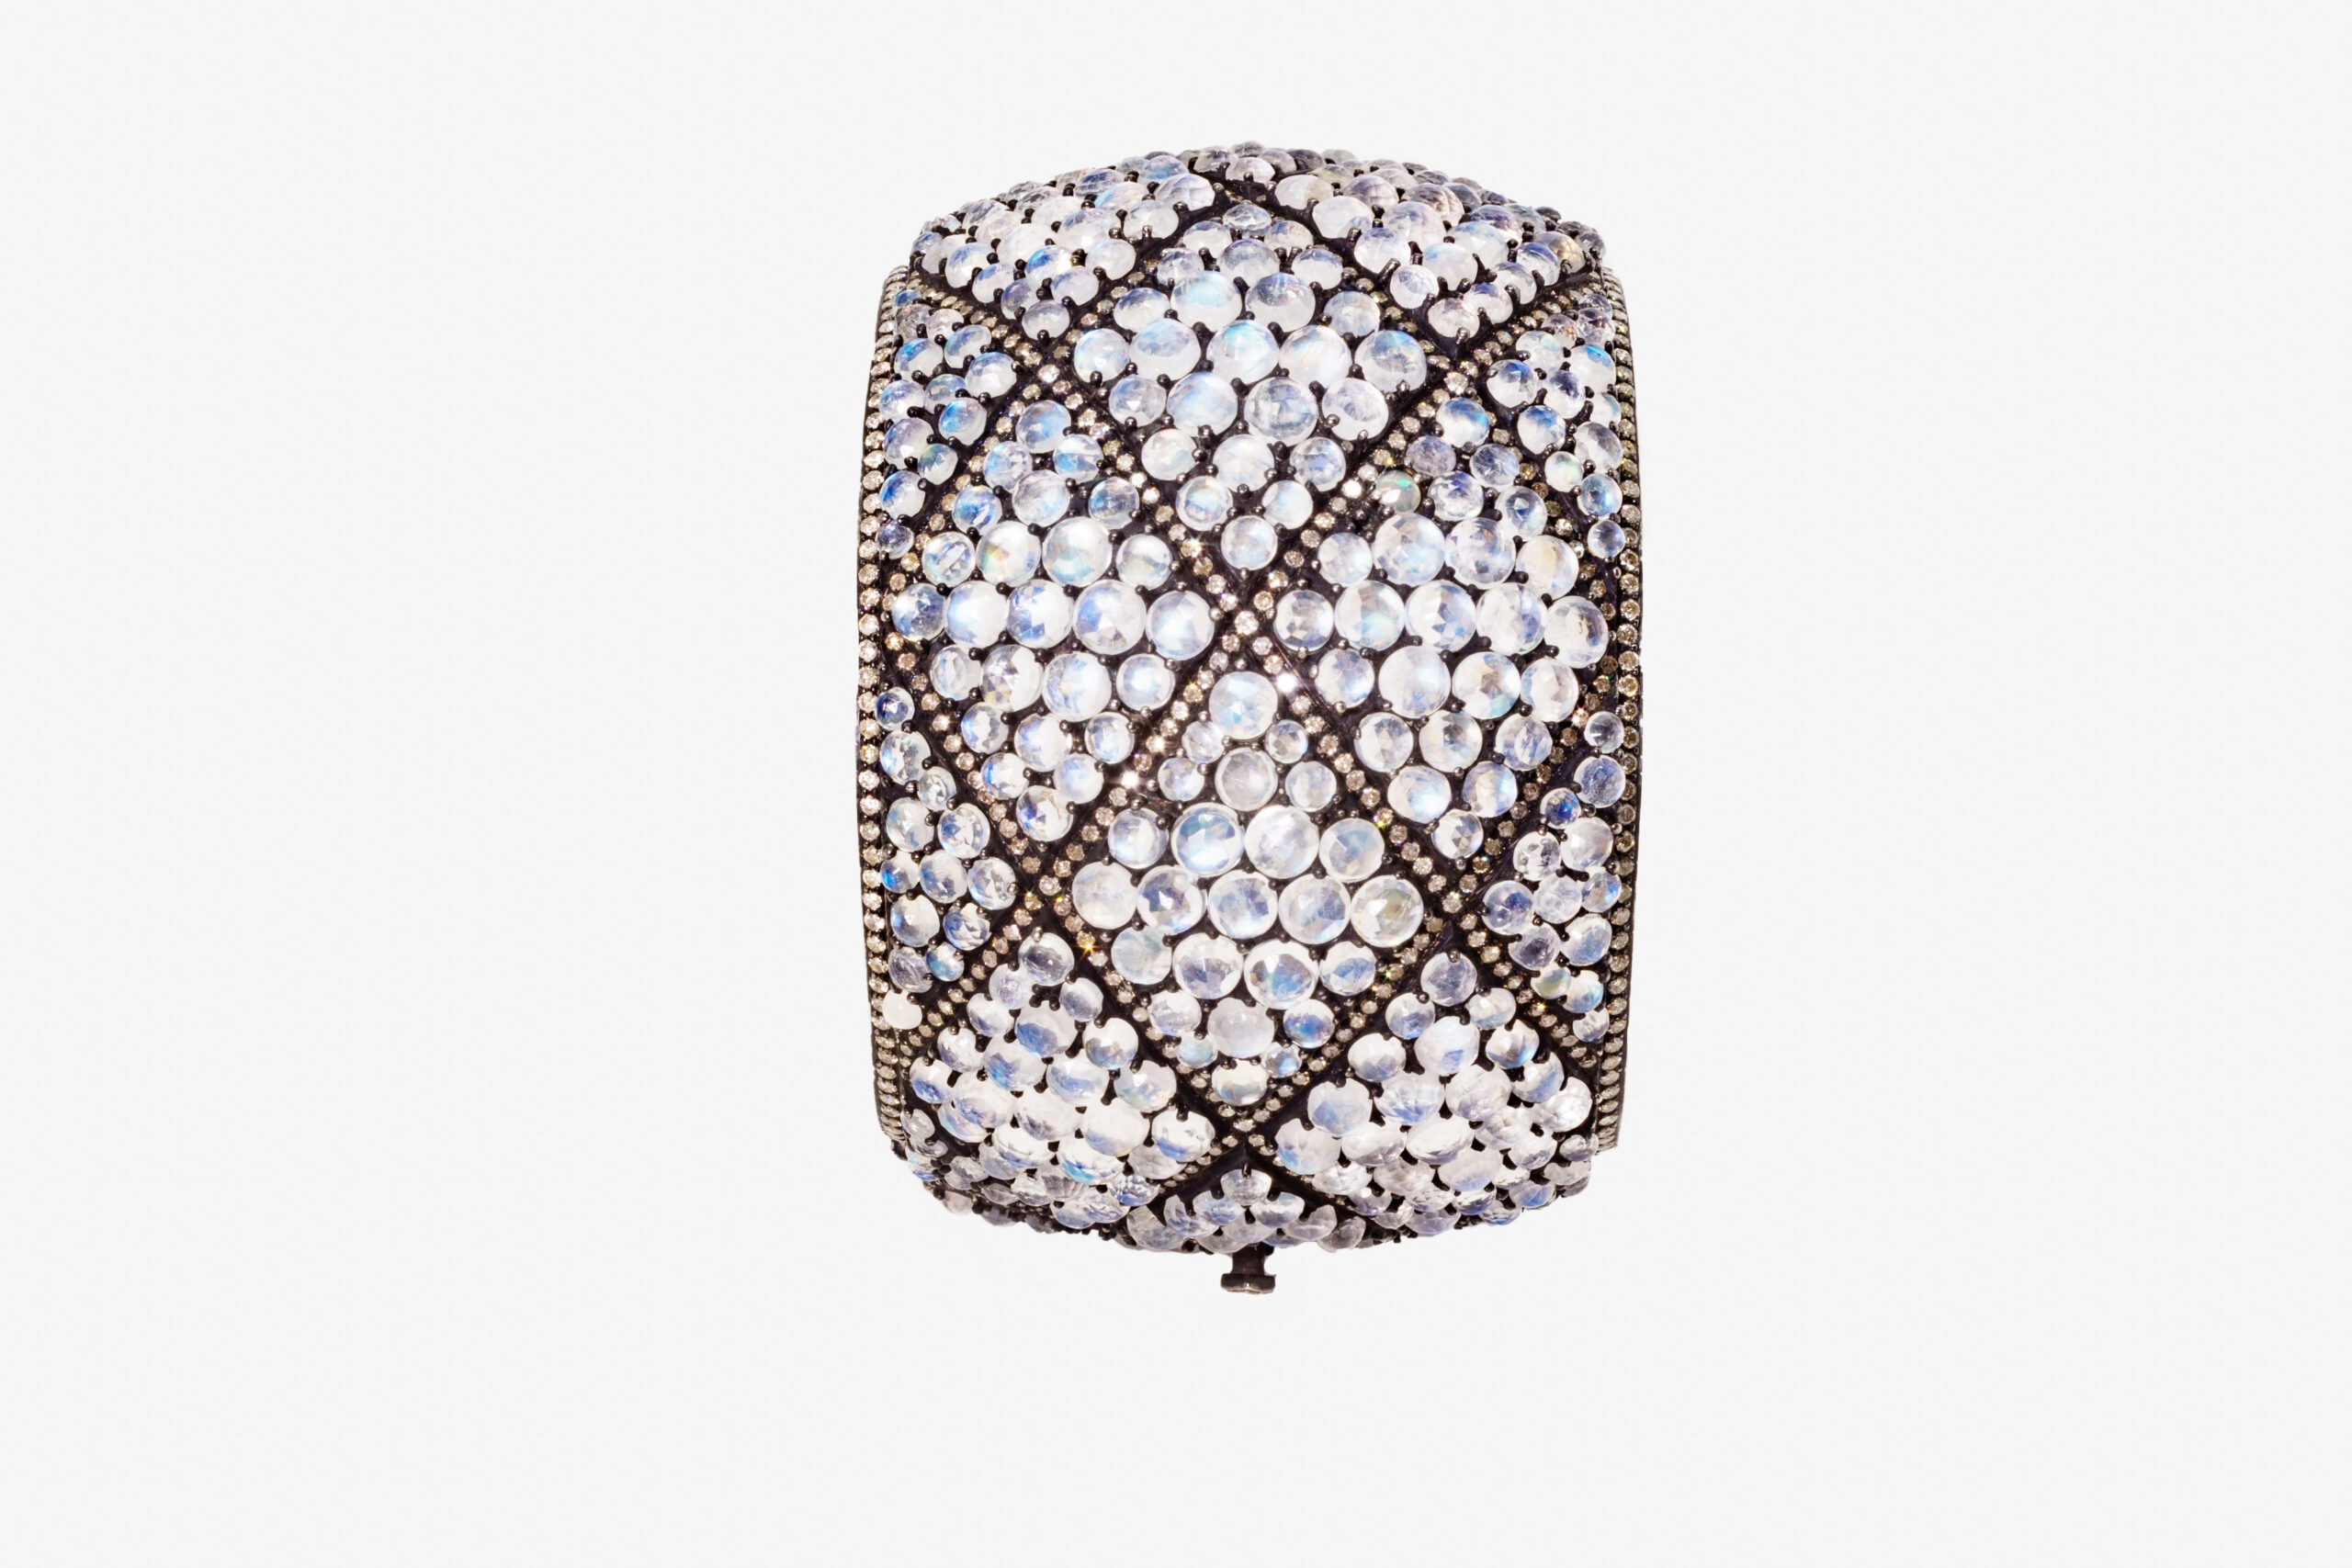
]]>The beauty of still life photography lies in the intentional arrangement of objects and the interplay of light and shadow that brings out the unique character and personality of each item. It’s fascinating to see how even the simplest of objects, when captured in a still life photo, can evoke emotions and tell stories that are both captivating and thought-provoking. Whether it’s a vase of flowers, a bowl of fruit, or a pile of books, each object has its own tale to tell, waiting to be discovered by the observant eye of the photographer. And that’s what draws me to this art form – the ability to create something beautiful and meaningful out of everyday objects and to have those items convey their own stories.


The post Still Life Photography Gallery appeared first on Croasdill Photography.
]]>The post How to Shoot Product Photography for Etsy appeared first on Croasdill Photography.
]]>
Understand Etsy’s Photo Requirements
Before starting, please make sure you know Etsy’s image requirements.
Etsy recommends using at least five high-quality photos from multiple angles. The maximum size of each image is 20MB and should ideally be at least 2000 pixels wide for clarity. However, images larger than 1MB may experience upload difficulties. You should use websites, Photoshop, or similar software to resize your images. Images should use the sRGB color profile to display the correct colors on Etsy.
Etsy’s style leans towards a more personal and intimate presentation of items. Lifestyle shots that show the item in use are highly encouraged.
Etsy product images should be in .jpg, .gif, or .png file formats, but note that animated .gif and transparent .png files are unsupported.
The first photo in a listing should be horizontal or square to optimize thumbnail views, and subsequent photos should match this shape. Etsy does auto-rotate listing photos based on the image file’s information, but you might need to manually adjust this with a photo editing service.
Your thumbnail images need a border for cropping, and you should use Etsy’s crop tool for accurate framing. Tips include capturing images from a distance, using horizontal or landscape orientation, and using an aspect ratio of 4:3. When adding images, use the placement tool for fine-tuning. The final image will likely be cropped down from the original, so the initial image must have a high resolution.
Steps to Create Your Product Images
Set Up Your Studio
Use natural light when possible, as it best captures your product’s authentic colors and detailsConsider using a mannequin or model to show scale and fit if it’s a wearable item. A well-lit room with a window can work wonderfully. Use a simple backdrop that does not distract from your product.
Prepare Your Product
Ensure your product is clean, tidy, and presentable. Consider using a mannequin or model to show scale and fit if it’s wearable.
Position Your Camera
A tripod is essential to ensure stability and prevent blurry images. Set the camera or smartphone at a distance where the product fills most of the frame.
Experiment with Angles and Context
Etsy shoppers appreciate seeing products from all angles. Close-ups of any unique features, craftsmanship, or textures help convey the quality of your product. Contextual or lifestyle photos showing the product in use can help buyers visualize how they could use or wear your item.
Shoot Your Photos
Take your shots, ensuring the product is in focus. Remember, having more photos is better, so take plenty.
Edit Your Photos
Adjust brightness, contrast, and color balance to ensure the photos represent the product accurately. Avoid overly processed images, as they can mislead customers. Also, make sure the images are edited and exported using the sRGB color space so that the colors display correctly on the site.
Upload Your Photos
Upload your photos to your Etsy listing. Remember, the first picture you upload will be the primary thumbnail image used in your shop and search results. Make it count!
Conclusion
Following these guidelines, you can create engaging, appealing product photography that stands out in Etsy’s marketplace, attracting potential customers and driving sales.
Thanks for reading. This post is part of a series on e-Commerce product photography. If you’d like to learn more about the tools needed to create great product photography for Amazon or anywhere online, please check out my E-commerce Product Photography Tools post.
And always, if you want to learn more about photography, check out our Guides section.
The post How to Shoot Product Photography for Etsy appeared first on Croasdill Photography.
]]>The post How to Shoot Product Photography for Amazon appeared first on Croasdill Photography.
]]>Understanding Amazon’s Product Image Requirements
Before you start, familiarize yourself with Amazon’s product image requirements.
To comply with the site’s standards, all product images must be true representations of the products on sale, match the product title, fill at least 85% of the image, and not exceed 10,000px on the longest side. The image files should be JPEG, TIFF, PNG, or GIF, with JPEG preferred. The images should not be blurry, pixelated, or have jagged edges. They must not contain nudity, Amazon logos, trademarks, badges, or anything similar.
The background must be pure white for the main product images, and the images should be professional photographs of the product without any text, logos, borders, color blocks, watermarks, and graphics. The image should show the entire product for sale without packaging unless it is an important product feature. Images involving clothing and accessories have specific requirements, such as being photographed flat, not showing any part of a mannequin, and showing the product on a human model for Women’s and Men’s clothing. Images of shoes should show a single shoe facing left at a 45-degree angle.
Steps to Create Your Product Images
Set Up Your Studio
Choose a location with plenty of natural light or supplement with artificial lighting. Use a lightbox or white backdrop, ensuring it’s clean and wrinkle-free.
Prepare Your Product
Make sure your product is in top condition. This might involve cleaning, assembling, or even staging the product in a manner that best showcases its features and uses.
Position Your Camera
Mount your camera or smartphone on a tripod. Adjust the height and distance to match your product size. Ensure the product and camera are at the same level.
Experiment with Angles
Amazon recommends multiple shots from different angles and detailed close-ups to showcase all the product’s features. Use standard angles like front, back, side, top, and a 45-degree angle.
Shoot Your Photos
Ensure the product is in focus, the lighting is even, and the product’s colors are represented accurately.
Edit Your Photos
Use photo editing software to tweak the brightness, clarity, and color. Remove any flaws or distractions. Per Amazon’s guidelines, ensure the background is white (RGB 255, 255 255).
Upload Your Photos
Upload your photos to your Amazon listing. Ensure they are correctly sized and formatted according to Amazon’s guidelines.
Conclusion
Following these guidelines, you can successfully shoot product photography that meets Amazon’s standards and appeals to potential customers.
Thanks for reading. This post is part of a series on e-Commerce product photography. If you’d like to learn more about the tools needed to create great product photography for Amazon or anywhere online, please check out my E-commerce Product Photography Tools post.
And always, if you want to learn more about photography, check out our Guides section.
The post How to Shoot Product Photography for Amazon appeared first on Croasdill Photography.
]]>The post Create Better E-commerce Product Photography Using These Tools appeared first on Croasdill Photography.
]]>In today’s digital age, e-commerce has become a booming industry. More and more people are shopping online, making it essential for businesses to have an online presence. However, with so many e-commerce websites on the internet, it can take some effort to stand out.
One way to grab the attention of potential customers is through high-quality product photography. However, not everyone has the budget to hire professional photographers or own expensive equipment. Fortunately, several affordable tools available in the market can help you achieve stunning product photography. In this blog post, we’ll cover the top e-commerce product photography tools amateur photographers can use to up their game.
What is E-commerce Product Photography?
E-commerce Product Photography refers to capturing high-quality, detailed, and attractive images of products for online sale. The primary aim is to provide online shoppers with a visual understanding of the product features, design, size, and color, almost as if they were examining it in a physical store.
Superior product photography can significantly impact a customer’s decision-making process, making it a critical aspect of any successful e-commerce business. It is a way to visually communicate the product’s value to potential customers, making it an integral part of the online shopping experience.
Basic E-Commerce Product Photography Tools
Camera and Lenses
No product photography toolkit would be complete without mentioning the camera and lenses. Beginners can start with a basic DSLR or mirrorless camera that offers a manual mode for greater control over settings such as aperture, shutter speed, and ISO. As for lenses, a standard 50mm lens can serve well for most product photography, but you may want to consider getting a macro lens for capturing smaller products or intricate details. Investing in a quality camera and lens can significantly improve your product images, making them more appealing to potential customers.
Tripod
One common problem amateur photographers encounter is shaky hands, resulting in blurry or unfocused images. Investing in a sturdy tripod can solve this issue. Tripods come in various sizes, materials, and prices, and you can choose one based on your budget and product size. A tripod gives you stability while taking pictures and allows you to experiment with different angles and compositions.
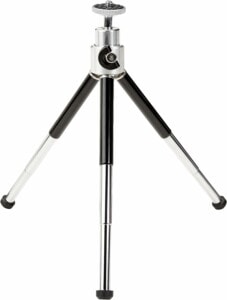
A small tripod can enhance your product images even if you use a smartphone to capture them.
LED Lighting
While you can use natural lighting by placing your products near an exterior window, it can’t be relied on (especially at night  ). Lighting is key in product photography, and LED lights are an accessible, versatile solution for amateurs and professionals alike.
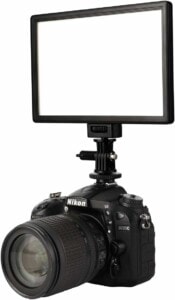
LED lights offer consistent brightness and a range of color temperatures and are energy efficient. You can get LED light panels or bulbs that screw into a regular lamp. A safe bet is to invest in a couple of LED lights that can dramatically improve the quality of your images, highlighting your product’s features and eliminating unwanted shadows. They’re a cost-effective addition to your product photography tools that can give your images a professional touch.
Tabletop Lightbox
A lightbox is an excellent tool for photographing small to medium-sized products like jewelry, accessories, and electronics. It creates an evenly lit space for your product, enhancing its features and making it stand out. Lightboxes are available in various sizes and can be easily assembled and disassembled, making them ideal for photographers short on space.

Photo Editing Software
No matter how well you click your pictures, flaws and imperfections might need fixing. That’s where photo editing software comes in handy. Several free and paid photo editing software like Adobe Photoshop, Canva, Lightroom, and GIMP allow you to enhance your images’ brightness, clarity, and color. You can also add text, logos, and watermarks to personalize your images.
Please look at some of the apps listed below if you use a phone or tablet to process your images.
White Backgrounds
Clean, white backgrounds are essential for e-commerce product photography. They ensure that your product takes center stage and nothing detracts from its features. You can buy a simple white background cloth or use a white cardboard box to create a DIY background setup that is straightforward and effective.

Smartphone Camera Lenses
Using your phone as your product camera is a good option. Smartphones are ubiquitous and have high-quality cameras that can take decent product photographs. However, attaching external lenses can enhance your smartphone’s camera capabilities. External lenses like fisheye, macro, wide-angle, and telephoto can enhance your images’ depth, clarity, and field of view, giving them a professional touch.
Conclusion
In the rapidly evolving sphere of e-commerce, product photography plays a pivotal role in attracting and persuading potential customers. With the right blend of tools – from lightboxes and tripods to advanced cameras, photo editing software, and lighting solutions – you can significantly enhance the quality of your product images, even on a budget.
Remember, high-quality, detailed, and appealing product images grab online shoppers’ attention and convey your offerings’ value and uniqueness, setting you apart from the competition and driving your e-commerce success.
Whether you’re a beginner or an established player in the online marketplace, investing in these e-commerce product photography tools is a step towards a more thriving and lucrative e-commerce business.
Thanks for reading, and if you want to find out more about product photography for Amazon, Etsy, eBay, or Mercari, please check out the linked articles.
And always, if you want to learn more about photography, check out our Guides section.
How to Photograph Your Product for eCommerce?
Photographing your product for eCommerce involves a few straightforward steps to achieve high-quality results easily.
- Set Up Your Studio: First, choose a location with ample natural light, or use artificial lighting to your advantage. Set up your lightbox or white background in this space.
- Position Your Product: Place your product in the middle of your background or lightbox. Ensure it is clean and in its best condition.
- Set Up Your Camera: Mount your camera or smartphone on a tripod to avoid blur from shaky hands. Adjust the height and distance to suit the size of your product.
- Experiment with Angles: Try different angles to show the product’s features. Standard angles include front, back, side, top, and a 45-degree angle.
- Take the Photos: Take your photos, ensuring the product is in focus and the lighting is even. Getting the perfect shot may take multiple tries, so be patient and experiment.
- Edit Your Photos: Use photo editing software to enhance your images further. Adjust the brightness, clarity, and color, and remove any flaws or distractions.
- Preview and Upload: Preview your photos on different screens to ensure they look good. Then, upload them to your eCommerce platform, ensuring they are correctly sized and formatted.
Remember, eCommerce’s goal for product photography is to accurately and appealingly represent your product to potential customers. By following these steps, you can achieve professional-grade product photos that can significantly impact your online sales.
Best Apps for Product Photography
There are several apps available to enhance your product photography skills. Here are some of the best ones:
- Snapseed (iOS/Android): This Google-owned app offers a comprehensive suite of photo editing tools. You can adjust white balance, contrast, saturation, and more. It also provides a selection of filters for quick image transformations and a healing tool to remove unwanted blemishes.
- Adobe Lightroom CC (iOS/Android): A go-to app for professional photographers, Lightroom CC offers robust editing tools, including preset filters, detailed color correction, and gradient adjustments. The app also syncs with its desktop version, allowing you to continue editing on a larger screen.
- VSCO (iOS/Android): VSCO is renowned for its classic film-like filters and simple interface. Beyond filters, VSCO offers professional-grade editing tools and a built-in community of photographers to share and discover new work.
- Afterlight 2 (iOS): A powerful all-in-one app, Afterlight 2 provides a robust set of editing tools, filters, text overlay options, and double exposure ability for creative layering effects. Despite its comprehensive features, the app maintains an intuitive and simple-to-navigate interface.
- Pixlr (iOS/Android): Pixlr offers over 2 million free effects, overlays, and filter combinations. You can create photo collages with various layout frames and backgrounds, and it also provides an auto-fix feature that balances out colors with a single click.
These apps can help you easily capture visually appealing product photos, enhancing your eCommerce business’s visual content.
The post Create Better E-commerce Product Photography Using These Tools appeared first on Croasdill Photography.
]]>The post Portable Tabletop Lightboxes For Better Product Photography In 2023 appeared first on Croasdill Photography.
]]>
If you are an online store owner and need some great pictures of your products or want to explore product, food, or macro photography, let me help you get started. The first step to success is finding a solid tabletop lightbox with good LED lighting. Put the plastic pipe you got at the big-box store down (I did that, too, it was so wobbly), and don’t let an inferior lightbox solution get in the way of doing your best work.
If you’re searching for a top-notch, lightweight lightbox you can easily bring wherever you go, the best lightbox is the Foldio3 by OrangeMonike.


Why use a Tabletop Lightbox?
Product photography needs two categories of images: “lifestyle shots” and “product shots.”
The “lifestyle shot” shows the product in place or used by someone. These can be very creative and are fun to do. I’ll cover the essential tools for lifestyle shots in another post.
The “product shot” features the product all by itself, usually with a white or transparent background. Creating great product shots is where using a lightbox is essential.
When I learned about product shots, I found that using a tabletop lightbox let me quickly position and evenly light the product. You want to separate the item from its background in eCommerce product photography. Having it cast shadows plays havoc with processing and preparing the image. Even lighting is crucial to getting a usable picture of your subject.
I’ve personally checked out four different lightbox solutions. They all were good and miles better than the poles and clamps I’d been using. In the end, I selected one of them to use in my studio.
What is the Best Tabletop Lightbox to use?
ORANGEMONKIE Foldio3 25″ Mini Studio

Overview
My favorite is the 25″ Mini Studio, and it’s helped me take many great product photos. What sold me is that this photo lightbox has adjustable light bars sitting inside the box. These bright LED light strips can be positioned to virtually eliminate shadows. That is one of the reasons that the Foldio3 is the product I use in my home studio.
Another great feature is that the tabletop studio is open in the front. Being open makes it easy to put products inside the box, adjust their positions, and move the camera around to get different angles. Other units close up and have a slit or oval cut in the front. These are just more annoying to get the product properly composed.
Finally, I love the way the Foldio folds up. I don’t have a lot of storage space, and this light box folds down to 2.5″ and lets me slip it into a narrow slot in my closet when I’m not using it. You can also easily put the folded-up Foldio in the car to transport it to a shooting location.
Drawbacks
One drawback with the Foldio is that the LED lights are not color temperature adjustable. The light created is daylight (5700k) only. Since there is not much of a call for changing the warmth of the lighting color in product photography, this is not a deal-breaker for me, but it would be nice to have for when you need a different lighting temperature.
Pros
Cons
Price
At last check, the basic Foldio3 25″ was priced at $139. Additional options like extra lights (Halo Bars) and a smart turntable are available to complete your photo studio setup.
Other Photography Light Box Options to Consider
Neewer Professional Photo Light Box Kit 32×32
Overview
The Neewer Professional Photo Light Box Kit is another awesome choice. Neewer has always been one of my go-to brands for photography tools, so I took a look at this tabletop photo studio. The Professional Photo Light Box Kit is a good option with its bright lights and reflective interior.
The Neewer Photo Light Box can be used as an open-front photo studio light box or with the front flap closed to provide additional reflected light on the subject. With a length of 32″ on all sides, I appreciate that it gives a large enough shooting space for most household items. This choice will work well for most products sold through an eCommerce site.
The LED strips provide powerful 8000-lumen light. Since the interior is covered in a silver film reflective material, that light is very even around any product inside the lightbox.
The Light Box Kit has three backdrops (Black, White, and Orange) and a light diffuser to cover the LED Strips.
Drawbacks
The drawback to this unit that made me shy away is that the box is not collapsible. It has a rigid frame that must be disassembled for transport or storage. This was not a killer, but it does seem like a PITA.
Another problem with this light box is the three LED light panels. Though they provide outstanding light, you may have to move their orientation to get that light even on the subject. And to move the lights, you have to take the whole thing apart, so it’s not very user-friendly.
Conclusion
The 32″ Neewer Professional Photo Light Box Kit is a terrific solution if you need a stationary product shooting setup. But I feel that because you need to keep partially disassembling this product to change the lights or the backgrounds, it’s not a great solution if you need flexibility.
Pros
Cons
Price
At last check, the 32″ Neewer Professional Photo Light Box Kit was priced at $125.
Fotodiox Pro LED Studio-in-a-Box
Overview
Another worthy candidate is the Fotodiox Pro LED Studio-in-a-Box. This offering provides a “no frame” solution. The stiff sides velcro together at the edges to create the photo box enclosure.
With a shoot-through hatch on the top panel of the box, the lightbox allows for top-down angles for product photographs. An optional front panel (with another shoot-through hatch) can be folded to prevent glare from bouncing from the reflective side panels.
Drawbacks
This photo box is a little clunky when installing the plastic sheets. They come folded in half and are very stiff. The four corners use double-sided velcro to hold the sides together. The problem is that the plastic sheet does not stay very well connected. When it disconnects, it makes the top pop off. This is a problem when you have an item in the box, and it is awkward to get it back together without taking everything out. There needs to be a better solution for holding it together.
Another thing I noticed was that the LED lights are in a square at the top. Using the included diffuser does not diminish the square reflection off all reflective surfaces. So, the Studio-in-a-Box is not a great solution for getting images of any glass or glossy products.
Conclusion
The Fotodiox Pro LED 20×20 Studio-in-a-Box is a terrific solution if you need a stationary product shooting setup. But I feel that because you need to keep partially disassembling this product to change the lights or the backgrounds, it’s not a great solution if you need flexibility.
Pros
Cons
Price
At last check, the Fotodiox Pro LED 20×20 Studio-in-a-Box was priced at $99.
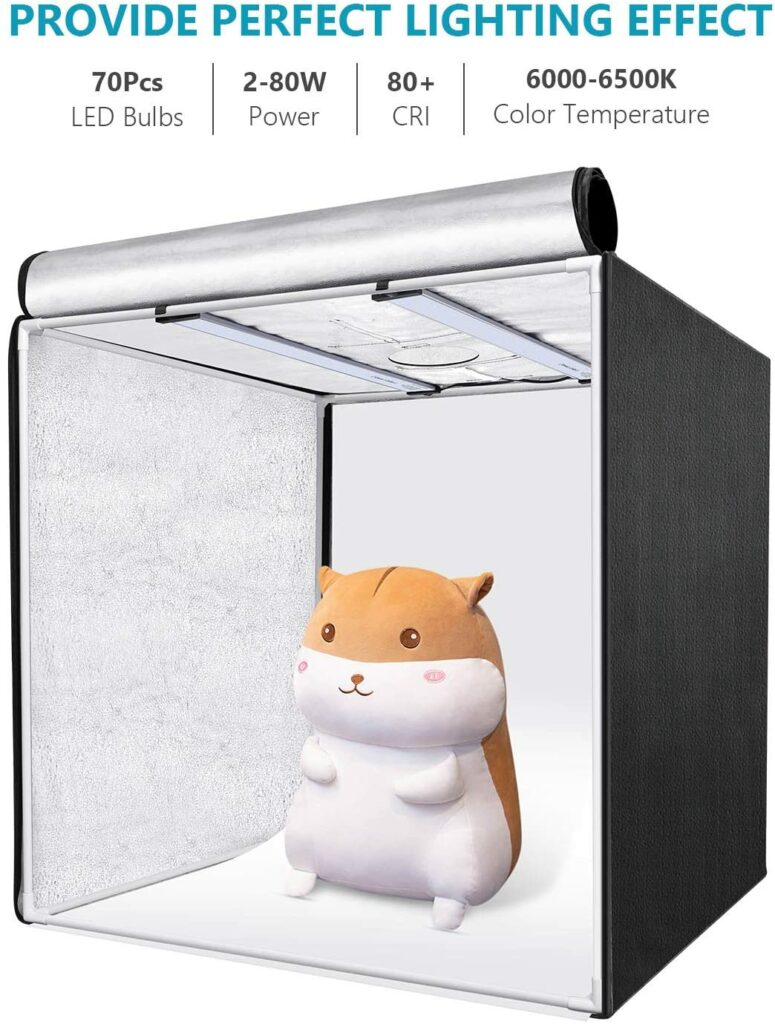
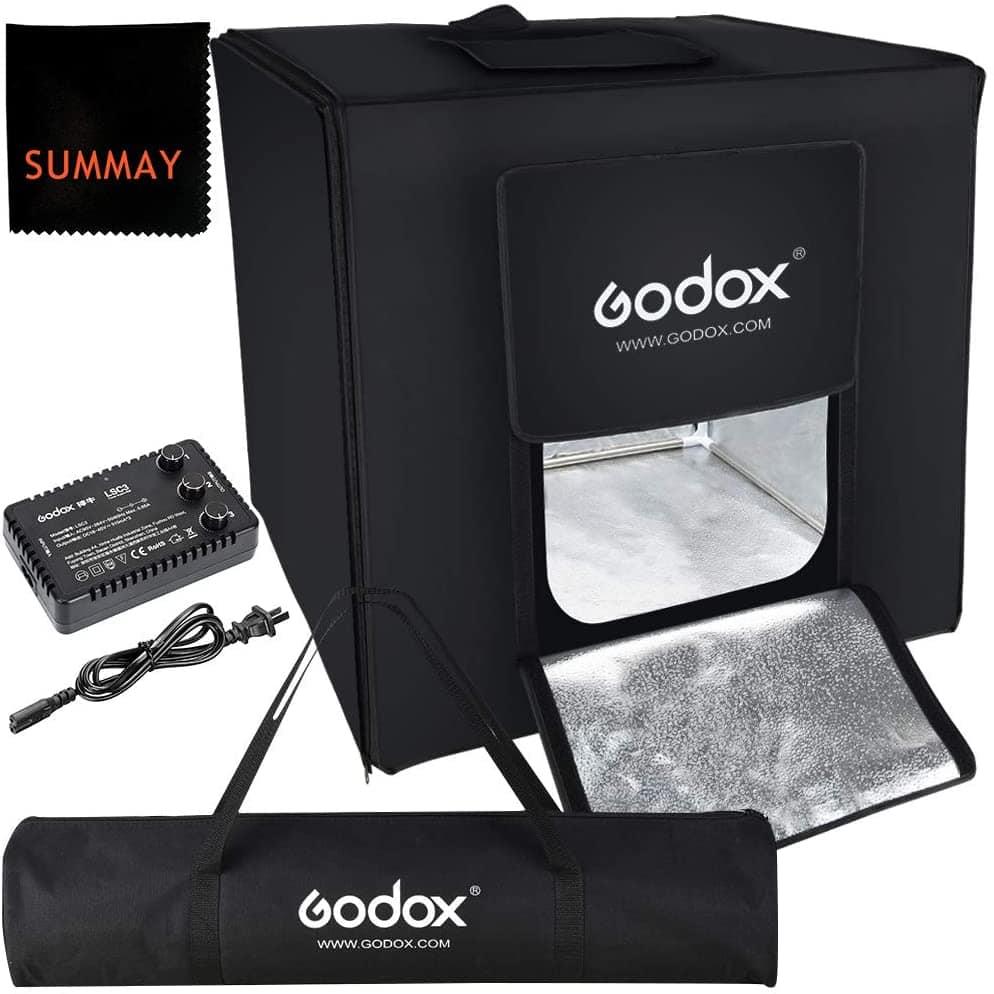
GODOX LSD80 LED Mini Photography Studio Tent
Overview
The GODOX LSD80 LED Mini Photography Studio Tent is a framed studio lightbox providing a stable platform for product photography. The photo box structure assembles quickly using a set of rods and corner braces. The material that forms the box is then connected using well-made zippers.
The lighting system consists of two LED strips that I found very bright. I also liked that you could place them on any side of the lightbox.
The GODOX LSD80 is also the only one of the photo boxes I looked at that had three openings for taking photos. You can have the front open or close the front and shoot through the front port. If you want to try a different angle, a port is at the top to take an overhead product image. The overhead shot could come in very handy depending on the product being shot.
Drawbacks
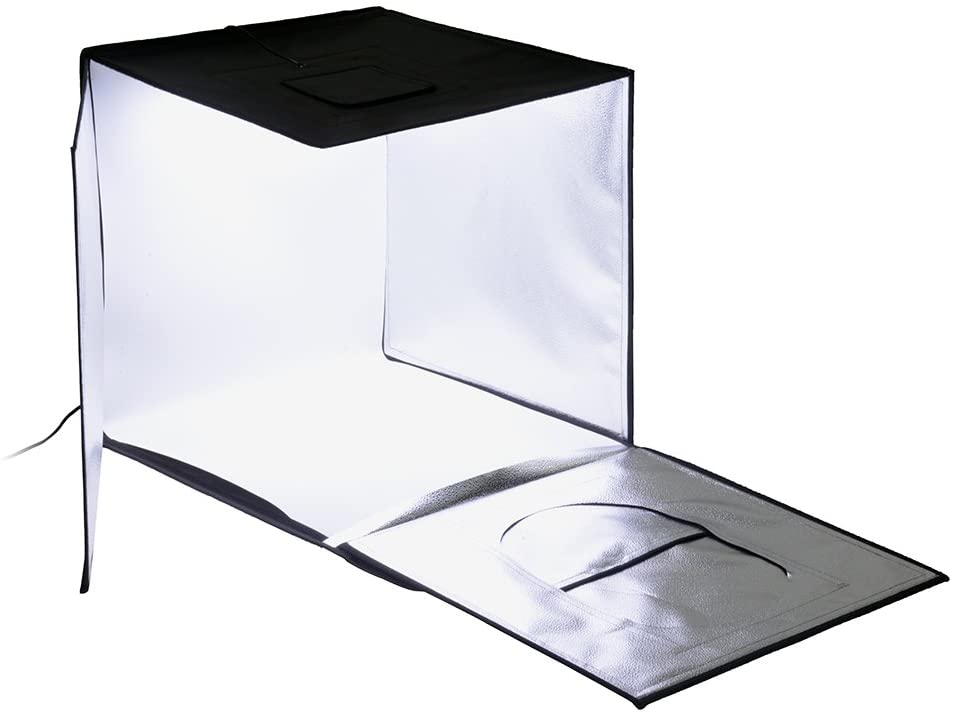
I did find it a little cumbersome to set up with all the rods and corner pieces. This is another photo box that I think would suit someone with plenty of space to leave it permanently in place.
Also, I didn’t particularly appreciate how the backgrounds fit in the box. They fight pretty tightly along with the interior and do not have a satisfactory way to attach to the frame. The backgrounds tend to crease along the back/bottom corner, leaving a noticeable shadow when used. Photoshop can remove that shadow, but it will take some time.
This is a very large, LED-lit lightbox. While the two LED light strips fill the shooting tent with light, a third panel would be great to surround the subject with light.
Conclusion
The GODOX LSD80 provides a large stage for product photography. Its bright LED panels and silvered interior will wrap your subject with light. I liked how the overhead view using the top port allowed me to create some very cool product shots.
Pros
Cons
Price
At last check, the GODOX LSD80 was priced on Amazon at $115 or B & H for $120
Conclusion
When choosing the right portable lightbox for your work, it is important to consider the following aspects:
- The quality of the construction
- How easy is the unit to set up and take down
- The brightness and temperature of light generated by the lightbars
- How easy it is to create and shoot the scene
Thanks for reading! I hope this helps you understand how a lightbox can help you with your product photography and find a product that fits your shooting style. If you have any questions, please leave a comment below!
If you’re interested in other Photography Business tools, check out our posts on SEO for Photographers and Tools to Make Running a Photography Business Easier. And for other great posts, look at our Reviews Section.
Common Questions about Tabletop Lightboxes
What is a Tabletop Lightbox?
Tabletop lightboxes are versatile and portable, perfect for small product photography shoots. A Tabletop Lightbox also referred to as a Light Box, Light Tent, or Studio Box, is a miniature photography studio in a box. These lightboxes come with built-in lights that you can adjust to different angles and intensities. Their inner surfaces can be covered with reflective surfaces such as white or silver fabric that bounce the light around to create even illumination of your subject.
Some tabletop models also include backdrops like paper or fabric sheets. Tabletop Lightboxes typically measure 24 to 36″ square – making them easy to store and transport.
Why use a Tabletop Lightbox?
Tabletop Lightboxes are a great solution to an age-old problem. Namely, how do you take quality product photos without the hassle of setting up light stands and plugging in multiple lights?
These small enclosed studios allow the photographer to set up a product quickly, staged in a clean, well-lit environment.
Tabletop Lightbox vs. Light table
Don’t confuse a Light box with a Light table. A light table casts even light through a translucent object to be viewed from above. Light tables are typically used to view slides or negatives, trace images, or even create art (think LiteBrite (TM))
How does a Tabletop Lightbox work?
A Tabletop lightbox is an all-in-one kit for taking pictures used in product, food, and macro photography. These tabletop photo booths are small enough to be placed on a surface like a table or a desk.
They have an open front, allowing you to place your product inside and adjust its position.
Like the ones in this article, smaller lightboxes come with their own LED strip lights. These provide all the lighting needed for the staged product pictures without setting up external lighting.
Because the LEDs are very close to the subject, placing light-diffusing fabric in front of the panels softens the light and reduces glare and reflections.
Additionally, lightboxes will come with backgrounds that will hide the back of the box from view. A background (or sweep) is a large bendable sheet of paper whose bottom acts as the surface beneath your product and then curves up into a white wall behind the product. A black or white background is a great way to separate the subject from the background and is often used in eCommerce or Social Media images.
What size Tabletop Lightbox do I need?
The interior space you need depends on the size of the products you will shoot.
For jewelry and small items, a 16″ square will probably do. However, if your products are more shoe-sized, you will want to look at lightboxes larger than 20″ square.
Remember that the smaller the box, the more your shooting angles and placement are limited. And if you want to do any staging or add other lifestyle elements in the frame, you will need to account for the props as well.
Since there is little price difference based on size, the best suggestion I can give is to buy the largest lightbox that will fit on the desk/table you intend on using for product photography.
What do you look for in the best Tabletop Lightbox?
- A strong and replaceable power supply
- A good set of neutral and color backgrounds (aka sweeps)
- Well-made assembly system that will stand up to repeated disassemblies
- Bright internal lights (8000 lumens or more total)
- Light diffuser
- Lightweight, compact size, portable size
What useful accessories should you get for a product photography light box?
- Turntable
- Additional lighting
- Color card
- Clamps
- Brushes
- Anti-static cleaning cloths
- Additional background sweeps
The post Portable Tabletop Lightboxes For Better Product Photography In 2023 appeared first on Croasdill Photography.
]]>The post The Best Export Settings For Instagram Revisited For 2023 appeared first on Croasdill Photography.
]]>
Instagram’s current guidelines for image sizes and aspect ratios are a little hard to track down because the page is no longer in the Help Center’s menu. But just in case you want to see the official info, here’s a direct link.
What Image Sizes Does Instagram Support?
When Instagram launched a decade ago, it only supported a square crop (1:1) image. In the intervening years, it has added support for landscapes (1.91:1) and portrait crops (4:5).
Instagram’s display area for images is 1080 pixels tall, so when you upload an image, the application will scale it to match that height.
Doing a little math shows that the best export settings for Instagram image sizes are:
- 1080px by 1080px (Square)
- 1080px by 1350px (Portrait) and
- 1080px by 566px (Landscape)
Preparing Your Images
The first step in exporting an image for Instagram is to crop your images into one of the sizes shown above. To crop the image, you will have to use the cropping tool in your photo editor and create the proper aspect.
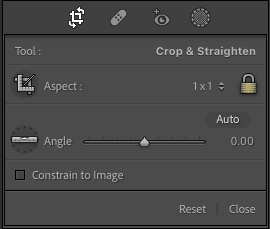
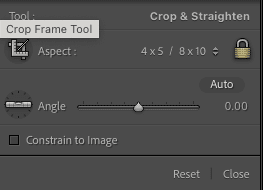
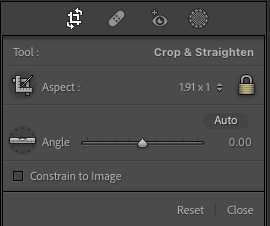
Even though you can crop your image when posting on Instagram, I always suggest changing the image in your photo editor. Your editor gives you more control over how the image will be cropped. You can zoom in on the image to see the exact placement of the crop and do some “border patrol” to ensure there are no oddly “cut off” people or elements.
Instagram Crop Formats
So use the editor’s crop tool and set the aspect ratio to one of the following based on how you want your image to be displayed :
- 1:1 – Square
- 4:5 (tall) – Portrait
- 1.9:1 (wide) – Landscape
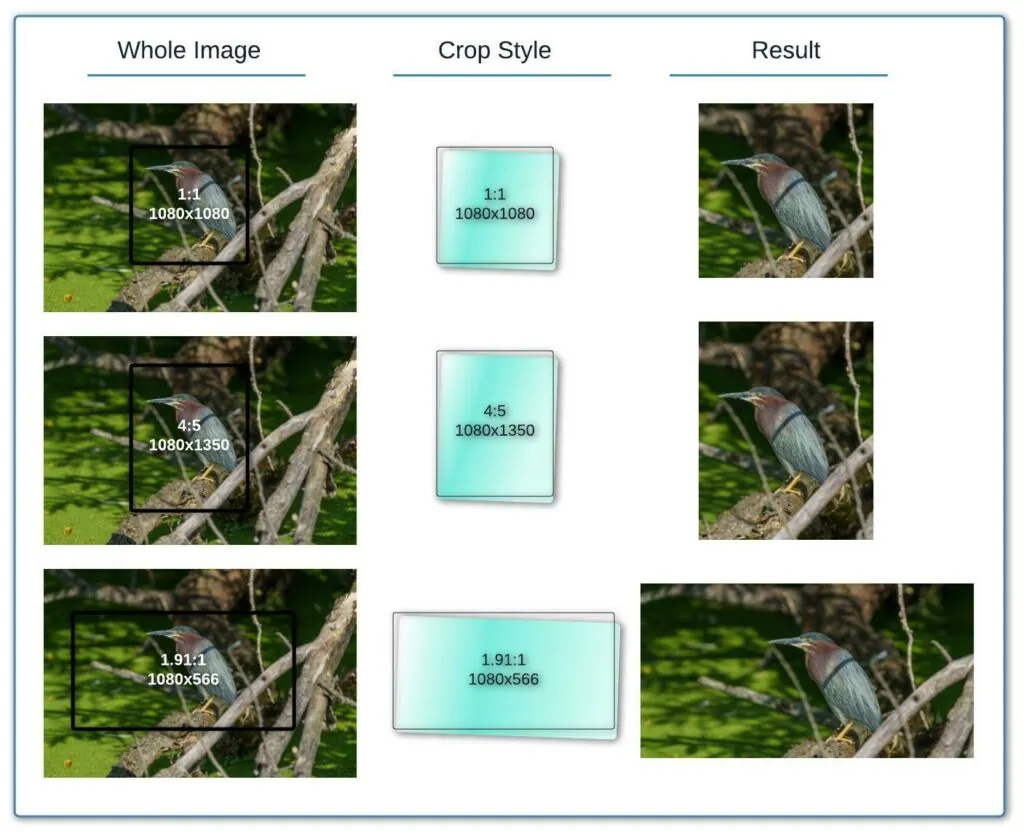
Tip – In Lightroom, when you set an aspect ratio, the crop will be in the wide mode. The crop will rotate 90 degrees to be in the tall mode by pressing the X key.
Instagram Image Sizes
Once the image is properly cropped, you can then export the image using the pixel with and height settings as shown here:
- 1080px by 1080px (Square)
- 1080px by 1350px (Portrait) and
- 1080px by 566px (Landscape)
Most people export to JPG format. Although other formats are supported, JPG is the most widely used for posting to Instagram.
Other Important Settings for Instagram Images
Other settings that are important to set up correctly are the color space, jpg compression, and sharpening.
Color Space
The colors in your digital image are controlled by a standard called the “color space.” There are several common color space standards, but Instagram, like most web-based applications, uses the sRGB colorspace.
If you export with one of the other color space settings (ProPhoto, Adobe, etc.), then the colors displayed in the image will be off in weird ways. So make sure to set the color space to sRGB.
JPG Compression Settings
Another important setting is the JPG compression or quality amount. The best image format for posting images on Instagram is JPG. While other image formats such as PNG, BMP, non-animated GIFs, most photographers tend to work with JPGs.
One of the features of the JPG image type is being able to set the compression level. JPG compression is called lossy compression meaning that the more compressed the image is, the smaller the file is and the lower the visual quality. There is always a temptation to crank the quality up to 100%, but there’s no win going above about 75%. The human eye really can’t see the difference and basically turning compression off creates a huge image file.
The downside to that is if your image size is too large, Instagram will compress it for you anyway using whatever compression setting they want. So, set the image quality/compression to about 75% so you create a reasonably sized file.
Sharpening
The last setting to look at export sharpening. Most image editors have a setting to add some additional sharpening when exporting the photo. Sharpening for the screen is done so that when images are displayed online, at reduced sizes or resolution will still have some pop to them.
I haven’t run too many tests to see how sharpening affects an Instagram photo. My suggestion would be to use the Sharpen for Screen (or Sharpen for Web) setting.
Boosting Instagram Image Quality with this Hack
But (there’s always a but) when you upload an image to Instagram, there still seems to be some image modification or compression. So even paying close attention and uploading with the proper crop settings and pixel sizes, Instagram will still mess with your image quality.
So how do you get around that?
Super Sizing Hack
I’ve seen it suggested that you can get around Instagram’s bad habits by doubling the pixel sizes on your images. By doubling the image’s pixel density, when Instagram’s image sizing algorithm kicks in and shrinks your images, it actually results in a sharper image.
To use a double-sized image for Instagram, the image sizes for posts are:
- 2160px by 2160px (Square)
- 2160px by 2700px (Portrait) and
- 2160px by 1132px (Landscape)
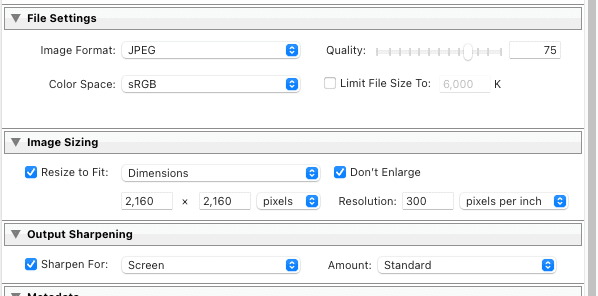
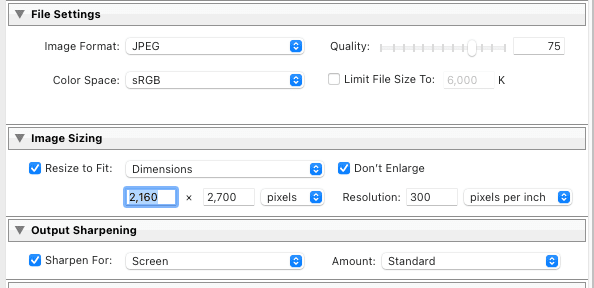
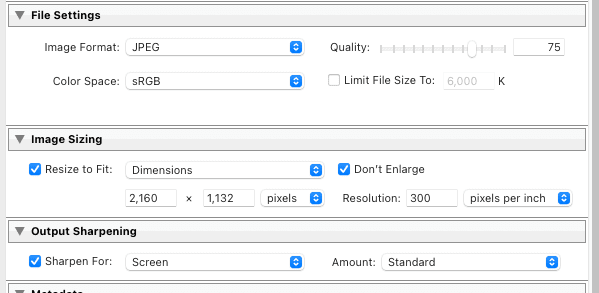
I tried this doubling technique as an experiment with the following image of a green heron. I thought that this photo would be a great choice because I could look at the quality in the fine detail of the feathers.
So I made five posts to Instagram and looked for the differences –
- Standard Crop 1:1, resized to 1080×1080 (native size) #1080×1080
- Standard Crop 1:1, resized to 2160 x 2160 (double native size – 1080×1080) #2160×2160
- Portrait Crop 4:5, resized to 1080 x 1350 (native size) #1080×1350
- Portrait Crop 4:5, resized to 2160 x 2700 (double native size – 1080 x 1350) #2160×2700
- Landscape Crop 1.9:1, resized to 1080 × 566 (native size) #1080×566
- Landscape Crop 1.9:1, resized to 2160 × 1132 (double native size – 1080px x566px) #2160×1132
Using my fingers to expand the images on my phone, I was able to see more detail in the double-sized images. So I think there is some truth to this technique, and I’ll be using these values to export my photos for Instagram
An important final note – If your image does not have enough resolution (pixels) to reach the required size (2160px), use the standard sizes. Your images will look like crap if Lightroom enlarges them, and then Instagram squishes them back down.
Conclusion
This quick tip has covered my suggestions for the best export settings for Instagram. While most of my examples are oriented towards exporting from Adobe Lightroom, you should easily be able to adapt these techniques to Photoshop, On-1, Luminar, or any other modern photography management system.
I hope these methods work for you, and I look forward to seeing your awesome posts on Instagram soon. If you have any questions or suggestions, please post a comment below!
For more quick tips and photography guides, check out my Guides Page
These articles will tell you about ways to improve your landscape photos or wildlife lenses.
My Test Posts on Instagram
I posted test images on Instagram. To see them navigate to my feed, https://www.instagram.com/gregc_test/, and search for the tag –
#instagramimagesize
FAQ
What is the optimum size for a Square Instagram Post?
You may be able to enhance the image by using double the pixel density at 2160 x 2160 px –
What is the optimum size for a Portrait Instagram Post?
You may be able to enhance the image by using double the pixel density at 2160 x 2700 px –
What is the optimum size for a Landscape Instagram Post?
You may be able to enhance the image by using double the pixel density at 2160 × 1132 px –

Where To Find More Info
Mango Street over on YouTube has a quick tutorial on exporting to Instagram from Lightroom. They don’t cover the double image size, but their vid is excellent at quickly covering the basics.
The post The Best Export Settings For Instagram Revisited For 2023 appeared first on Croasdill Photography.
]]>